
Il est important de disposer des outils adaptés à chaque tâche dans tous les domaines, mais cela est particulièrement vrai lorsqu’il s’agit de micros. Tous les micros ne sont pas conçus de la même manière et, bien qu’ils permettent tous d’enregistrer le son, ils le font de manière complètement différente. Il est essentiel de s’assurer que vous avez le bon micro pour la bonne situation, car le meilleur contenu peut rapidement devenir le pire si votre audio n’est pas au point.
Avec autant de types de micros différents disponibles et autant de similitudes entre eux, il n’est pas toujours facile de savoir par où commencer pour acheter le bon. J’ai élaboré ce guide pour vous aider. Nous aborderons les principes de base du fonctionnement des microphones, les différences entre les types de microphones et la manière d’identifier le microphone le mieux adapté à vos besoins.
Principaux types de microphones
Si vous faites le mauvais choix, vous aurez du mal à obtenir un son utilisable, sans parler d’enregistrements de qualité. Mais en choisissant bien, vous avez déjà fait la moitié du chemin. Heureusement, à un niveau général, ces types de micros sont tous très différents et il n’est généralement pas trop difficile de déterminer celui dont vous avez besoin. Entrons dans le détail
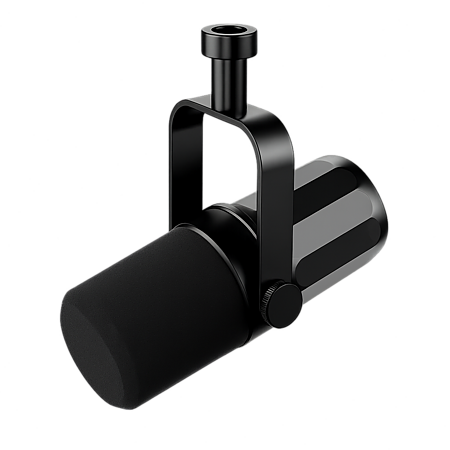
Dynamique
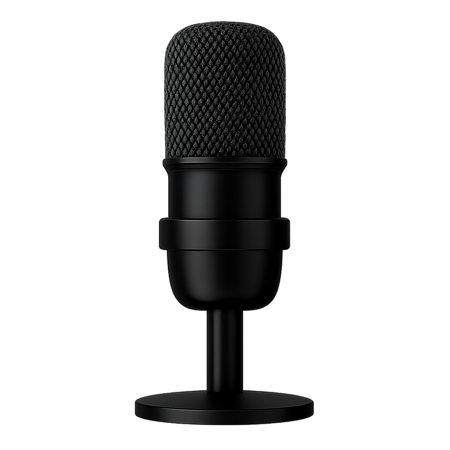
Les microphones dynamiques sont les plus courants. Il s’agit d’un produit polyvalent. Vous les avez vus devant des chanteurs, des animateurs de podcasts et des humoristes. Lorsque vous fermez les yeux et que vous imaginez un micro, il y a de fortes chances qu’il s’agisse d’un microphone dynamique. Ils constituent une solution très polyvalente, car ils ne nécessitent pas d’alimentation externe, ils sont très efficaces pour éliminer les bruits de fond et, comme ils ne sont pas particulièrement sensibles, ils sont suffisamment robustes pour survivre aux chutes, aux volumes élevés et à une manipulation un peu brutale.
Les microphones dynamiques sont la meilleure solution pour les spectacles en direct, les émissions télévisées et l’enregistrement de voix dans des environnements moins que parfaits, car ils se concentrent sur le son situé juste en face d’eux et excluent le reste. Si vous cherchez à capter le son de personnes ou d’instruments et que vous n’êtes pas dans un véritable studio d’enregistrement, un micro dynamique est probablement la meilleure solution.
Condensateur
Lorsque vous avez besoin d’un maximum de détails et de qualité audio, et que vous disposez de la configuration nécessaire pour vous adapter à leur nature sensible, les microphones à condensateur sont la solution idéale. Vous les trouverez dans les studios d’enregistrement, les cabines de doublage et les installations de diffusion en direct, partout où la qualité du son est primordiale et où l’environnement peut être contrôlé. Ces micros sont beaucoup plus sensibles que les micros dynamiques et captent tout le spectre sonore avec une grande précision.
C’est pourquoi les micros à condensateur nécessitent un peu plus de soin et d’attention. Ils ne sont pas aussi robustes qu’un microphone dynamique et nécessitent généralement une alimentation fantôme provenant d’une interface audio ou d’une table de mixage. Les micros à condensateur se distinguent dans les environnements calmes et contrôlés et sont souvent le micro de prédilection pour les voix, les instruments acoustiques et la création de contenu professionnel.
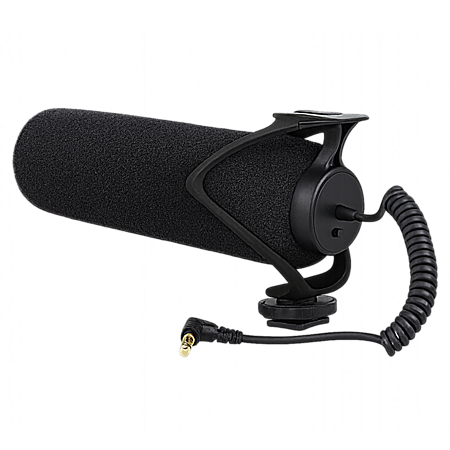
Canon
Vous trouverez le plus souvent un microphone canon fixé à une caméra ou placé à proximité de celle-ci. Ce micro long et fin avec une bonnette pelucheuse que vous voyez fixé à une perche ? Micro canon. Le petit tube en forme de carotte monté sur le dessus d’un reflex numérique ? Il s’agit également d’un micro canon.
Ils sont un élément essentiel de la production vidéo parce qu’ils captent un son ciblé, qu’ils peuvent le capter à distance et qu’ils conviennent bien aux tournages en extérieur ou sur le terrain. Si vous enregistrez loin d’une installation fixe et contrôlée, un micro canon est probablement ce qu’il vous faut.
Cravate
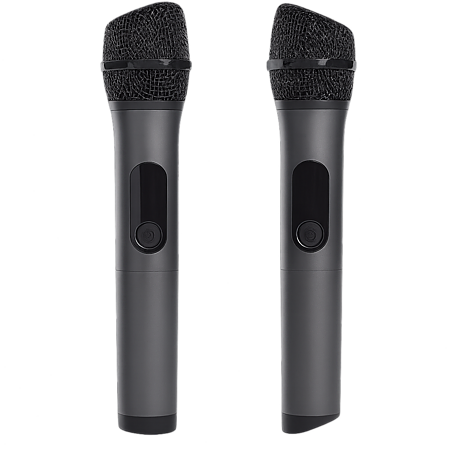
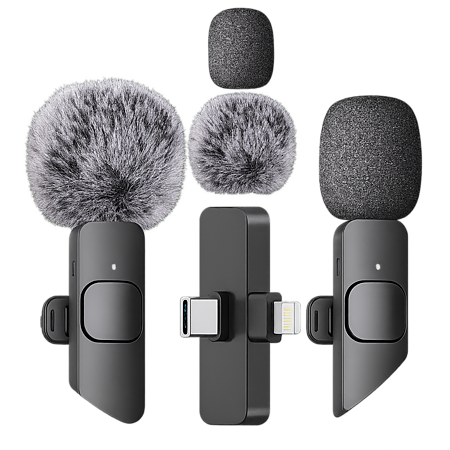
Le plus petit microphone de la sélection, les micros-cravates (également appelés Lavallière) sont ceux que l’on voit généralement accrochés au col d’une personne lors d’une interview. Pensez au petit point noir que vous voyez souvent sur le bord de la cravate d’un présentateur de journal télévisé, c’est un classique. De nos jours, les micros-cravates sans fil sont devenus un élément essentiel de la création de contenu à petit budget pour les réseaux sociaux. La petite boîte noire que l’on voit souvent dans les contenus TikTok et les Reels Instagram est le RODE Wireless GO : une nouvelle version du micro-cravate qui combine tout en un seul appareil.
Ils sont appréciés parce qu’ils sont mains libres, discrets, et parce qu’ils peuvent être positionnés près de la bouche d’une personne, ils sont parfaits pour capter un dialogue clair à la volée ou lors d’interviews ou de présentations. Si vous avez besoin d’un son clair sans avoir à tenir ou à pointer un micro, en particulier lorsque vous vous déplacez, un micro-cravate est probablement le meilleur choix.
Explication des principales caractéristiques
Quel que soit le type de microphone que vous recherchez, dès que vous commencerez à faire le tour des magasins, vous serez confronté à toute une série de termes techniques et de spécifications. Si vous êtes novice en matière d’enregistrement audio, cela n’a peut-être pas beaucoup de sens à première vue, mais c’est un excellent moyen de comparer un micro à un autre si vous savez comment traduire ces détails dans la réalité. Voyons ensemble les éléments clés à prendre en compte dans les spécifications techniques d’un microphone.
Réponse en fréquence
Pour comprendre la métrique des fréquences, il faut d’abord comprendre les principes fondamentaux du fonctionnement du son. À son niveau le plus élémentaire, le son est constitué de vibrations qui se propagent dans l’air, puis sont interprétées par nos oreilles et « converties » en sons.
Ce processus se produit sur un spectre comportant différentes vitesses de vibration. Les vibrations lentes sont les grondements graves et profonds de la basse, tandis que les vibrations rapides deviennent des sons plus aigus.
La réponse en fréquence est la mesure de la partie du spectre sonore que le microphone est capable de capter. En résumé, sa capacité à restituer les graves, les médiums et les aigus.
Elle est mesurée en hertz (Hz) et est généralement indiquée sous la forme d’une plage comprise entre 20 Hz et 20 000 Hz, qui correspond à la gamme de fréquences que nous sommes capables d’entendre en tant qu’êtres humains. Si la gamme de fréquences d’un microphone est comprise entre 20 Hz et 20 kHz, vous savez qu’il est capable d’enregistrer tout ce que vous pourrez entendre lors de la lecture.
L’indication n’est pas toujours précisée sur la page produit, mais gardez un œil sur les commentaires ou les discussions qui mentionnent la forme de la réponse d’un microphone. Une réponse plate signifie que le micro capte tout de manière égale, tandis qu’une réponse profilée peut amplifier ou atténuer certaines fréquences afin d’adapter le son provenant d’une source spécifique, comme les voix par rapport à la batterie.
Par exemple, les microphones conçus principalement pour les voix ont souvent une légère amplification des fréquences moyennes afin d’apporter clarté et présence à la voix humaine, tout en réduisant les fréquences très basses pour éviter les grondements et les bruits ambiants indésirables. Les micros de grosse caisse, en revanche, feront probablement l’inverse. Dans ce cas, on peut s’attendre à une baisse des moyennes fréquences et à une augmentation dans les graves pour une profondeur plus percutante.
Sensibilité
La mesure de la sensibilité d’un microphone est un peu plus facile à comprendre en théorie, même si les chiffres réels peuvent parfois prêter à confusion. C’est aussi simple que cela en a l’air : la sensibilité d’un microphone correspond à sa capacité à convertir les sons faibles en un signal électrique puissant ou en une sortie sonore forte.
Un micro plus sensible capte plus facilement les sons plus faibles, tandis qu’un micro moins sensible nécessite un son plus fort au départ ou d’augmenter le gain pour obtenir le même niveau de sortie. Il existe deux méthodes de mesure, qui sont interchangeables, soit en millivolts par pascal (mV/Pa), soit en décibels par rapport à 1 V/Pa (dBV/Pa).
Les microphones à condensateur sont généralement plus sensibles que les microphones dynamiques, c’est pourquoi ils sont plus efficaces pour capter les détails vocaux subtils ou les caractéristiques d’un espace d’enregistrement.
Les micros dynamiques, quant à eux, ont généralement une sensibilité plus faible, ce qui en fait un excellent choix pour les sources sonores puissantes et les environnements plus bruyants. Si vous enregistrez des podcasts, des voix off ou de la musique acoustique dans un studio, une sensibilité plus élevée est généralement utile. Mais dans les environnements bruyants ou non contrôlés, une sensibilité trop élevée peut en réalité vous nuire, en captant tous les bruits indésirables, tels que les froissements, les tapotements ou les bourdonnements de fond.
La sensibilité n’est donc pas simplement une question de qualité, il s’agit plutôt de s’assurer que la sensibilité d’un microphone correspond à vos intentions et à votre environnement.
Pour l’enregistrement de voix ou le podcasting, un micro à condensateur plus sensible autour de -35 dBV ou 15 mV/Pa est une bonne solution, car il vous donnera un signal fort sans que vous ayez besoin d’augmenter votre préamplificateur ou d’augmenter la puissance en postproduction.
Pour essayer de capter le son en direct ou des instruments bruyants comme une batterie, il est probablement préférable de réduire la sensibilité à -60 dBV afin d’éviter l’écrêtage ou la distorsion. Il en va de même pour les streamers en direct : ne sous-estimez pas le bruit que peut faire votre clavier mécanique et à quel point cela peut distraire vos spectateurs.
Un microphone ultrasensible peut sembler être une bonne idée pour optimiser le son de votre voix, mais cela peut rapidement devenir gênant s’il capte trop de bruits parasites. Préférez un niveau intermédiaire entre -40 et -45 dBV.
Impédance
L’impédance est un sujet un peu plus technique, mais heureusement, c’est aussi probablement la mesure dont vous devez vous soucier le moins dans des situations occasionnelles ou même semi-professionnelles.
L’impédance est la résistance qu’offre un microphone au passage du courant électrique et se mesure en ohms (Ω). Les micros à faible impédance sont généralement inférieurs à 600 ohms, ce qui est la norme pour la plupart des équipements modernes. Ces micros à faible impédance sont conçus pour fonctionner avec la plupart des tables de mixage, des interfaces et des enregistreurs. Les micros à haute impédance sont moins courants de nos jours, avec une résistance supérieure à 1 000 ohms Ω, ils peuvent entraîner une perte de signal et d’autres problèmes liés aux longueurs de câble.
Faut-il donc se préoccuper de l’impédance lors du choix d’un microphone ? Pas vraiment, car vous vous rendrez vite compte que presque tous les microphones et interfaces audio modernes sont conçus sur la base de modèles à faible impédance qui sont compatibles entre eux dès leur sortie de l’emballage. L’impédance peut encore avoir son importance lorsque vous envoyez votre signal sur une longueur de câble particulièrement longue, mais nous parlons ici de 15 mètres ou plus.
Donc, en réalité, à moins que vous ne vous intéressiez de près aux équipements vintage ou que vous installiez un câble particulièrement long ou inhabituel, l’impédance est davantage un paramètre à vérifier qu’un élément essentiel. Il suffit de s’épargner quelques tracas et de s’en tenir à des micros à faible impédance, inférieurs à 600 Ω.
Diagramme polaire
Nous avons abordé les caractéristiques des différents types de microphones et les détails techniques, mais il existe un autre élément très important à connaître pour choisir le microphone adapté à vos besoins : le diagramme polaire.
On parle également de « diagramme de captation », qui indique l’endroit où votre microphone capte le son et, plus important encore, les directions d’où il l’ignore. Il existe de légères différences entre les diagrammes polaires des différents microphones, mais on distingue généralement quatre catégories principales.
Cardioïde
Il s’agit du modèle de prise de son par défaut. C’est un excellent produit polyvalent qui répondra aux besoins de la plupart des personnes dans des situations normales. Ressemblant un peu à un champignon, un diagramme polaire cardioïde capte le son à l’avant en forme de bulbe tout en le rejetant à l’arrière.
Il s’agit donc d’un excellent choix pour le streaming, les voix et les podcasts, car il isole votre voix tout en bloquant les bruits de clavier ou les voix des autres personnes assises en face de vous.
Supercardioïde et hypercardioïde
Comme leur nom l’indique, ce sont les cousins plus ciblés du modèle cardioïde. Ils suivent le même concept de base, mais captent le son d’une zone plus étroite devant le microphone. C’est l’idéal pour isoler votre voix dans les pièces bruyantes, mais sachez que ces types de microphones captent également une petite quantité de son provenant directement de l’arrière du micro.
Pour les streamers devant un moniteur, cela ne pose pas de problème, mais cela peut entraîner une duplication du son si vous essayez de faire fonctionner deux micros supercardioïdes dos à dos dans une configuration d’interview. Vous devrez également veiller à parler directement dans le microphone, car la qualité et la puissance du son diminuent rapidement si l’on s’éloigne de l’axe.
Omnidirectionnel
Autre modèle dont le nom dit tout, ce diagramme polaire permet de capter le son de manière uniforme dans toutes les directions : devant, sur les côtés, derrière, partout. Il est idéal pour enregistrer des conversations de groupe autour d’une table ou pour inclure les sons environnants lorsque vous essayez de capter une ambiance plus naturelle et moins produite.
Cependant, comme il capte le son sous tous les angles, il n’est pas bien adapté aux environnements bruyants, et vous devrez donc faire preuve d’un peu de prudence lorsque vous choisirez un microphone doté de cette configuration de prise de son.
Bidirectionnel
Le moins courant des principaux diagrammes polaires, le diagramme bidirectionnel ou en forme de 8 capte le son à l’avant et à l’arrière, mais rejette les entrées provenant des côtés. Il est pratique pour les interviews en face à face ou les chants en duo lorsque deux personnes sont en face l’une de l’autre, mais son utilisation générale est limitée, de sorte que vous ne trouverez pas beaucoup de micros présentant ce diagramme polaire.
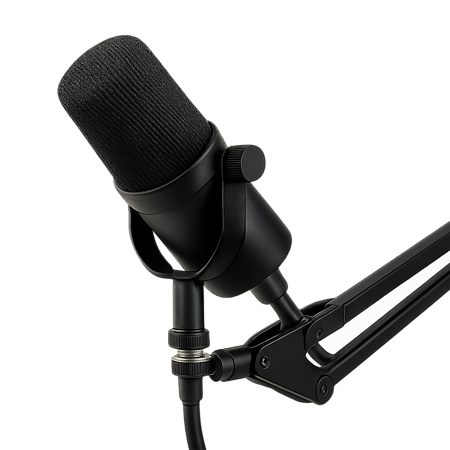
Support et positionnement
Le choix d’un matériel adéquat doit évidemment être votre priorité numéro un, mais il ne sert à rien d’avoir un microphone parfaitement adapté si vous finissez par l’utiliser de manière totalement erronée. L’environnement, la configuration et l’étiquette du microphone sont autant de pièces essentielles du puzzle qui vous permettront d’obtenir le meilleur son possible.
Support
Il n’existe pas de solution de support universelle qui convienne à tous les microphones, mais il existe quelques principes universels qu’il est préférable de respecter. Je vais vous donner ici des conseils généraux pour vous aider à vous mettre sur la bonne voie, mais vous devrez faire quelques essais pour trouver ce qui convient le mieux à votre situation.
Dans la plupart des cas, et quelle que soit votre solution de montage, votre objectif doit toujours être de limiter autant que possible les mouvements et les vibrations à travers le micro. Il s’agit d’isoler le microphone pour permettre à la capsule de recueillir un son propre sans interférence due aux chocs et aux coups.
Dans une configuration de bureau, vous pouvez utiliser un support lesté ou un petit trépied. Certains micros à usage multiple en incluent même un dans la boîte, mais un bras de micro suspendu offre généralement plus de flexibilité.
Les micros-cravates sont moins susceptibles d’être perturbés par les mouvements et les vibrations. En revanche, vous devez éviter tout contact avec des objets qui frottent directement sur le microphone. Essayez d’attacher le micro à des vêtements plus épais et plus rigides et évitez les fluides ou des cheveux longs qui pourraient créer des bruits de froissement gênants.
Les micros canon sont très sensibles et peuvent être facilement perturbés par les secousses et les vibrations indésirables. Un support antichoc est indispensable ici, qu’il soit monté sur un pied fixe et lourd ou maintenu en hauteur sur une perche télescopique.
Utilisation correcte
Une fois le microphone en place, il est tout aussi important de s’assurer que vous l’utilisez correctement. C’est ce que l’on appelle l’étiquette du microphone. Il s’agit simplement de comprendre comment votre microphone doit être utilisé et de vous adapter en conséquence. Ces besoins varient légèrement d’un micro à l’autre, notamment en fonction des diagrammes polaires dont nous avons parlé précédemment, mais là encore, il existe quelques vérités universelles.
Parlez correctement dedans
Chaque micro a un côté spécifique pour la prise de son, là où le son se transmet directement à la capsule. Les deux principales options sont la prise de son sur la face avant ou arrière et sur la face latérale. Aucune n’est meilleure que l’autre, il s’agit purement d’un choix esthétique du fabricant, mais il est essentiel que vous identifiiez celle de votre micro et que vous la respectiez.
Il n’est généralement pas difficile de s’en rendre compte. Il suffit de rechercher des grilles ouvertes ou même un logo de la marque pour savoir de quel côté se trouve l’appareil. Beaucoup d’enregistrements de bonne qualité ont été gâchés parce que l’on a parlé accidentellement du mauvais côté. Assurez-vous donc de bien vous placer avant de commencer !
Chaque microphone aura également un angle de prise de son différent. Les microphones à condensateur étant beaucoup plus sensibles, il est souvent judicieux de parler légèrement en dehors de l’axe et de parler « au-delà » du micro plutôt que directement dans celui-ci. Cela peut aider à réduire la distorsion causée par les sons explosifs et sifflants.
Les microphones dynamiques, quant à eux, bénéficient d’une prise de son directe et n’ont pas besoin d’être orientés.
Les micros-cravates sont légèrement différents, car ils sont souvent positionnés sur le côté, ils doivent pointer vers la bouche sans être placés devant elle, alors que les micros canon doivent pointer directement vers leur cible pour être plus efficaces.
Ne le mangez pas
À l’exception des micros canon, votre bouche doit rester raisonnablement proche du micro à tout moment. Pour les microphones à condensateur et les microphones dynamiques, une astuce simple consiste à faire le shaka des surfeurs, pouce et petit doigt tendus, et à l’utiliser comme mesure de la distance initiale entre la bouche et le micro.
En vous approchant trop près du micro, vous risquez d’introduire une distorsion due à un pic (lorsque l’entrée dépasse la capacité d’enregistrement maximale de votre installation et est coupée, ce qui produit un son franchement horrible). Les micros-cravates tolèrent une plus grande proximité, tout en gardant une distance de l’ordre de la largeur d’un poing.
Comprendre les fonctionnalités supplémentaires
Nous avons abordé les principes fondamentaux du choix entre deux microphones à un niveau général, ce qui devrait vous donner une bonne base pour établir une sélection. Vous trouverez rapidement un grand nombre de modèles équivalents de différentes marques avec des fiches techniques correspondantes, ce qui rend le choix encore plus difficile.
Pour les départager, vous devrez souvent étudier la gamme des fonctions bonus et les accessoires requis avant de prendre une décision finale. Passons en revue certaines des fonctionnalités les plus courantes que vous verrez.
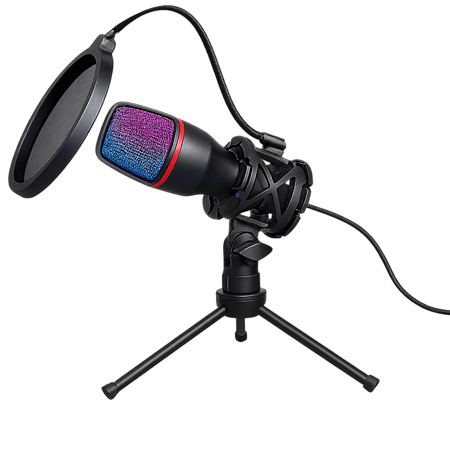
Filtre anti-pop
Lorsque vous parlez, de petites bouffées d’air sortent de votre bouche et peuvent causer des problèmes à la capsule de votre microphone. Un filtre anti-pop est une défense physique qui protège contre ces éclats sonores généralement causés par les consonnes occlusives fortes commençant par p, d, t, k et b.
Le filtre anti-pop est généralement un écran à mailles fines qui se trouve entre vous et la capsule du micro pour disperser ces souffles d’air avant qu’ils ne causent des problèmes. Certains micros, en particulier ceux destinés aux créateurs à domicile, intègrent des filtres anti-pop internes, tandis que d’autres s’appuient sur des solutions externes.
La plupart des grandes marques proposent des filtres anti-pop spécifiques pour chaque microphone, qui se clipsent facilement, mais il existe également une gamme de solutions universelles proposées par des marques tierces. Bien que cela ne soit pas techniquement nécessaire, je recommande vivement d’utiliser un filtre anti-pop, quelle que soit sa forme.
Support antichoc
Nous avons parlé de l’importance de bien fixer votre microphone, et un support antichoc est souvent la dernière pièce du puzzle. Pensez-y comme un hamac pour votre micro, un moyen de le suspendre à l’abri des chocs, des coups et des vibrations générales du bureau.
Sans cela, un simple coup de genou sous le bureau pourrait gâcher un enregistrement, c’est pourquoi il vaut la peine d’investir. Tout comme les filtres anti-pop, certains micros en incluent un en standard, certaines marques vendent des supports dédiés à chacun de leurs modèles, et d’autres vous demandent de choisir une option universelle. Encore une fois, ce n’est pas absolument nécessaire, mais cela vaut la peine d’investir si vous voulez vraiment un son propre.
Alimentation fantôme
Vous n’aurez pas le choix, si votre microphone nécessite une alimentation fantôme, il ne fonctionnera tout simplement pas sans elle. Il est généralement fourni par votre interface audio ou votre table de mixage via le même câble XLR que celui par lequel il reçoit le signal de retour, donc vérifiez que votre matériel le prend en charge si vous optez pour cette solution. Cela ne s’applique qu’aux microphones à condensateur et à la plupart des micros canon branchés sur XLR. Cependant, les micros dynamiques ou les micros à condensateur connectés via USB n’ont pas besoin d’alimentation fantôme.
Amplification
Plus tôt, nous avons parlé de la mesure de la sensibilité que vous trouverez sur les fiches techniques et de l’amplification, qui permet de renforcer les microphones les plus silencieux et les moins sensibles. Cela peut se faire soit via un préamplificateur intégré au microphone lui-même, soit via une interface audio externe, mais cela doit se faire quelque part, car lésiner sur un amplificateur de qualité peut entraîner des enregistrements faibles et avec des parasites.
Prise casque de contrôle
Avez-vous déjà remarqué que les animateurs radio et les podcasteurs portent presque toujours des casques audio ? Ce n’est pas seulement pour qu’ils puissent entendre les invités ou les producteurs, la plupart du temps ils entendent aussi leur propre voix.
C’est ce qu’on appelle la surveillance, qui peut constituer une partie importante de votre installation. Comme vous risquez rapidement de vous emmêler les pinceaux si votre playback présente le moindre décalage, de nombreux microphones sont équipés d’une prise casque intégrée qui vous permet d’écouter directement et en temps réel ce que votre micro capte et de détecter tout problème le plus tôt possible.
Cela ne sera pas nécessaire dans toutes les situations et certains créateurs pourront trouver cela choquant, alors décidez si c’est une caractéristique importante pour vous. Si vous avez jeté votre dévolu sur un microphone qui n’offre pas de prise de contrôle intégrée, tout n’est pas perdu. De nombreuses interfaces audio offrent cette fonctionnalité, ce qui vous permet d’intercepter le signal juste un peu plus loin sur le chemin.
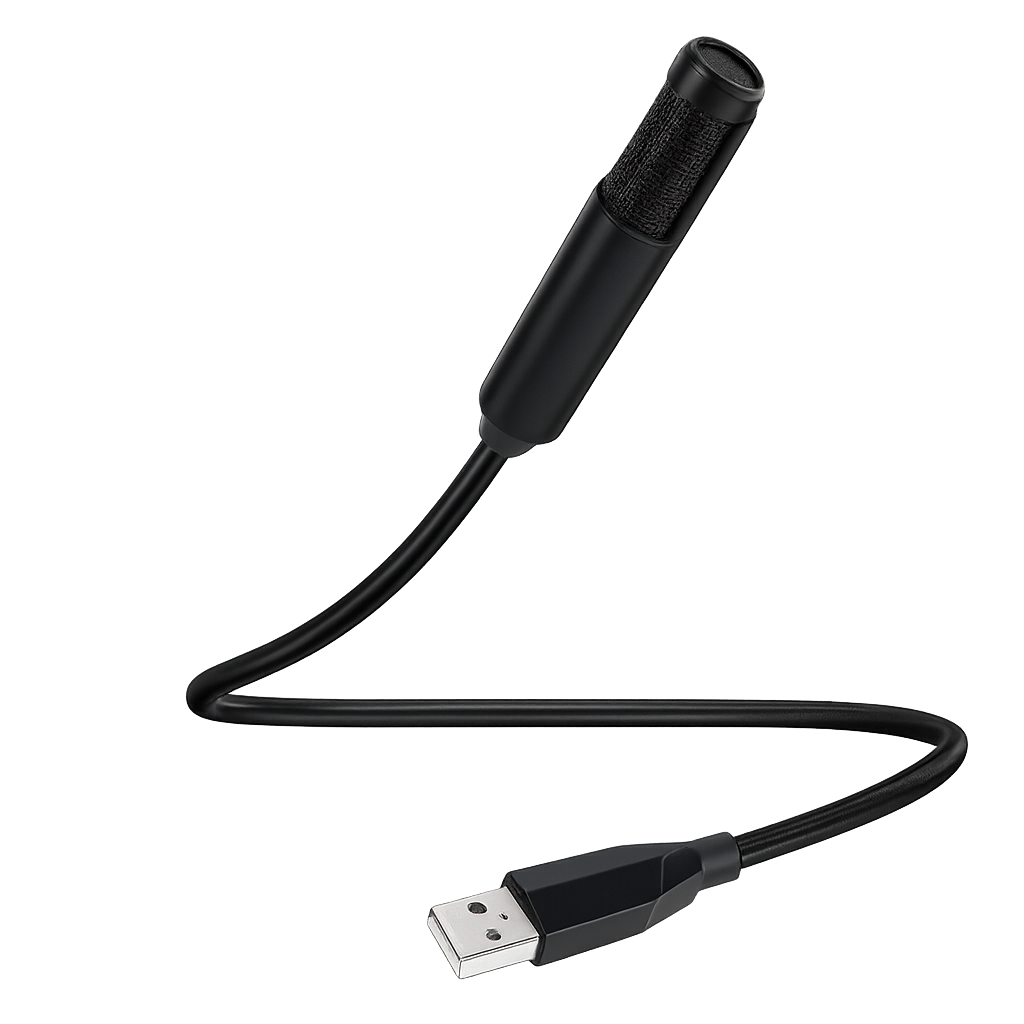
XLR ou USB ?
C’est une question qui a fait l’objet d’un débat animé ces dernières années et les opinions ont tendance à être assez tranchées sur la meilleure solution. Chacun a ses avantages et ses inconvénients, et il n’y a pas de vainqueur incontestable, car plusieurs facteurs entrent en jeu, en fonction de votre installation, de votre budget et de votre volonté d’optimiser la qualité du son. Analysons les avantages et les inconvénients pour vous aider à choisir entre un microphone USB et un microphone XLR.
XLR
Pour
- Qualité audio de niveau professionnel — Les professionnels utilisent toujours des microphones XLR, car ils offrent le son le plus net et le plus qualitatif.
- Flexibilité — La compatibilité est assurée par le câble XLR, qui est un élément standardisé, de sorte que votre microphone peut être connecté à une large gamme d’appareils de toutes marques.
- Plus adapté aux configurations complexes — Si vous effectuez un enregistrement avec plusieurs appareils, vous trouverez souvent qu’il est beaucoup plus simple de brancher un ensemble de microphones XLR sur une table de mixage ou une interface unique et multiport.
- Mise à niveau plus simple — Grâce à leur compatibilité, les configurations XLR sont parfaitement compatibles entre elles. Vous pouvez facilement commencer modestement et simplement avant de remplacer et d’améliorer différents éléments un par un, sans avoir à tout racheter ou à tout changer en même temps.
Contre
- Nécessite de matériel supplémentaire — Un microphone XLR seul ne vous sera d’aucune utilité. Pour suivre cette voie, vous devrez également investir dans une interface audio ou une table de mixage, et probablement acheter des câbles, ce qui peut rapidement augmenter le coût et la complexité.
- Configuration plus complexe — Plus il y a de pièces dans le puzzle, plus la configuration prend du temps, plus il y a de câbles à gérer et plus l’encombrement matériel est important. Ce n’est pas idéal si vous essayez de tout ranger sur votre bureau de streaming à la maison.
- Peuvent être plus encombrants et moins faciles à transporter — Bien que ce ne soit pas toujours le cas, les microphones XLR et leurs interfaces correspondantes peuvent souvent être plus lourds et moins faciles à transporter. De plus, si vous passez d’une configuration à l’autre, il y a beaucoup plus de choses à transporter et à assembler.
USB
Pour
- Plug-and-play — Les microphones USB fonctionnent avec un seul câble. Il suffit de les brancher à votre ordinateur pour être prêt à enregistrer, sans matériel ni câbles supplémentaires.
- Compact et facile à transporter — Les microphones USB ont tendance à être plus petits et cette petite taille les rend faciles à emporter et à installer une fois sur place.
- Idéal pour les débutants et les créateurs occasionnels — Si vous débutez ou si vous ne souhaitez pas vous lancer sérieusement dans cette activité, les micros USB sont beaucoup moins compliqués et plus adaptés aux débutants.
- Des designs plus flashy — Il y a toujours des exceptions, mais en général, les microphones USB ont des designs plus attrayants, car ils sont destinés aux streamers et aux créateurs de contenu qui souhaitent montrer leur micro à la caméra.
Contre
- Plus contraignant — La simplicité fonctionne dans les deux sens. Si elle est idéale pour commencer, elle peut aussi vous limiter lorsque vous cherchez à faire évoluer votre installation vers quelque chose de plus professionnel.
- Peu ou pas de possibilités de mise à niveau — Outre l’ajout éventuel d’un support antichoc ou d’un filtre anti-pop, le micro USB que vous sortez de la boîte est celui que vous aurez jusqu’à ce que vous le remplaciez. Il n’est pas possible d’ajouter de nouveaux éléments à votre installation pour en améliorer certains aspects.
- Pas idéal pour les configurations audio complexes — Bien que cela soit de moins en moins un problème, les PC ont souvent du mal à gérer correctement plusieurs entrées audio USB à la fois.
- Dépendant d’une application — Les microphones USB ont souvent besoin d’une application pour maximiser leur qualité. Ce n’est pas un problème en soi, mais c’est un élément supplémentaire à entretenir et une source potentielle de défaillance à l’avenir.
Faut-il utiliser un logiciel de post-traitement ?
Il s’agit là d’une autre question fréquemment posée, mais la réponse est plus précise et plus simple. Il n’y a pas de mal ou de honte à utiliser le post-traitement pour rendre un bon son excellent. C’est là que réside la distinction essentielle : les logiciels de post-traitement ne doivent pas être considérés comme une solution pour corriger un mauvais son brut, mais seulement comme un moyen de nettoyer, peaufiner et améliorer un son bien capté.
C’est un peu comme l’assaisonnement en cuisine : une pincée de sel et de poivre à la fin peut vraiment rehausser le plat final si les bases sont bien préparées, mais vous ne pouvez pas rattraper un steak trop cuit en le recouvrant de sel. Espérons que tout ce que nous avons vu jusqu’à présent vous évitera de trop cuire votre steak en forme de micro. Voyons maintenant quelques ajouts qui permettront vraiment de faire chanter le plat.
Si vous utilisez un microphone USB d’une marque connue, il y a de fortes chances qu’il dispose de sa propre application avec une interface simple et probablement quelques préréglages au choix. C’est un excellent point de départ et, bien souvent, l’un de ces préréglages peut vous suffire.
Si vous comptez ajouter votre propre post-traitement dans une application d’enregistrement, ou si vous souhaitez approfondir les possibilités offertes par le logiciel de votre microphone, voici une petite analyse de ce que chacune des options de base peut faire.
Réduction du bruit
Ces filtres se présentent sous différentes formes, de nombreuses applications modernes utilisant l’IA pour éliminer complètement les bruits de fond indésirables. Si cela n’est pas possible ou si votre PC d’enregistrement n’est pas à la hauteur, vous pouvez essayer d’ajouter un Noise Gate et/ou un filtre passe-haut pour atténuer ces distorsions. Un Noise Gate empêche l’enregistrement de tout ce qui se trouve en dessous d’un certain niveau de gain, tandis qu’un filtre passe-haut réduit les basses fréquences pour éliminer les bruits atmosphériques sourds.
Normaliser le son
Si votre voix est le principal atout, vous aurez peut-être envie de lisser les aspérités pour obtenir le meilleur son possible. Un filtre De-Esser est une bonne option ici, car il réduit l’impact des sons « ess » agressifs, tandis qu’un compresseur normalisera le volume audio et vous empêchera d’atteindre des pics si vous vous animez un peu trop.
Composer
L’égaliseur est le moyen le plus courant pour améliorer la qualité audio. Il est recommandé d’essayer différents niveaux sur l’ensemble du spectre de fréquences afin de bien comprendre l’effet de chacun. La voix de chacun est différente, vous devrez donc faire vos propres essais, mais en général, augmenter les fréquences moyennes rendra votre voix plus pleine et plus riche, tandis qu’augmenter les fréquences aiguës lui donnera plus de netteté et de précision.
Les marques et leurs atouts
Lorsque vous choisissez un microphone, la marque que vous choisissez influe sur votre expérience longtemps après l’achat. Des éléments tels que l’assistance à la clientèle, la couverture de la garantie, la disponibilité des pièces et la fiabilité générale varient plus que vous ne le pensez. Voici ce que vous pouvez généralement attendre des marques de microphones les plus réputées, sur la base des expériences des utilisateurs, des forums tels que Reddit et des politiques des fabricants.
- Audio-Technica est l’une des marques les plus fiables en matière d’assistance à long terme. La plupart de leurs microphones sont assortis d’une garantie exceptionnellement généreuse de 15 ans dans l’UE, qui couvre les défauts de fabrication et inclut la gratuité des pièces et de la main-d’œuvre. Ils sont régulièrement félicités pour la rapidité et l’amabilité de leur service de réparation. Certains signalent des délais d’exécution inférieurs à 10 jours et même des réparations gratuites hors garantie. Si vous appréciez la simplicité d’utilisation, ils constituent un excellent choix.
- Shure, l’un des noms les plus reconnus dans le domaine du son en direct et en studio, offre une garantie standard de 2 ans. Leur matériel est conçu pour durer, mais en cas de problème, l’expérience du service après-vente peut varier. Ils n’offrent pas de remplacements avancés ou de prêts pendant l’entretien, et les interruptions de service sont donc à prendre en compte.
- RØDE offre une assistance efficace sur toute sa gamme, en particulier si vous enregistrez la garantie de votre matériel. La plupart des produits bénéficient d’une garantie d’un an, mais de nombreux modèles populaires, tels que le micro dynamique M1 ou les condensateurs de la série NT, peuvent bénéficier d’une garantie prolongée jusqu’à 10 ans. Le processus de réparation est généralement simple et l’entreprise offre une bonne assistance pour les accessoires et les pièces détachées.
- DPA opère dans le segment haut de gamme et s’adresse principalement aux professionnels de la radiodiffusion, du cinéma et de l’enregistrement musical haut de gamme. Leurs microphones bénéficient d’une garantie de 2 ans, mais certaines séries sont garanties jusqu’à 5 ans. Leur modèle de service est bien adapté aux professionnels : les pièces sont disponibles pour les réparations et les mises à niveau, et leur réseau d’assistance est conçu pour que les systèmes audio critiques fonctionnent avec un minimum d’indisponibilités.
- Neumann, une autre marque haut de gamme, offre une garantie de 24 mois et assure le service après-vente par l’intermédiaire de centres mondiaux certifiés. Leur réputation de précision et de longévité est accompagnée par une infrastructure de service fiable. Ils ne font peut-être pas de publicité tapageuse sur leur garantie, mais si vous investissez dans un micro Neumann, vous pouvez compter sur une assistance à long terme et la disponibilité des pièces pendant des années.
- AKG, qui fait désormais partie du groupe Harman, offre toujours de bonnes conditions de garantie (généralement un à deux ans), bien que l’assistance soit plus centralisée et parfois plus lente en fonction de la zone géographique où vous vous trouvez.
- Schoeps, marque spécialisée connue pour ses condensateurs à petit diaphragme, offre d’excellentes performances, mais s’appuie davantage sur les revendeurs et distributeurs audio pour le service et les pièces détachées. La marque n’est pas aussi facile à utiliser que les marques grand public, mais pour ceux qui travaillent dans le domaine de la diffusion ou de l’enregistrement classique, elle en vaut la peine.
- Blue Microphones, connu pour ses micros USB comme le Yeti et le Snowball, appartient désormais à Logitech. La garantie est généralement d’environ un an et l’assistance est gérée par les systèmes de Logitech. Le service est ainsi relativement accessible, en particulier pour les consommateurs, bien qu’il soit moins adapté que les marques professionnelles.
En général, des marques comme Audio-Technica et RØDE se distinguent par leur longue garantie et leur facilité de réparation. Neumann et DPA se concentrent davantage sur la fiabilité de niveau professionnel et la disponibilité des pièces à long terme. Shure fournit du matériel résistant, mais peut manquer de constance en ce qui concerne le service à la clientèle. Blue, AKG et Schoeps se situent au milieu — Un bon choix, mais votre expérience dépendra davantage du produit spécifique et de l’endroit où vous êtes basé.
Pour terminer
Il y a beaucoup d’éléments à prendre en compte pour enregistrer un son de qualité, et acheter le microphone adapté à vos besoins est la première et la plus importante des étapes. Il s’agit d’un exercice d’équilibre qui nécessite de prendre en compte de nombreux facteurs, mais nous espérons que vous comprenez désormais clairement non seulement à quoi sert chaque type de microphone, mais aussi comment les distinguer à partir des fiches techniques, ce que vous devez prendre en compte avant d’acheter et, une fois votre achat effectué, comment en tirer le meilleur parti.