


Si vous avez décidé de vous lancer dans le streaming sur Twitch, Kick ou YouTube, l’une des premières choses que vous remarquerez est que votre microphone est tout aussi important que votre caméra, voire que votre gameplay. Les spectateurs peuvent fermer les yeux sur un débit binaire faible ou quelques pertes d’images occasionnelles, mais ils resteront rarement si le son est mauvais.
Un bon micro peut vous permettre de faire une impression claire, chaleureuse et engageante. Un mauvais micro peut donner une image faible, étouffée ou déformée. Et dans un monde où les spectateurs peuvent passer à un autre stream en quelques secondes, cela peut faire la différence entre gagner un nouvel abonné ou non.
La bonne nouvelle, c’est que vous n’avez pas besoin de dépenser une fortune pour obtenir un excellent son en streaming. Le plus difficile est simplement de savoir quel microphone convient à votre configuration, à votre voix et à votre style de streaming. Il existe de nombreuses options, chacune avec ses forces et ses faiblesses, et le jargon marketing peut être déroutant si vous n’êtes pas déjà familier avec le matériel audio. Ce guide vous présentera les éléments essentiels, vous expliquera les différences en termes simples et vous aidera à éviter certaines des erreurs courantes que commettent les nouveaux streamers lorsqu’ils achètent leur premier micro.
Pourquoi un micro est plus important que vous ne le pensez
Si certains joueurs de haut niveau peuvent se contenter de leur gameplay, dans la réalité, le streaming repose avant tout sur la connexion et la personnalité. Les spectateurs se connectent souvent parce qu’ils apprécient votre personnalité ou vos commentaires, indépendamment du jeu auquel vous jouez ou de ce que vous faites en même temps.
C’est votre micro qui transmet cette personnalité directement à leurs oreilles. Si votre micro est trop faible, trop agressif ou saturé par des bruits de fond, votre contenu en pâtira, même si vous êtes très amusant. Pensez au nombre de fois où vous avez rejoint un streaming et l’avez quitté parce que le son était difficile à écouter. Imaginez maintenant que vous vous trouviez de l’autre côté.
Le son du jeu est bien sûr important, tout est relatif, mais il est secondaire par rapport à votre micro. Votre voix transmet le ton, l’émotion et l’humour d’une manière qu’aucun chat superposé ou graphique à l’écran ne peut reproduire. Un bon micro vous permet non seulement d’avoir un meilleur son, mais aussi de faciliter la compréhension des spectateurs sans qu’ils aient à faire d’efforts, et ce confort incite les gens à regarder plus longtemps.
Pourquoi le microphone de votre casque n’est pas à la hauteur
De nombreux streamers peuvent être tentés de commencer avec le microphone intégré à leur casque de jeu. Nous comprenons, c’est pratique, il est déjà là et il devrait être suffisant, n’est-ce pas ? Eh bien, pas vraiment, car malheureusement, les micros des casques sont généralement médiocres.
Il s’agit souvent de petites capsules de mauvaise qualité, conçues davantage pour le chat vocal de base dans les jeux que pour offrir une clarté de niveau professionnel. Ils peuvent produire un son faible, compressé et manquer de la richesse offerte par un microphone dédié. À moins que vous n’essayiez de reproduire le style de la radio AM à l’ancienne ou du système de sonorisation d’un aéroport, évitez le micro du casque.
Il ne s’agit pas seulement de qualité, mais aussi de cohérence. Les micros des casques sont si proches de votre bouche que même de petits mouvements peuvent entraîner d’importants changements de volume ou de tonalité. Les bruits de respiration, les pops explosifs sur les sons « P » et « B » et les coups occasionnels lorsque vous ajustez le casque peuvent tous se glisser dans votre flux et rendre l’écoute très désagréable. Oubliez la commodité, repliez ce petit bras et utilisez votre casque uniquement pour le son, car le passage à un microphone autonome adapté constituera presque toujours une amélioration notable pour vous et votre public.
Condensateur ou dynamique : quel type convient le mieux au streaming ?
L’un des premiers choix que vous aurez à faire lorsque vous ferez vos recherches sera d’opter pour un microphone à condensateur ou un microphone dynamique. La différence entre les deux est assez fondamentale et ne doit pas être négligée. Il ne s’agit pas seulement d’une question de marketing, ils fonctionnent de manière complètement différente et conviennent chacun à des styles et des configurations très différents.
Un microphone à condensateur est plus sensible et capte davantage de nuances dans votre voix. Techniquement, c’est également l’option la plus qualitative si vous cherchez à maximiser les détails bruts. Il captera les tonalités subtiles, les aigus brillants et restituera de manière plus complète le caractère naturel de votre voix.
En gros, vous aurez un son plus fidèle à votre voix avec un microphone à condensateur. C’est pourquoi ils sont préférés pour les enregistrements professionnels en studio et par les streamers qui recherchent un son clair et haute fidélité. En contrepartie, ils captent également davantage les bruits ambiants, y compris ceux que vous ne souhaitez pas vraiment que vos spectateurs entendent. Si vous avez des ventilateurs de PC bruyants, des claviers mécaniques ou des personnes qui parlent en arrière-plan, un microphone à condensateur captera tous ces bruits et les diffusera en streaming avec votre voix.
Un microphone dynamique est moins sensible, ce qui signifie qu’il se concentre davantage sur ce qui se trouve directement devant lui et moins sur tout ce qui se passe autour. Cela le rend idéal pour les pièces non traitées acoustiquement, les environnements bruyants et les streamers qui ne veulent pas avoir à se soucier que chaque bruit de la maison soit entendu pendant le stream. Bien qu’il ne capture pas autant de détails que les condensateurs, il peut tout de même produire un son riche et plein, surtout avec une bonne technique de micro.
Pour les streamers, le choix dépend souvent de votre environnement. Si vous disposez d’un espace calme et que vous souhaitez un maximum de détails, un micro à condensateur peut être fantastique. Si vous streamez dans une pièce partagée ou bruyante, un micro dynamique peut être un meilleur choix.
USB ou XLR : quel est le mieux adapté aux streamers ?
Une autre décision importante à prendre dès le début concerne la manière dont votre microphone sera connecté à votre équipement de streaming.
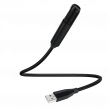
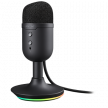
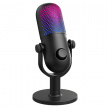
Les micros USB sont l’option la plus simple et celle que nous recommandons à la plupart des nouveaux créateurs de contenu. Il s’agit d’une solution tout-en-un, prête à l’emploi, qui se connecte directement à votre ordinateur, ce qui signifie qu’aucun équipement supplémentaire n’est nécessaire pour commencer. En général, ils fonctionnent dès leur sortie de l’emballage, sans configuration supplémentaire. De nombreux micros USB sont même équipés d’une prise casque intégrée qui vous permet de contrôler votre voix sans aucun décalage. Ils sont également plus susceptibles d’offrir un style RGB funky ou plus axé sur les gamers.
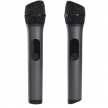
Les micros XLR sont la norme professionnelle et l’option la plus traditionnelle, mais leur configuration est également un peu plus complexe. Au lieu de se connecter directement à votre ordinateur, ils se branchent sur une interface audio ou une table de mixage, qui se connecte ensuite à votre PC. Cet équipement supplémentaire augmente le coût, la complexité et le temps d’installation, mais il vous offre également plus de contrôle, une qualité audio potentiellement meilleure et la possibilité de mettre à niveau des composants individuels à l’avenir.
Si vous envisagez d’investir davantage dans votre équipement audio au fil du temps, le XLR mérite d’être pris en considération. Mais si vous recherchez simplement une solution simple, l’USB convient parfaitement à la plupart des nouveaux streamers.
Caractéristiques et spécifications clés à rechercher
Lorsque vous achetez un microphone pour le streaming, il est facile de se perdre dans les chiffres, les spécifications techniques et le blabla marketing, surtout si vous êtes novice dans le domaine de l’audio. Avant de parcourir les listes de produits, voici ce que signifient certaines des fonctionnalités mises en avant et celles qui importent vraiment.
Diagramme polaire
On parle parfois de diagramme de captation. Il indique comment le microphone captera le son en fonction de la source et dans quelles directions il ignorera les sons. Pour la plupart des streamers, un diagramme cardioïde est idéal. C’est également l’option la plus courante pour les micros dynamiques et à condensateur.
Une directivité cardioïde ressemble un peu à un cœur à l’envers et capte le son provenant de l’avant tout en rejetant la plupart des sons provenant des côtés et de l’arrière, ce qui devrait contribuer à réduire le bruit de fond. Certains micros ont des directivités commutables, ce qui est un avantage appréciable, mais en réalité, vous n’utiliserez probablement que la directivité cardioïde pour le streaming.
Réponse en fréquence
Si le diagramme polaire explique comment un micro peut écouter en fonction de la source, la réponse en fréquence indique la gamme de sons qu’un micro peut entendre. La gamme typique d’un micro à usage général est comprise entre 20 Hz et 20 kHz, ce qui couvre toute la gamme audible par l’oreille humaine.
Curieusement, même si la plupart des micros de streaming sont capables de capturer toute cette gamme, vous ne voudrez pas vraiment l’inclure dans votre mixage final. La plupart des créateurs utilisent alors un post-traitement pour atténuer les extrêmes graves et aigus de cette gamme afin d’adapter leur son. De nombreux micros destinés aux créateurs intègrent une forme de traitement intégré pour gérer les bases de cette opération, certains proposant également leurs propres applications qui offrent une gamme de préréglages.
Sensibilité
Il est important de tenir compte de cet élément si vous hésitez entre un modèle à condensateur et un modèle dynamique. Une sensibilité plus élevée signifie que le micro captera davantage les sons faibles, ce qui est idéal dans une pièce calme, mais peut poser problème si votre environnement est bruyant. Les micros moins sensibles nécessitent un signal d’entrée plus puissant, ce qui permet de réduire certains bruits de fond indésirables, mais vous oblige également à faire plus attention à la façon dont vous parlez dans le micro.
À faire et à ne pas faire pour choisir votre micro pour streaming
Pensez à votre espace de streaming
Le fait de pouvoir diffuser depuis l’environnement le plus calme et le plus contrôlé possible améliorera le son de presque tous les micros, mais cela n’est pas toujours possible pour la plupart des gens lorsqu’ils débutent. Si vous ne pouvez pas contrôler votre environnement, choisissez un micro qui s’adapte à celui-ci plutôt que de le contrarier, c’est-à-dire un micro dynamique et un micro équipé d’une sorte de système de suppression du bruit alimenté par l’IA.
Positionnez correctement votre micro.
Nous reviendrons plus en détail sur ce point dans un instant, mais même le meilleur microphone produira un son de mauvaise qualité s’il est trop éloigné ou mal orienté.
Considérez vos besoins à long terme.
Cela dépend un peu de votre budget, mais essayez de réfléchir à ce que l’avenir vous réserve, à vous et à votre contenu. Si vous pensez vous lancer dans le podcasting, la musique ou la production haut de gamme, cela pourrait valoir la peine de passer dès le départ à un micro XLR avec une interface.
Ne vous laissez pas influencer uniquement par le battage médiatique autour d’une marque
Les marques connues constituent certainement un bon point de départ pour vos recherches, et il existe de nombreux acteurs bien établis proposant un large éventail d’options. Vous verrez souvent les mêmes modèles apparaître dans plusieurs flux, mais il existe également des modèles moins connus proposés par des marques concurrentes qui peuvent offrir un meilleur rapport qualité-prix.
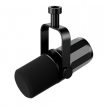
N’oubliez pas le support ou le bras
La plupart des microphones ne sont pas fournis avec leur propre support standard et vous devrez vous procurer le vôtre. La plupart des créateurs opteront pour un simple bras de micro à pince, mais assurez-vous de disposer d’un espace suffisant pour le fixer à votre bureau.
N’oubliez pas les accessoires
De simples accessoires tels qu’un filtre anti-pop ou une bonnette anti-vent peuvent épargner à votre public les sons désagréables des « P » et des « B », tandis qu’une suspension antichoc est particulièrement importante si vous utilisez un bras de micro, car elle empêchera les vibrations de votre bureau d’être retransmises dans votre flux.
Comment installer un microphone pour le streaming ?
C’est un point important que les nouveaux créateurs ont souvent tendance à négliger. Un excellent micro donnera un son moyen s’il n’est pas correctement installé, tandis qu’un micro moyen peut donner un très bon son s’il est parfaitement installé. L’emplacement et la manière dont vous installez votre micro auront une incidence directe sur la qualité du son, et chaque micro a des besoins différents.
Un simple bras de micro est un excellent investissement, car il offre une grande liberté de placement et facilite l’alignement. Il maintient le micro près de votre bouche sans bloquer votre vue sur l’écran et peut également réduire les bruits indésirables provenant du bureau. Attention toutefois, si presque tous les micros utilisent un filetage universel, certains des bras de micro les moins chers ne peuvent pas supporter le poids des micros haut de gamme à corps métallique et causeront plus de tracas qu’ils n’en valent la peine.
Une fois qu’il est en place, vous devrez également veiller à ce que votre micro soit à la bonne distance. S’il est trop éloigné, votre voix semblera faible. S’il est trop proche, vous risquez d’obtenir une distorsion ou des plosives trop fortes. En général, placer le micro à une distance de 15 à 20 cm de votre bouche fonctionne bien pour le streaming. Pour vérifier facilement cette distance à la volée, faites le signe « shaka » avec votre main, le micro à l’extrémité de votre petit doigt et votre bouche à l’extrémité de votre pouce. En général, vous devrez placer un micro dynamique un peu plus près de votre bouche, tandis que les micros à condensateur peuvent être placés un peu plus loin si nécessaire.
Lorsque vous déballez votre microphone pour la première fois, vérifiez comment il doit être orienté. En général, les micros se divisent en deux catégories : ceux à orientation frontale et ceux à orientation latérale/frontale. Il est essentiel que vous sachiez à quelle catégorie appartient le vôtre. Si vous parlez dans la mauvaise zone, le son sera horrible ! Il est également conseillé de l’incliner légèrement sur le côté ou vers le bas par rapport à l’endroit où vous parlez, ce qui peut aider à réduire les bruits de respiration et les plosives sans perdre en clarté.