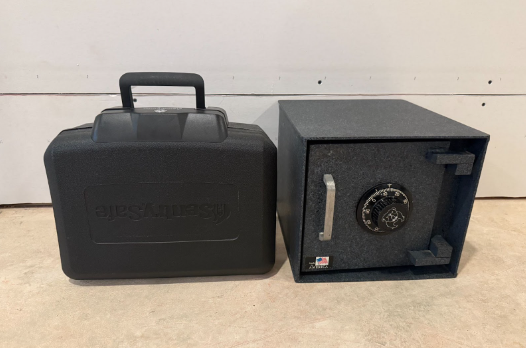


Over the past decade, I’ve owned two safes – an 80-pound combination safe and a portable fire safe – and learned firsthand that installation matters just as much as the safe itself. A poorly installed safe can create a dangerous sense of security, while a properly anchored safe dramatically improves theft resistance, usability, and long-term durability.
You’d think choosing a safe is the hard part. In reality, the challenge often begins after delivery. That’s when you discover that few manufacturers explain how to anchor a safe correctly, how to avoid damaging your floors or walls, or how to confirm that your home’s structure can support the weight safely.
This guide walks you through installing the three most common types of home safes: floor-mounted, wall-mounted, and cabinet safes. I’ll cover the tools you need, how to choose the right location, what structural issues to watch for, and when professional installation is the smarter (and sometimes safer) choice.
Tools and Materials Required
Getting the right tools upfront prevents mid-project trips to the hardware store and ensures your installation goes smoothly. I learned this lesson when my neighbor tried to drill into my concrete floor using basic drill bits. We ended up making three trips to the store before getting proper masonry bits and finishing the job properly.
The exact tools you need depend on your safe type and mounting surface. Floor installations on concrete require completely different equipment than wall mounting into drywall. Cabinet installations need the least specialized tools, but still require proper fasteners to handle the weight safely.
Basic tools for all installations:
- Hammer drill with appropriate bits (masonry for concrete, wood/metal for studs)
- Level (4-foot recommended for larger safes)
- Measuring tape and pencil for marking
- Socket wrench set or adjustable wrench
- Safety glasses and work gloves
- Stud finder for wall installations
- Vacuum for cleaning debris from drilled holes
Materials vary by installation type:
- Concrete anchors (wedge anchors for permanent installs, sleeve anchors for removable setups)
- Lag screws for wood stud mounting (minimum 3-inch length)
- Washers to distribute the load properly and prevent fastener pull-through
- Heavy-duty drywall anchors or toggle bolts for limited stud access
- Mounting brackets if the safe doesn’t include integrated anchor points
- Shims for leveling on uneven surfaces
The quality of your anchors matters more than any other single factor. Cheap anchors can loosen, shear, or pull free over time, especially in concrete. High-quality wedge anchors rated well above your safe’s weight provide far better long-term reliability. For wall installations, lag screws should penetrate studs by at least two inches to ensure proper load transfer and prevent gradual pull-out.
How To Install a Safe: Step by Step
Before you pick up any tools, it’s important to understand that the type of safe you’re installing – floor, wall, or cabinet – dictates different requirements for tools, placement, and structural considerations. A combination safe that sits on a concrete basement floor will make installation straightforward. Wall safes and cabinet installs require more planning due to structural limits, stud placement, and weight distribution.
Step 1: Choose Your Location and Verify Structural Support
![[MK] Draft: How to Install a Safe](https://www.market.com/wp-content/uploads/2025/07/-mk-draft-how-to-install-a-safe-2.png)
Location determines everything else about your installation. For floor-mounted safes, concrete slabs are ideal. They provide unmatched strength, eliminate load concerns, and simplify anchoring. That’s why I placed my combination safe in the basement — the concrete floor eliminated all questions about structural capacity.
Concrete floors offer the strongest foundation and simplest anchoring, making basements ideal for heavier safes. Installing on upper floors requires careful attention to joist placement and load capacity, especially for larger models.
Wall safes require finding studs and clearance checks for plumbing, electrical wiring, or HVAC ducts. Cabinet safes need shelving that can handle the weight and may require reinforcement to prevent sagging or failure. In my own office, the perfect hiding spot turned out to contain cable runs that would have required costly rerouting.
Ultimately, you’ll want to choose a spot that balances security, concealment, accessibility, and structural support.
Step 2: Gather Your Tools and Hardware
![[MK] Draft: How to Install a Safe](https://www.market.com/wp-content/uploads/2025/07/-mk-draft-how-to-install-a-safe-3.png)
Each safe type demands distinct tools, but never assume that the included hardware is adequate. Manufacturers often provide minimal anchors that meet packaging requirements but fall short in real-world durability.
The bolts that shipped with my neighbor’s safe were too short, and the stamped steel brackets flexed under load. Upgrading to higher-quality anchors dramatically improved rigidity and long-term security.
Before starting, verify that your drill bits match your mounting surface, your anchors exceed the safe’s weight rating, and your screws are long enough to penetrate framing properly.
Step 3: Mark and Drill Your Mounting Points
![[MK] Draft: How to Install a Safe](https://www.market.com/wp-content/uploads/2025/07/-mk-draft-how-to-install-a-safe-4.png)
This step separates successful installations from frustrating do-overs. Use your safe as a template to mark anchor locations carefully, but double-check measurements before drilling anything permanent. For concrete, drilling shallow pilot holes first allows you to confirm depth and material consistency. For wall installations, alignment becomes trickier since stud spacing rarely matches pre-drilled mounting holes. In those cases, mounting plates or reinforcement brackets help distribute weight safely across framing members.
Step 4: Install Anchors and Test Fit
![[MK] Draft: How to Install a Safe](https://www.market.com/wp-content/uploads/2025/07/-mk-draft-how-to-install-a-safe-5.png)
Concrete anchors for floor mounting need to be sized correctly for your safe’s weight. Undersized anchors can pull out under stress, even if they initially feel secure.
Once anchors are in place, test-fit everything before final tightening. Confirm the safe sits level, rests flush against mounting surfaces, and engages all fasteners properly. This step allows you to make small adjustments before the installation becomes permanent.
Step 5: Secure the Safe and Verify Installation
![[MK] Draft: How to Install a Safe](https://www.market.com/wp-content/uploads/2025/07/-mk-draft-how-to-install-a-safe-6.png)
Final tightening should leave the safe completely immobile when properly executed. Floor anchors should be tightened gradually in a cross pattern to avoid binding. Wall-mounted safes need extra attention to be sure they don’t tilt or flex under load.
Test the stability of your installation by trying to rock or lift the safe gently. A properly mounted floor safe shouldn’t move at all. If you detect any looseness, stop and address it before considering the job complete. Minor movement compounds over time and undermines security.
Choosing the Right Safe Type and Size
![[MK] Draft: How to Install a Safe](https://www.market.com/wp-content/uploads/2025/07/-mk-draft-how-to-install-a-safe-7.png)
One of my biggest early mistakes was choosing a safe without thinking about installation logistics. My 80-pound combination safe seemed like a good middle ground until I realized it was too heavy for wall mounting but too light for real floor security without bolting. Your installation options depend entirely on the safe type, weight, and size, so getting this decision right upfront saves headaches. If you’re still evaluating models, review our home safe guide to help clarify which designs best match your security priorities.
Floor Safes vs. Wall Safes vs. Cabinet Safes
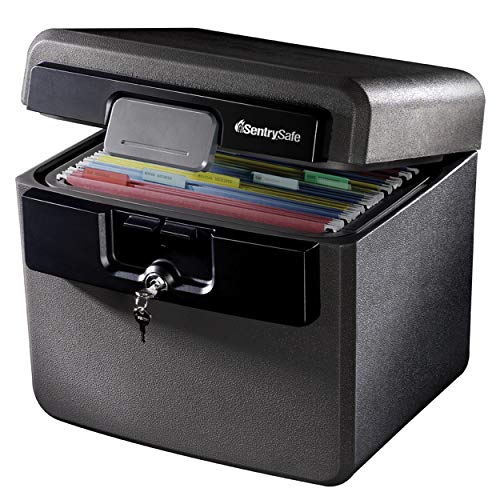
Floor safes provide the highest level of theft resistance when anchored into concrete. Their mass and mounting make removal extremely difficult. However, anything under about 200 pounds still benefits greatly from anchoring. Fire safes like my second unit prioritize document protection over theft resistance, so their lighter weight actually makes sense for portable security.
Wall safes appeal to people who want hidden storage, but they impose serious size limitations. Most residential walls can’t support more than 50 pounds between studs, and finding a wall location without plumbing or electrical gets tricky fast. If concealment is your priority, learning where to hide a safe can dramatically improve real-world security.
Cabinet safes prioritize portability and convenience. They work well for renters, those storing documents rather than valuables, and people who move frequently. The trade-off is theft resistance – lighter safes can be carried away entirely if not properly concealed
Sizing for Current and Future Needs
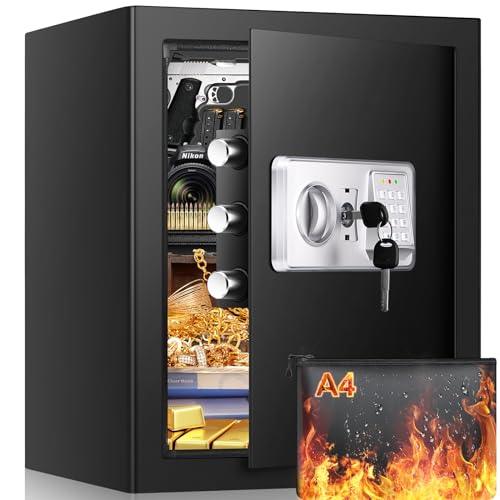
Size calculations should account for future needs, not just current contents. Important documents, backup drives, insurance records, and family paperwork accumulate faster than you might expect. Fire safes, in particular, need extra space because document storage expands naturally over time. Choosing a size slightly larger than your current needs prevents costly upgrades later.
Lock Types and Daily Usability
Lock type affects both security and daily usability more than most people realize. My combination lock works great for infrequent access, but entering a long combination gets annoying if you need the safe regularly. Electronic locks offer convenience but require battery maintenance, while key locks like my fire safe provide simple reliability at the cost of having another key to manage.
Learn more about biometric security to clarify whether fingerprint scanners fit your lifestyle and security expectations.
Additional Tips for Better Security
Proper installation creates the foundation for security, but a few strategic details can significantly improve real-world protection.
- Use corner placement whenever possible. Positioning your safe in a corner limits access and reduces leverage points, making it far harder for someone to pry, tilt, or force it loose.
- Prioritize concealment over complexity. A well-hidden safe is far more effective than one protected by elaborate locking mechanisms but left in plain sight. Closets, basement corners, and disguised cabinetry dramatically reduce detection.
- Ensure comfortable, repeatable access. Safes that are awkward to reach or operate often get used less or positioned poorly over time. Comfortable access improves daily usability and reduces wear on locking components.
- Control temperature and humidity. Fire safes, in particular, benefit from stable environments. Excess moisture, heat swings, and condensation can damage documents, electronics, and mechanical locks. Climate-controlled interior spaces outperform garages and attics long-term.
When To Hire a Professional
Some installation scenarios move beyond DIY work and introduce real safety, structural, and liability risks. Concrete wall installations, structural masonry drilling, and heavy safe placement often justify professional help. Drilling into structural concrete walls requires specialized equipment and experience that most homeowners lack. Mistakes can crack structural elements or damage rebar.
Older homes introduce unknowns – unexpected steel reinforcement, brick veneer over concrete block, and unconventional framing can all complicate DIY installation. Professional installers are prepared to handle these surprises.
Some warranties and insurance policies require professional installation to remain valid. Fire rating and UL listings can depend on proper installation. Some fire-rated safes require specific mounting methods to maintain their ratings. If the fire protection matters to you, professional installation might be the only way to preserve the safe’s certified performance.
Apartment installations usually require landlord approval and often mandate professional installation to avoid lease violations. Even if your lease allows modifications, the liability issues around improper safe installation can create problems when you move out.
Legal and Insurance Considerations
Installing a safe can affect your insurance coverage, lease terms, and even local building requirements. These factors are easy to overlook, but getting them wrong can lead to denied claims, lease disputes, or costly corrections later.
- Insurance coverage is not automatic. Many homeowners assume adding a safe improves coverage by default, but insurers often require documentation of the safe’s fire rating, weight, and installation method. Some policies mandate professional installation to maintain full protection for stored valuables.
- Building codes can apply based on weight and placement. While codes rarely address residential safes directly, heavy installations on upper floors may require structural verification or permits. Basement installs on concrete slabs typically avoid permit issues since they involve no structural changes.
- Rentals require special caution. Most lease agreements prohibit permanent modifications without written consent, and drilling anchor holes usually qualifies. Even heavy portable safes can violate lease terms if they risk floor damage or increase perceived break-in risk.
- HOA rules may restrict installations. Noise limits, drilling restrictions, and architectural guidelines can all apply. Some associations require approval even for basement installations if utility lines or venting systems are affected.
- Accurate insurance reporting is essential. Overstating installation quality or misrepresenting anchoring methods can void coverage. Keep receipts for the safe, hardware, and any professional services, and ensure your insurer has accurate documentation.
Common Safe Installation Mistakes To Avoid
Even well-made safes fail to deliver real protection when installation details are overlooked. Most security failures come from a handful of common mistakes that are easy to avoid once you know what to watch for.
- Assuming weight alone provides security. Safes under about 200 pounds are far easier to move than most people expect. Without anchoring, even heavy units can often be removed in minutes.
- Using low-quality anchors or hardware. Weak fasteners loosen over time, especially in concrete and drywall. High-grade anchors rated well above the safe’s weight make a dramatic difference in long-term security.
- Skipping structural verification. Floors, studs, and cabinetry all have load limits. Failing to confirm structural support can lead to sagging, cracked finishes, or long-term damage.
- Choosing visibility over concealment. A hidden safe provides more real-world security than a visible one, regardless of lock complexity or steel thickness.
- Placing convenience above usability. Awkward access leads to frustration and improper use, increasing wear and encouraging unsafe shortcuts.