


A dash cam records the road ahead – and sometimes behind – your vehicle, automatically starting when an impact is detected or manually triggered. Installing a dash cam is generally straightforward and requires no special tools beyond what’s included with the device. However, you may want additional accessories to neatly hide the dash cam’s power cable.
There are three main ways to install a dash cam:
- Temporary: Easily move the dash cam between vehicles.
- Semi-permanent: Hide the power wires for a cleaner setup.
- Permanent: Hardwired installation, which may require professional assistance.
Below I list the steps of a semi-permanent installation of a MioFive Mini 2 dash cam in a 2024 Honda Passport. A similar installation requires only basic DIY skills and about an hour of time.
Tools You’ll Need to Install Your Dash Cam
Before you get started, make sure to get these 4 items to make the process go smoothly and achieve a professional-looking install:
- Glass cleaner
- Paper towels
- Pry tool (included)
- Cable clips, tape, or zip ties (optional)
How to Install a Dash Cam in Your Car in 9 Steps
Installing a dash cam is simpler than it seems. While some setups require professional help, a semi-permanent installation can be done with basic DIY skills in about an hour. Follow these steps for a clean, professional-looking install.
Step 1: Choose the Mounting Location
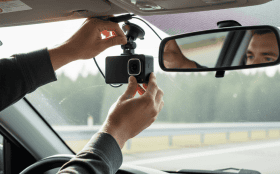
Pick a spot on your windshield that has an unobstructed view but also will not block the driver’s view in any way. A great place to mount a dash cam is usually behind the rearview mirror.
Step 2: Clean the Windshield Where You’ll Mount the Dash Cam
Use glass cleaner and paper towels to clean the area where you’ll mount the dash cam. A clean surface that’s clear of any dirt or smudges ensures the mount adheres securely.
Step 3: Apply Electrostatic Film
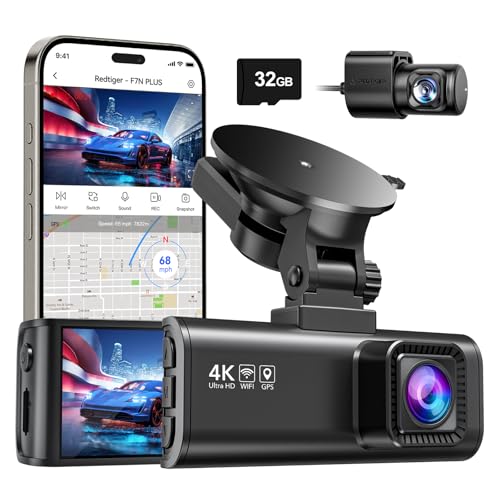
Many dash cams, including the MioFive Mini 2, come with adhesive mounts that use 3M tape specifically designed for windshields. To protect the glass and make future removal easier, place a sheet of electrostatic film at the chosen mounting spot. This film creates a static charge that helps the mount cling to the windshield and prevents residue from sticking directly to the glass. Some dash cams use suction cups instead of adhesive, which are easier to move between vehicles but tend to be less secure.
Step 4: Connect the Power Cord
Plug the supplied power cord into the dash cam and then into your car’s 12-volt outlet. For a semi-permanent setup, leave some slack in the cable to allow routing behind trim and seams. If you plan to hardwire the dash cam for a permanent install, the cord will connect to the car’s fuse panel for continuous power, which may require professional installation.
Step 5: Plan and Hide the Power Cord
Plan the route for the power cable before tucking it away. For the MioFive Mini 2 in the Honda Passport, the cable is routed along the headliner, down the driver-side A pillar (the trim between the windshield and driver’s door), along the dashboard edge, under the steering wheel, and to the 12-volt outlet. Use the included pry tool to discreetly wedge the cable into seams and hide it from view. Make sure the cable doesn’t dangle or interfere with the pedals or driver’s movement. Cable clips, tape, or zip ties can help secure it neatly.
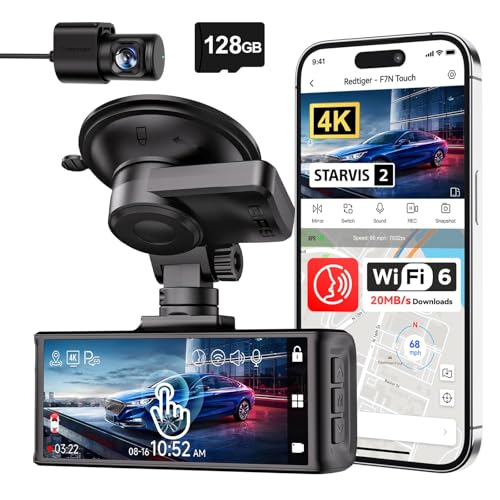
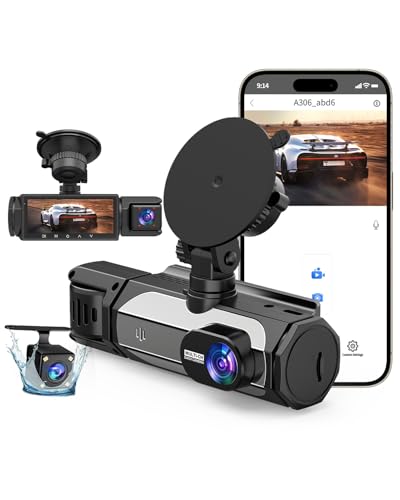
Step 6: Install the MicroSD Card
Insert the microSD card into the dash cam before mounting. Most dash cams require formatting, which is easier to do when the camera isn’t yet attached to the windshield. Installing the card now ensures your dash cam is ready to record immediately after mounting.
Step 7: Mount the Front Dash Cam
With the above steps completed, it’s time to mount your dash cam on the windshield. Peel the backing from the adhesive mount and press the dash cam onto the windshield at the planned location. Hold it firmly for about 30 seconds to ensure the adhesive bonds securely. Check the camera angle using the companion app or built-in screen, if available, and make adjustments for a centered, unobstructed view of the road.
Step 8: Mount and Route the Rear Camera
For dual-camera setups like the MioFive Mini 2, place the rear camera in an upper corner of the rear window, typically on the passenger side. Make sure it’s not blocked by cargo or window tint lines. Then, route the rear camera cable along the headliner and down the passenger-side A pillar, leaving enough slack so the wire doesn’t pull when the liftgate opens. Use the pry tool to hide the cable in seams and run it under the dashboard to connect it to the front camera’s power port.
Step 9: Adjust and Test the Cameras
Once everything’s connected, power up the dash cam and open its companion app (for the MioFive Mini 2, that’s the MioFive smartphone app). Use the app to view live video, fine-tune the camera angles, and test functions like recording, switching views, and parking mode. If your dash cam has a built-in screen, you can make adjustments directly from there instead.
Hardwiring a Dash Cam
If you want your dash cam to always have power – even when your car is turned off – you can hardwire your dash cam to your car’s electrical system. This type of installation is a job for skilled DIYers or professionals, which you can usually find at a local car stereo shop. Many dash cam companies, including MioFive, offer optional hardwire kits that make the process more straightforward.
What Hardwiring Involves
The basics of hardwiring include the following steps:
- Locate your car’s fuse box. Consult your vehicle’s manual to find where it’s located – typically under the dashboard, near the glove compartment, or in the engine bay.
- Identify the right type of fuse. Determine whether a fuse controls a constant-on accessory (such as interior lighting, which works even when the car is off) or an ignition-on accessory (like the radio, which only works when the car is on). This can be determined using a car fuse/circuit tester that lights up when its probe makes contact with a fuse.
Warning: Avoid connecting to fuses related to a car’s safety features like airbags, ABS, or stability controls. Look for the ones connected to accessories such as the radio or 12-volt outlets. Also, make sure to use fuse slots that are rated at 10 amps to 30 amps.
- Connect the wires from the hardware kit. Once you determine the correct fuses:
- Connect the red wire to a constant-on fuse.
- Connect the yellow wire to an ignition-on fuse.
- Attach the black ground wire to a metal bolt or screw on the vehicle’s body.
Some dash cams let you choose between constant power – so the camera records even when the car is off (for features like Parking Mode) – and ignition-on power, which only activates recording when the car is running.
- Use fuse taps for a secure connection. Most dash cam hardwire kits come with fuse taps. These replace the original fuse, allowing you to plug in both the original fuse and the dash cam’s circuit safely. This setup keeps your car’s factory wiring intact and ensures a more secure, professional installation.
The MioFive Mini 2 hardwire kit also includes built-in low-voltage protection, which automatically shuts off the dash cam if the battery voltage drops too low – preventing battery drain when the car is parked.
Regular Maintenance Requirements
Most dash cams require very little maintenance. Most store video on the microSD card as loop recordings that record new footage over older footage. But with some dash cams that use a microSD card with a lower memory, I’ve had to manually delete video to make room on the card before the dash cam would record new footage.
It’s also worth performing a quick periodic check to make sure everything’s in good working order. Over time, heat can weaken the adhesive mount, so ensure the dash cam is still securely attached to the windshield. If it feels loose, replace the adhesive pad or mounting tape. Finally, wipe the lens periodically with a soft cloth to keep recordings clear and sharp.
FAQs
Where should a dash cam be placed?
For front-facing dash cams, mount it as high and centered on the windshield as possible for the best vantage point without obstructing the driver’s view. I’ve found the space just behind the rearview mirror to be ideal.
For SUVs or hatchbacks, mount the rear camera in an upper corner of the rear window where it has a clear view and won’t be blocked by cargo. In sedans and trucks, it can go directly on the rear glass. With any vehicle, install the rear camera in a way that allows for the easiest cable routing to the front of the car.
Do dash cams drain your car battery?
It depends. For temporary and semi-permanent setups that plug into a 12-volt outlet, the answer is usually no – these outlets typically only supply power when the ignition is on. However, in some vehicles, the outlet stays powered even when the car is off, so you may need to unplug the dash cam manually.
If hardwired, a dash cam can potentially drain the battery, but most hardwire kits—such as MioFive’s – include low-voltage protection that automatically shuts off the camera if the voltage drops too low, preventing battery drain.