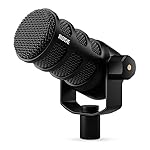
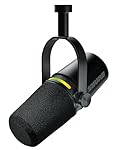
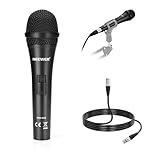
There’s something about an XLR microphone that just feels… proper. That chunky three-pin connector brings instant professional vibes, thanks largely to the fact that XLR has been the go-to standard in studios, radio stations, and live venues for decades. Trusted for its reliability, sound quality, and ability to handle just about any recording situation you throw at it, it’s easy to see why many creator’s minds instantly default to this option when looking for a new microphone.
XLR microphones aren’t the simplest option though and if you’re new to audio it can be tricky to know what’s going on. They also need a little supporting cast of other gear, you’ll need an audio interface or mixer, a good cable, and a little understanding of how it all fits together too. But in return, you get more control over your sound, the freedom to upgrade parts of your setup over time, and access to a huge range of microphones—from budget-friendly workhorses to legendary models used on hit records.
In this guide, we’ll walk through what makes XLR mics worth considering, what gear you’ll need to pair them with, and what to look for when you’re ready to buy. Whether you’re a podcaster, musician, streamer, or all of the above, the right XLR setup can take your audio from “that’s fine” to “wow, that sounds great.”
Why Should You Choose an XLR Microphone Over USB?
The gap between a good USB microphone and a good XLR mic used to be rather wide. There was often an obvious difference between the two kinds and those with a keen ear would probably spot both of them a mile away.
That’s changed in recent years though and USB microphones are now able to achieve some pretty incredible sound. It means the choice to go with an XLR microphone isn’t quite as instant as it once was, but for many creators it’s still a relatively easy decision. Why choose one? Well the short answer is that XLR mics give you more control, better sound potential, and a path to upgrade your gear without replacing everything.
With a USB microphone, the mic itself handles just about everything on its own. It has its own built-in preamp and analog-to-digital converter (ADC), which means your computer gets a ready-to-use digital signal with the simplicity of plug-and-play. The quality of those built-in components varies a lot between models and once you’ve bought the mic, you’re locked into whatever hardware it has.
An XLR mic works differently. It sends an analog signal through its cable, which then gets handled by an external audio interface, mixer, or recorder. That means you can choose the interface with the preamp, ADC, and features you want, and if you decide to upgrade your sound later, you can swap the interface without replacing the mic, or the other way around.
There’s another big advantage too: XLR is the professional standard. You’ll find it in music studios, radio stations, and stage setups because it’s reliable, works with long cable runs without losing quality, and offers a level of compatibility that USB microphones can only dream of. If you want to mix and match gear or have a setup that grows with you, XLR is the way to go.
The Pros of XLR Microphones
Sound Quality Potential
A good XLR mic paired with a solid interface can capture incredibly clean, detailed audio. Because you can choose your own preamp and converter, you’re not stuck with whatever was crammed blindly inside a USB mic. You’re also not restricted by whatever processing a brand has chosen to apply, that analogue signal transmits exactly what it hears and you’re free to tinker with it how you like later.
Upgrade Flexibility
Want to switch up your sound? Just swap out the mic. Want cleaner, punchier gain with more connection options? Upgrade your interface. With USB mics, you’d need to replace the whole unit to make a change.
Reliability
The XLR connection is physically solid and far less prone to the kind of dropouts or digital glitches you might get from a USB connection. It’s also a balanced connection, which helps reject interference and noise, especially over long distances. That’s handy too, because unlike USB, XLR cables can happily run a long way before your output degrades – even beyond 100m with some high quality options.
Variety
From affordable entry-level models to legendary studio staples, XLR mics cover the full range of prices and uses. You can start small and work your way up without rethinking your whole setup.
Multiple Mic Setups
While more a benefit of audio interfaces and mixers rather than a microphone itself, by going the XLR route you avoid almost all potential headaches that crop up from trying to work with multiple microphones at once. Interfaces frequently have multiple XLR input ports to make setup super simple without having to worry about your computer panicking about two of the same device.
The Cons of XLR Microphones
Extra Gear Required
You can’t just plug an XLR mic into your computer in the same way you can with a USB microphone. You’ll need an audio interface or mixer, plus at least one XLR cable. That’s more cost and more desk space, and potentially a power socket too.
Less Portable
A USB mic is easy to throw in a bag with a laptop for quick recordings. An XLR mic needs a full setup, not only is that bulkier but it usually needs mains power for the interface or mixer too.
Learning Curve
With more options comes more to learn. Once your new XLR setup arrives you’ll need to understand gain staging, phantom power (for some mics), and how to set up your interface correctly. None of this is hard, but it’s an extra step compared to USB mics which will handle a lot of this for you out of the box.
Key Specs to Look At
Before you start browsing online stores, it helps to think about how you’ll use your new microphone, where you’ll use it, what you want to record with it and what you’ll connect it to.
First, you’ll need to decide what type of mic you want and for most kinds of content the choice is between dynamic and condenser microphones. Dynamic mics are great for rejecting background noise and handling loud sources, making them ideal for untreated rooms, live performance, or situations where durability matters. Condensers are more sensitive and capture more detail, making them a popular choice for studio vocals, voice-overs, and acoustic instruments where the highest quality possible is the primary goal.
Think about your recording space too. A high-end condenser will reveal every little detail of your voice, but it will also pick up your keyboard clacking, the hum of your fan, and the neighbour’s dog barking outside. If you can’t control your room noise, you might be happier with a dynamic model, even if it’s a little less “studio-sparkly” as a result.
Budget is another big factor. Remember that with an XLR mic, you’ll also need an audio interface or mixer, so set aside part of your budget for that. Skimping too much on the interface can bottleneck your sound quality, even with a good mic. You’ll also almost certainly need to provide your own XLR cable, and most mics won’t include a stand either.
Are all XLR cables the same?
Yes and no. XLR cables are actually quite simple things, particularly compared to many other cable types and unlike say an HDMI cable, they’re all capable of the same thing. Every XLR cable has the same basic three-pin connector and carries the same signal, there’s no speed or resolution differences to consider. The differences you do need to keep an eye out for mostly come down to build quality, flexibility, shielding, and connector durability.
Cheap cables will work and will be just as compatible as premium ones, but they’re more likely to develop crackles or fail over time. If you’re moving your setup around a lot of coiling and uncoiling cables daily, investing in well-made cables with solid connectors is worth it. That said, you don’t need to spend a fortune. A reliable mid-range cable will do the job just as well as a “premium” one for most uses, particularly in a static desk setup.
The Role of an Audio Interface or Mixer
An XLR mic on its own can’t do much. It sends a small analog signal that needs boosting and converting before your computer can use it. That’s where an audio interface or mixer comes in.
An audio interface is the most common partner for an XLR mic in home studios and podcast setups because it gets the job done in the simplest way. It has microphone preamps to amplify your signal, an ADC to convert it into digital audio, and outputs for your headphones or speakers. Many also include phantom power, which condenser mics need to work.
A mixer takes things to the next level — it does the same basics but also gives you more hands-on control at the same time. By running your XLR microphone into an audio mixer you can adjust levels, dial in your EQ, and add effects in real time. Mixers are also great if you’re working with several mics or instruments at once, or if you’re doing live streaming and want to balance everything on the fly.
You may be tempted to throw all your budget at your microphone and skimp out on your interface, but you shouldn’t. The quality of your interface or mixer matters almost as much. A good preamp will give you clean gain without hiss, and a good converter will capture the detail of your mic’s sound. This is why even the best XLR mic can still sound flat and distinctly average if it’s pushed through a poor interface.
Polar Pattern
This describes how the mic picks up sound. You might also see it referred to as a pickup pattern.
- Cardioid is the most common for voice work and podcasting as it focuses on what’s in front of it and rejects most of what’s behind, great for cutting down on room noise and echoes.
- Omnidirectional mics pick up evenly from all around, which can sound more natural and is perfect for multiple voices in the same room, but will grab background noise too.
- If you see a “multi-pattern” mic, it means you can switch between different polar patterns depending on your needs.
For most people starting out though, a fixed cardioid mic is more than enough.
Frequency Response
This tells you the range of sounds the mic can capture and you’ll usually see it as a range listed in hertz (Hz) to kilohertz (kHz). The spectrum of sound humans can hear runs from about 20 Hz to 20 kHz, but not every mic will cover that full range and you also won’t always want it to. For spoken voice content, anything from around 60 Hz to 15 kHz will still sound natural.
If you see a mic with a bottom end lower than 50 Hz, that’s more relevant for capturing instruments with deep bass, like kick drums, and while you can still use it for vocals you may want to roll some of that bottom end off with post processing.
Sensitivity
This measures how much signal output the mic produces from a given sound level and it’s an important metric to note when shopping for XLR microphones in particular. It’s usually shown in millivolts per pascal (mV/Pa) or as a negative dBV number.
For example, a condenser might have a sensitivity around -35 dBV (17 mV/Pa), while a dynamic might be closer to -55 dBV (1.8 mV/Pa). Higher sensitivity means it needs less gain from your interface, which can help avoid hiss from lower-quality preamps. If you’re getting a low-sensitivity mic like a podcast-focused dynamic (pushing down towards -60 dBV), make sure your interface has plenty of clean gain, ideally 60 dB or more, to offset this.
Self-noise
This applies mainly to condenser mics and is measured in decibels A-weighted (dBA). It describes the mic’s own electronic hiss when no sound is present, important for clean final audio. Under 15 dBA is excellent, 15–20 dBA is fine for most uses, but above 20 dBA might begin to be noticeable if you’re recording soft-spoken voices or quiet instruments.


