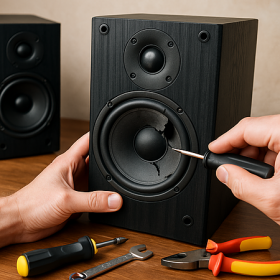


Home audio speakers can seem like complex devices, but many common issues are fixable with some basic tools and patience. Rather than rushing to replace a speaker at the first sign of trouble, a DIY repair can save money and bring your sound system back to life. This guide will walk you through diagnosing problems, making repairs, and even preventing future speaker failures in an easy-to-follow way.
What You’ll Need:
- Duct Tape (for dented cones or tweeters)
- Vacuum
- Screwdriver Set
- Digital Mutlimeter
- Speaker Repair Glue or Adhesive
- Soldering Iron (for advanced repairs)
- Any Replacement Parts (e.g., new cone or tweeter)
Quick Fixes for Common Speaker Issues
Before diving into complex repairs, it’s wise to rule out simple issues. Many “speaker problems” are actually caused by setup errors or external issues. Go through these quick troubleshooting steps to ensure the problem truly lies within the speaker hardware:
- Check Connections: Make sure all speaker wires are securely connected and matched to the correct terminals.
- Confirm Power Supply: Ensure your speaker or amplifier is turned on and not muted or in protection mode.
- Test the Audio Source: Try playing different audio or switch devices to see if the problem lies with the source.
- Review Settings: Double-check your system’s audio settings for balance, EQ, or disabled speaker outputs.
Step 1: Assess the Problem
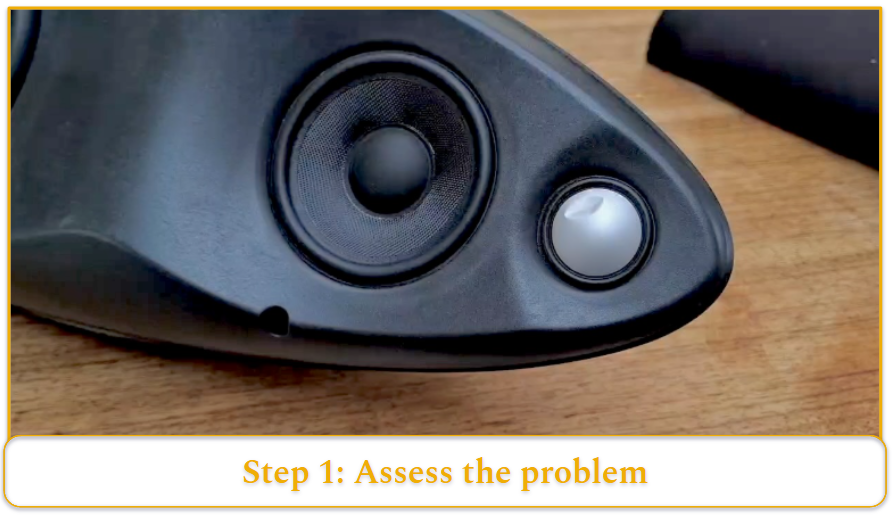
Many easy and moderately challenging speaker issues can be solved without consulting professionals.
I recommend using the audio inspection, visual inspection and diagnostic tips mentioned above to assess the damage.
In my case, shown here, on a Bowers & Wilkins Zeppelin Air, I noticed uneven sound in the treble frequencies with subtle harshness. Based on what I heard, it wasn’t surprising to see that the right tweeter had a dent in it.
Luckily, this issue is relatively easy to fix.
When a speaker is truly broken (for example, a driver is “blown” or physically damaged), you have two main options: repair the specific component or replace the entire driver unit.
The complexity of this can range from a simple swap to an involved rebuild. For instance, replacing a small bookshelf speaker’s woofer with an identical part is fairly straightforward, while reconing a vintage speaker or fixing internal circuitry is more challenging.
Step 2: Disconnect the Power and Remove Covers/Grilles
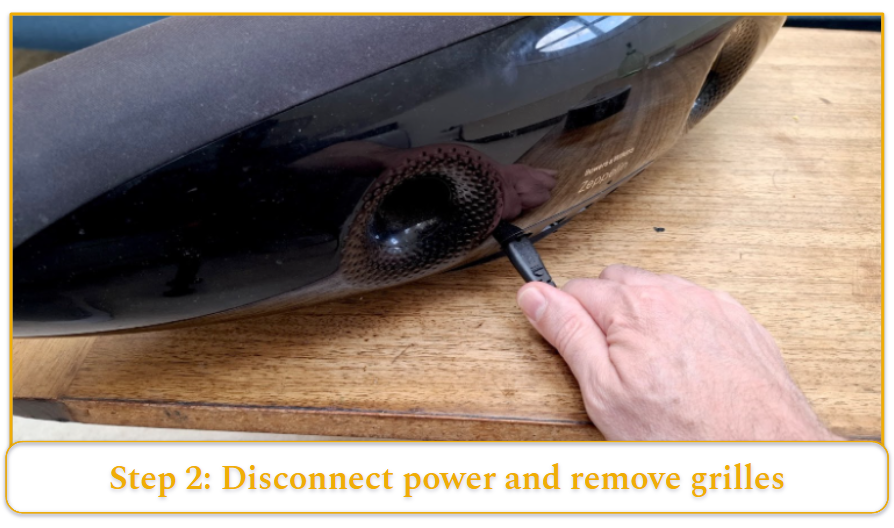
Always start by unplugging any power and disconnecting the speaker from the amplifier. Remove any exterior grille or cover
If the problem lies deeper, use a screwdriver to take out the screws holding the speaker driver or panel. In many home speakers, the drivers (woofer, tweeter) are front-mounted with 4–8 screws around the perimeter.
Carefully pull the driver out of the cabinet. It may be snug due to a sealing gasket. If it doesn’t come out easily, check for any additional screws or clips. Once open, disconnect the wires attached to the driver (usually spade connectors or soldered leads). Remember which wire goes to positive and negative (mark them if needed). Now you have access to the damaged component.
Step 3: Repair or Replace the Damaged Component
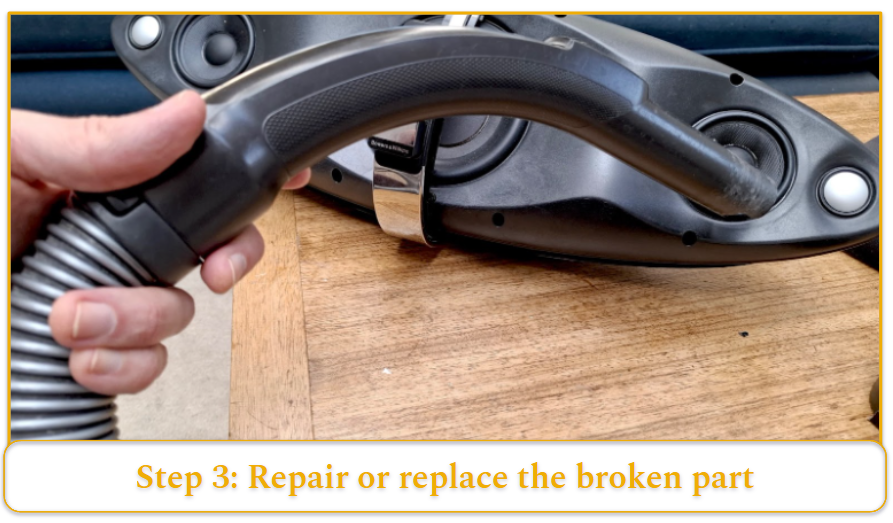
Now that I have found the problem on my speaker, I will repair the dented tweeter first by trying a bit of duct tape. While being careful not to further indent the tweeter, I press lightly with the tape and pull back which pulls the dent back out into place.
I find that duct tape works best for this as it is sticky enough to have a real effect. Lighter tapes like masking tape or Scotch tape don’t have enough pull.
If the tape solution does not work for your cone or tweeter dent, another effective solution is to use a vacuum cleaner to suck the dent out of place. Use gentle suction first and increase until the dent is removed.
If you’re replacing a particular driver (woofer/tweeter), fully detach it by unplugging or desoldering its wires.
For a woofer with a damaged cone or surround, you might be removing the entire thing to either swap in a new one or to perform a reconing.
Essentially, take out whatever faulty part needs replacement, being mindful of any fasteners or glue holding it in place. Keep any screws organized for reassembly.
Step 4: Install the New Component (If Needed/Optional)
Position the new or repaired part in place of the old one. If it’s a new driver, double-check that it’s the correct replacement (matching impedance and size) for your speaker model.
Connect the wires to the new driver’s terminals, ensuring positive and negative are correctly attached (this may involve soldering the leads or sliding on connector clips exactly as they were on the old driver).
If you re-coned a speaker, follow the kit’s instructions to glue the new cone, voice coil, and surround, and allow proper drying time. The key is to restore all connections securely and in the same configuration as before.
Step 5: Reassemble and Test
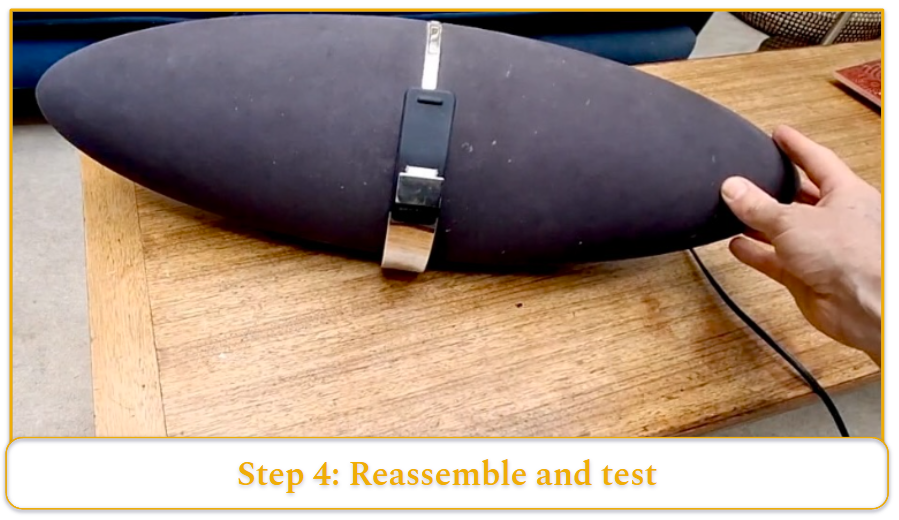
Once the speaker is repaired, reconnect the speaker to your system and test it at low volume first. Play some music or test tones and listen carefully to ensure the new part is functioning and that there are no new rattles or issues.
Gradually raise the volume to a normal level and verify that the speaker sounds clean and balanced. If everything sounds good, put the grille or cover back on – your speaker is repaired!
Not every speaker can be fixed easily – sometimes the damage is too extensive (for instance, a warped frame or multiple components blown). In those cases, consider the cost and effort: you might replace the entire speaker unit or seek professional repair if the speaker is valuable.
However, for most common issues like the ones we’ve discussed, following these steps will have your home audio speaker working again without a trip to the store or the repair shop.
How to Tell If Your Speaker Needs to be Repaired
Determining whether a speaker is damaged involves using your ears, eyes, and a couple of simple tools. Below we cover audible warning signs, visual clues, and diagnostic techniques that indicate a speaker needs repair.
Audible Indicators
One of the first signs of a bad speaker is an unusual sound. Listen for distortion or crackling. A healthy speaker should produce clear audio, whereas a blown or damaged speaker may sound fuzzy, buzz at certain frequencies, or crackle especially when you turn up the volume.
No sound or intermittent sound from a speaker that is connected and should be working is another red flag. Pay attention to imbalanced output: if you have a stereo setup and one speaker sounds fine but the other is faint or distorted, the weaker one likely has an issue.
In multi-driver speakers, you might notice missing highs (tweeter not working) or missing bass (woofer issue) as an audible clue.
Visual Inspection
Sometimes you can see the problem. Carefully remove the speaker’s grill or cover and inspect the driver components. Look for tears, holes, or cracks in the cone or surround.
Even a small rip in the paper or foam can cause major distortion. For example, a noticeable tear in the cone like the one below is a clear sign of damage that needs repair.
Also check if the speaker’s dust cap (the small dome in the center) is dented or if any parts of the cone are deformed. Inspect the speaker’s wiring and terminals: a loose or detached wire might be visible and can lead to no sound output.
In some cases you might detect a burnt smell or charred coil, which indicates the voice coil overheated. Any obvious physical damage or disconnection means the speaker likely requires fixing.
A tear in the speaker cone (visible in the upper area) is a clear visual sign that the speaker needs repair. Even small cones or surround damage can cause distorted sound.
Diagnostic Tools
If the symptoms aren’t obvious, a few simple tests with tools can confirm the speaker’s condition.
A multimeter is extremely useful: disconnect the speaker and measure its impedance or continuity across the terminals. A healthy speaker driver usually shows a steady resistance (close to its rated impedance, e.g. 4–8 Ω), whereas a blown voice coil may read as an open circuit or infinite resistance (no continuity).
You can also use audio test tones or a sine wave sweep played through the speaker to pinpoint issues: for instance, a rattling at certain bass frequencies could mean something is loose, or silence in a high-frequency test tone could confirm a dead tweeter. These diagnostic methods help verify whether the speaker needs repair or if the problem lies elsewhere (such as the amplifier or source).
Common Problems and What They Sound Like
Not all speaker problems are equal – some are quick fixes, while others require significant effort or expertise. Below is a breakdown of common speaker issues and the relative difficulty of repairing them:
Dented Speaker Cone or Tweeter (Easy)
Dented tweeters and speaker cones are common issues that can affect sound quality, especially in high-fidelity setups.
Dust cap dents are usually cosmetic with minimal audio impact, but larger cone damage can cause noticeable degradation. Fortunately, many dents — especially in dust caps or soft domes — are relatively easy to fix with basic tools and care.
Loose Connections (Easy)
Wiring issues are one of the simplest to fix. Symptoms include crackling or the sound cutting in and out, which often result from a loose speaker cable or a bad solder joint. Repair usually involves re-seating or tightening connections, or re-soldering a wire, which is straightforward even for beginners.
Blown Tweeters (Moderate)
When a tweeter fails, you’ll lose the high-frequency output from that speaker (music may sound muffled or lacking detail). Replacing a tweeter driver or its diaphragm is typically moderate in difficulty.
It often involves unscrewing the old tweeter and dropping in a compatible replacement part. Basic soldering or connecting of two wires may be needed. As long as you can obtain the correct tweeter for your model and use a screwdriver and soldering iron, this repair is very doable.
Damaged Cones (Challenging)
A woofer or midrange with a torn cone or foam surround will distort sound and buzz. Fixing cone damage can be challenging because it may require a recone kit or surround replacement kit specific to your speaker.
Minor tears can sometimes be patched with special speaker repair glue and fabric or paper patches, but larger damage means you must remove and replace the cone (and often the voice coil and spider) entirely.
This process requires careful alignment of components and patience. It’s a more time-consuming repair, but many enthusiasts successfully re-foam or recone their speakers with the right kit and instructions.
Faulty Crossovers (Advanced)
Crossovers are the circuits inside speakers that direct frequencies to the appropriate drivers (tweeter, woofer, etc.). If a crossover fails (due to a burned-out capacitor, inductor, or resistor), the speaker might lose a range of frequencies or stop working.
Diagnosing a bad crossover can be tricky. You might notice one driver (like the tweeter) isn’t working despite the driver itself being fine. Repairing it often requires electronics skills.
This is considered advanced because it involves reading schematics or at least identifying electronic parts and safely using a soldering iron on a circuit board. If you’re not comfortable with that, this is one of those repairs that might be best left to a professional.
Preventative Maintenance
Once you’ve fixed your speakers (or if you want to avoid problems in the first place), a bit of simple maintenance will keep them sounding great for years. Here are some tips to help prevent future speaker damage and ensure longevity:
- Regular Cleaning: Wipe down the cabinets and remove dust from the speaker cones and grills using a soft cloth or brush. This keeps airflow clear and prevents sound distortion caused by buildup.
- Avoid Overloading: Don’t crank the volume beyond what your speakers can handle. Distortion or overheating can damage the voice coils. Stick to moderate levels and use an amp that matches your speaker’s power rating.
- Proper Storage and Placement: Keep speakers in a dry, room-temperature environment and avoid damp or overly hot areas. Store them safely away from strong magnets and places where they could be knocked over.
- Routine Inspections: Check for loose screws, cracked surrounds, or deteriorated foam every few months. Catching small issues early can prevent larger, more expensive problems later.