


Mouse sensitivity is one of those small details that can make a big difference to your daily screen time. It affects sniping in a game, editing pixel-perfect graphics, or just scrolling through emails.
At the heart of that sensitivity is DPI, or “dots per inch.” This guide explains what DPI is, why it matters, how to check your mouse’s current DPI, and what to do if you want to change it.
What is Mouse DPI?
DPI stands for dots per inch and describes how far the pointer moves on-screen for every inch your mouse travels on a surface. A high DPI means faster movement; a low DPI offers finer control.
DPI is often confused with pointer speed, but the two are different. DPI is a hardware-level measurement, while pointer speed is a software-adjusted setting.
This sensitivity setting affects how responsive and accurate your mouse feels. A graphic designer might prefer slower, more controlled cursor motion for detailed editing. A gamer might opt for high DPI to whip the cursor across the screen quickly, or low DPI for pixel-perfect aiming. And anyone with a large or multi-monitor setup may benefit from adjusting DPI for more fluid navigation.
How to Check Mouse DPI: Step by Step
Step 1: Check the Manufacturer’s Specifications
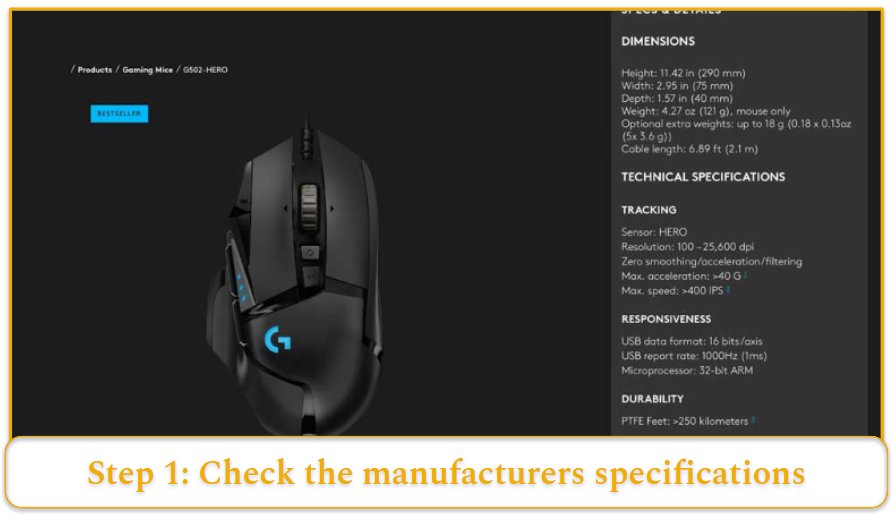
Your mouse’s DPI range is usually listed on the box, in the user manual, or on the product page of the manufacturer’s website.
- Gaming mice like the Logitech G502-HERO can go from 100 up to 25,600 DPI.
- Budget or office mice often have fixed values like 800 or 1000 DPI, while some allow limited cycling through a few preset levels.
- If your mouse supports DPI stages, the defaults are often 400, 800, 1600, and 3200.
- If you don’t have the original packaging, try searching “[mouse model] + DPI specs” online to find details.
Step 2: Use Manufacturer’s Software or Drivers
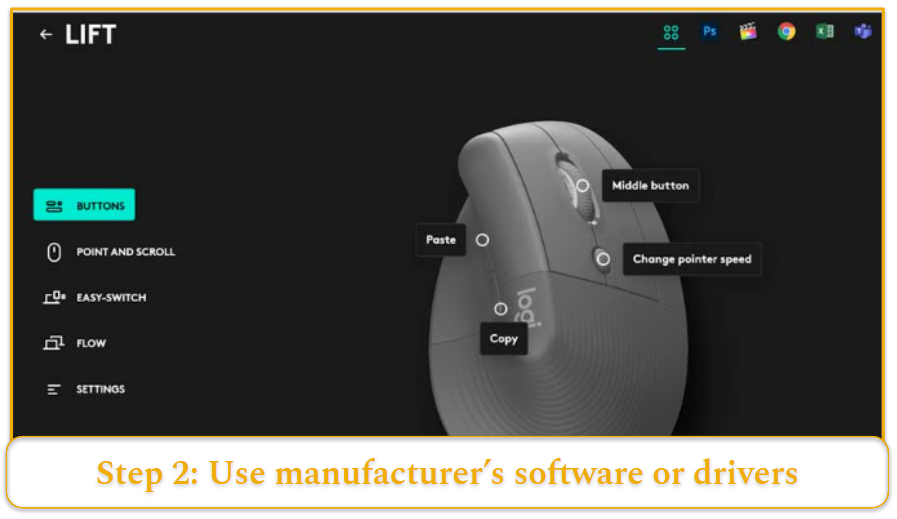
If your mouse supports it, the brand’s software is often the most precise way to view and adjust DPI. Some popular brands handle DPI differently, for example:
- Logi Options+ or Logitech GHUB: Displays exact DPI values for logitech mice and allows you to set multiple levels. It supports profiles for different apps or games.
- Razer Synapse: Lets you configure up to five DPI stages. Each stage is adjustable, and you can assign different stages to toggle buttons.
- Corsair iCUE: Supports up to three DPI settings plus a separate sniper setting if your mouse includes a sniper button.
- Microsoft Mouse and Keyboard Center: For compatible models, you can adjust DPI or pointer speed, depending on the device.
If your mouse uses software but doesn’t report a DPI value, it likely has a fixed setting.
Step 3: Use Online DPI Analyzer Tools (Any OS)
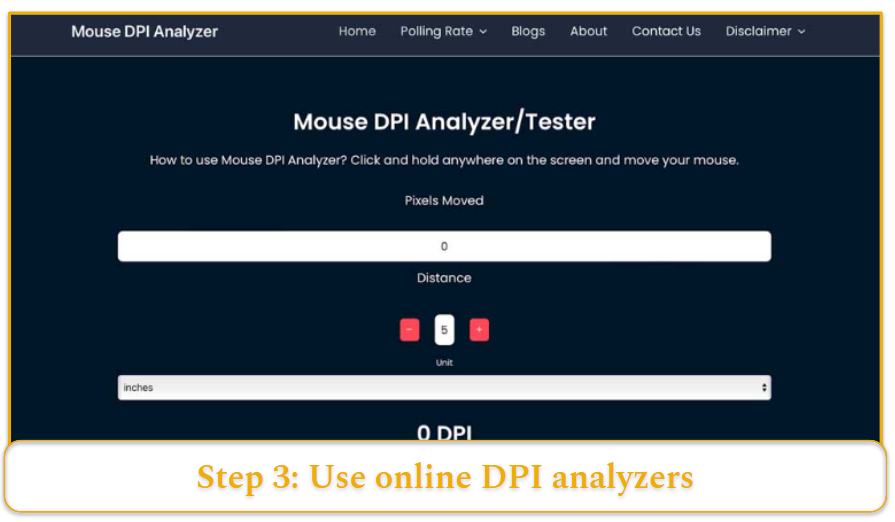
Several browser-based DPI testers can help estimate your DPI:
Mouse DPI Analyzer or Mouse DPI Tester: With these free online tools you input a target physical movement (like 1 inch or 2.54 cm) and the tool calculates DPI based on how far your pointer moves.
For best results, disable pointer acceleration and use a ruler to ensure accurate physical movement.
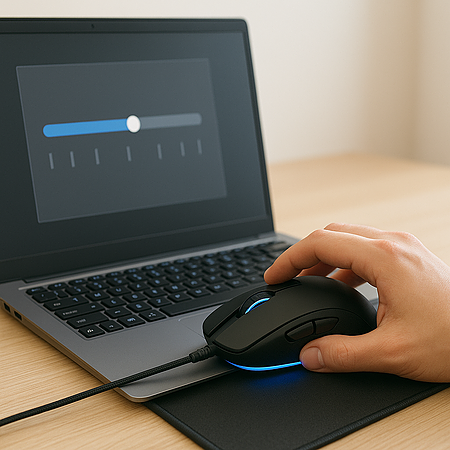
Step 4: Manual DPI Calculation
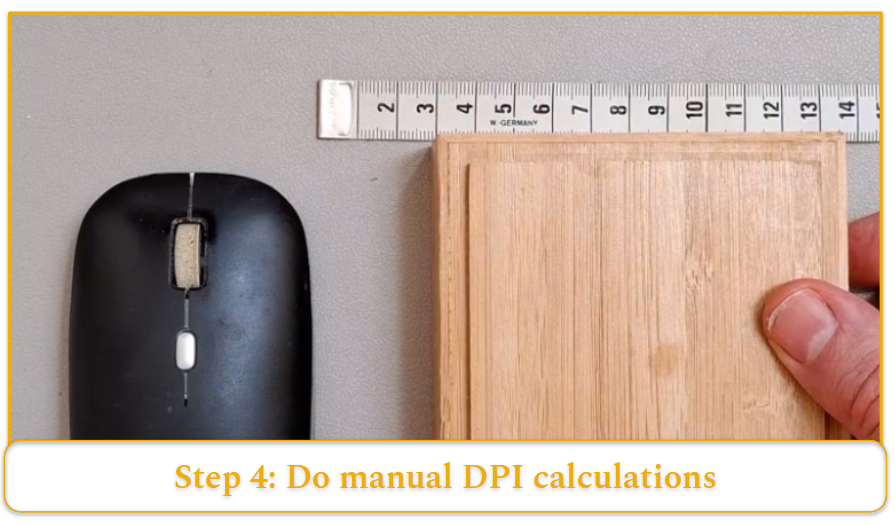
For Windows users, there’s a DIY method to approximate DPI using Microsoft Paint and a ruler.
- Disable pointer acceleration in the Mouse Properties under “Pointer Options.”
- Set your mouse speed slider to the middle (default) setting.
- Open Paint and zoom to 100%.
- Move your cursor to the top-left corner and note the coordinates.
- Move your mouse exactly 1 inch (2.54 cm) (measured with a ruler and a hard surface to stop against like a large book) and check the new X coordinate.
- The difference in pixels is your DPI.
- Repeat the test a few times and average the results for better accuracy.
Step 5: Check Hardware DPI Buttons or Indicators
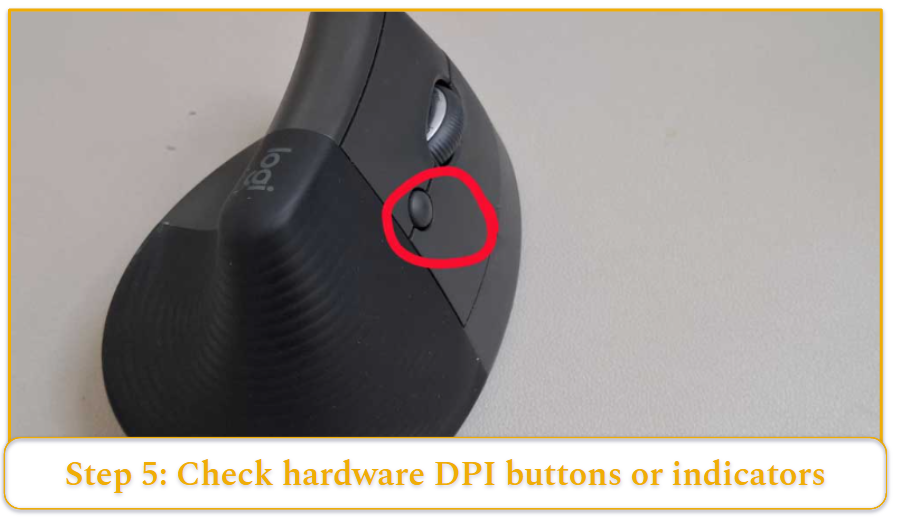
Many mice, especially gaming models, include a DPI toggle button, usually near the scroll wheel or on the top panel. Pressing it cycles through DPI stages. The following models display visual feedback:
- Logitech G-series: Often have LEDs that light up in different patterns to show the active DPI stage.
- Razer: Uses on-screen indicators in Synapse and sometimes color-coded lighting to show DPI changes.
If there’s no visual feedback, try pressing the button while observing how quickly the pointer moves. Slower or faster movement indicates a change in DPI.
Why Mouse DPI Matters
Mouse DPI isn’t just a number. It determines how the mouse feels in action.
- For gamers, Low DPI (400–800) is common for first-person shooters due to the precision it offers, especially for aiming. Higher DPI settings (1600–3200 or more) are useful for fast-paced games or high-res displays.
- For designers and editors, lower DPI is often required for finer motor control.
- Office Users tend to prefer a higher DPI which helps to move across large monitors more quickly and reduce strain.
Matching DPI to your workflow helps reduce hand movement, improve accuracy, and increase comfort.
How to Change Mouse DPI
Changing DPI via Operating System Settings (MacOS and Windows)
If your mouse doesn’t support native DPI changes, you can still alter how it behaves. Here are some OS-specific instructions:
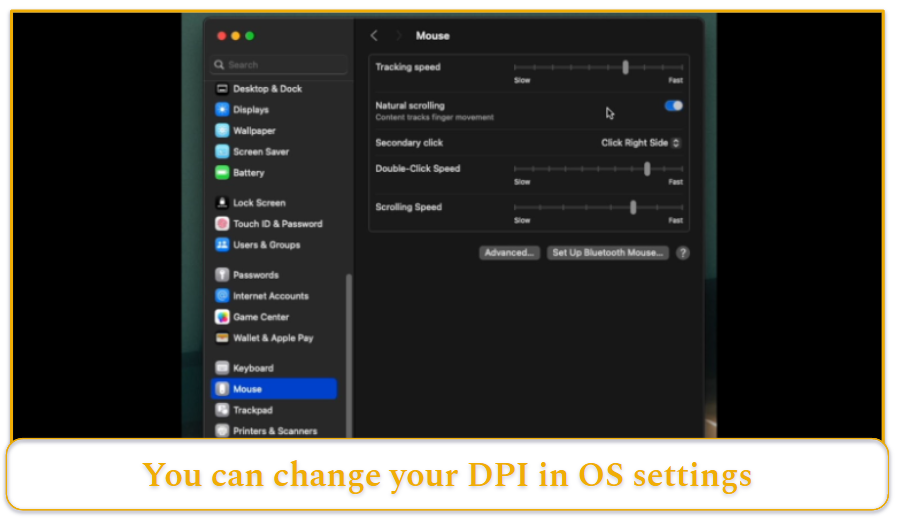
MacOS
Navigate to System Settings > Mouse and adjust the “Tracking Speed” slider. macOS applies acceleration by default, so DPI isn’t a fixed value unless you’re using third-party tools.
Keep in mind, these settings don’t change the actual sensor DPI; they only scale the cursor movement.
Windows
Go to Settings > Bluetooth & devices > Mouse > Additional mouse settings. Under “Pointer Options,” use the slider to adjust pointer speed. Uncheck “Enhance pointer precision” for consistent movement.
Changing DPI Using Manufacturer Software
With brand-specific software, you can directly set your mouse’s DPI in the following ways:
- Set exact values (e.g., 800, 1600, 3200).
- Create and switch between profiles for different use cases.
- Configure on-the-fly DPI switching for responsive control mid-game or during design work.
- Settings often apply to onboard memory, so your DPI stays consistent across devices.
Using Physical DPI Buttons on the Mouse
If your mouse has a DPI button, use it to toggle between predefined levels. You may be able to:
- Assign new values to each stage in the software.
- Use LED indicators to check the current DPI stage.
- Configure a sniper button to temporarily lower DPI while held.

