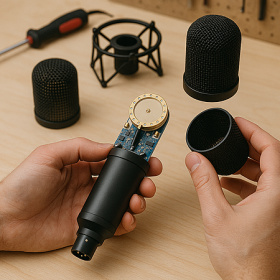
Microphones are indispensable for musicians, content creators, and professionals who rely on clear audio.
This guide explores common technical issues that arise when using microphones in various settings, including studio recording, live performances, and virtual communications. Here, you’ll find preliminary checks to get you on the right track, along with solutions to the most common problems.
Preliminary Checks
1. Check if your microphone is connected properly
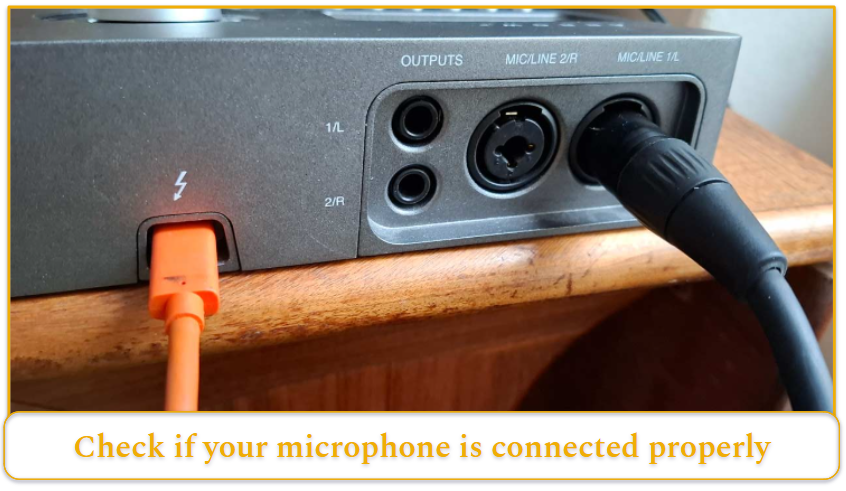
Before diving into more complex solutions, start with basic troubleshooting steps.
- Ensure that cables are properly connected and undamaged, as faulty or loose connections can cause intermittent sound or complete audio failure.
- If the microphone uses an adapter or requires a preamp to boost the signal, confirm that everything is correctly set up. Testing with a different cable or input port can help identify hardware-related issues.
2. Enable phantom power for condenser microphones
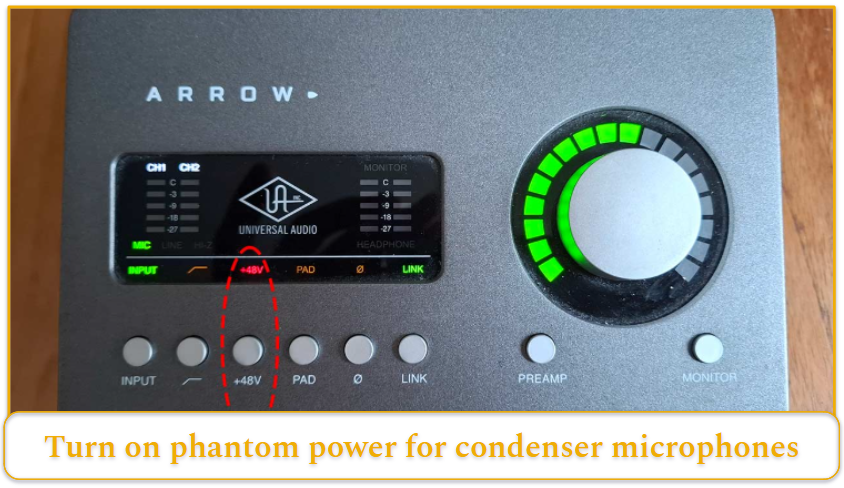
Another essential but often overlooked factor is the power supply.
- Condenser microphones that connect via XLR cables require phantom power, typically 48V, from an interface or mixer.
- If you are using a dynamic microphone, phantom power is not needed.
- If your microphone relies on batteries, ensure they are charged and properly inserted.
- USB microphones should be connected directly to a computer rather than through an unpowered hub.
3. Check your operating system, software, and audio driver settings
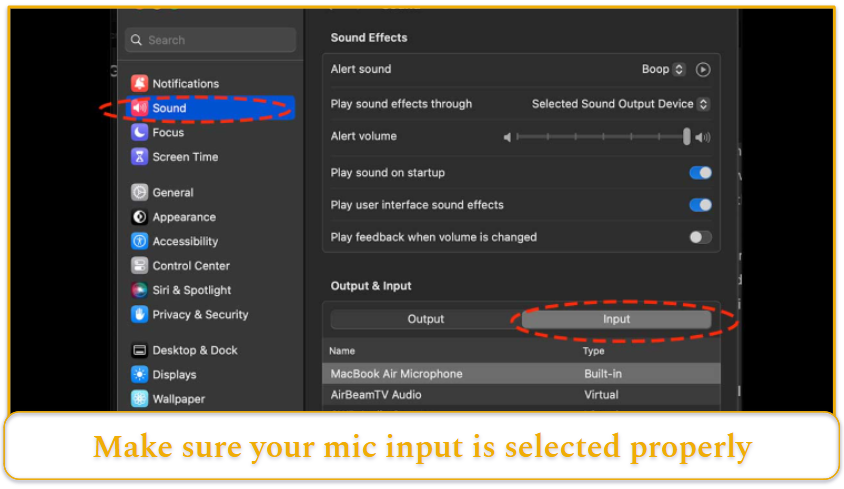
Many microphone issues stem from incorrect settings in the operating system, recording software, or audio driver. Always check the following:
- Verify that the correct microphone is selected in the system’s audio settings, within the audio driver (if using an audio interface), and in any DAW or application you are using.
- Verify that the correct input source is selected in your DAW or application
- If using an audio interface, ensure the audio driver and firmware are up to date.
4. Adjust your environment
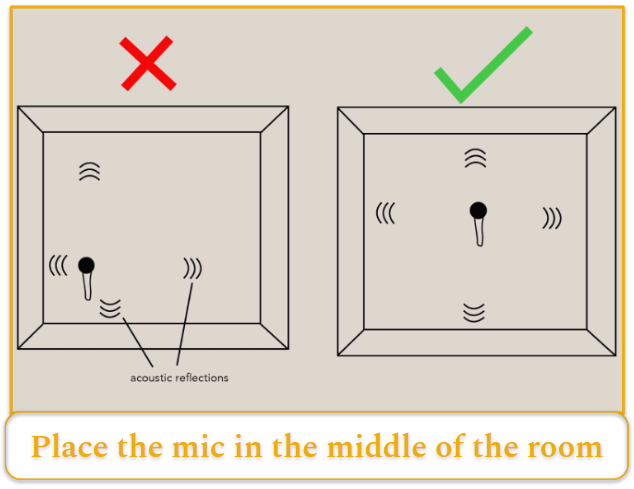
Environmental factors play a significant role in audio quality. Background noise, echo, and reflections from walls can degrade recordings, especially in untreated spaces.
- Simple solutions like placing rugs, curtains, or foam panels around the recording area can help reduce unwanted noise.
- Positioning the microphone near the center of a room, away from reflective surfaces, noisy electronics, or air vents, will noticeably improve clarity.
- If working in a noisy environment, using a dynamic microphone with lower sensitivity, such as the Shure SM7B or Electro-Voice RE20, will produce a more focussed result compared to a sensitive condenser mic.
5. Remove any signal Interference
Wireless microphones introduce additional challenges, including signal interference. Nearby Wi-Fi routers, Bluetooth devices, mobile phones, and other radio signals can disrupt performance.
- Selecting a less congested frequency and keeping the transmitter and receiver within line of sight can minimize interference. The 2.4 GHz band is shared by most Wi-Fi and Bluetooth devices, so it’s best to avoid it in high-traffic areas and opt for the UHF band (470-608 MHz) when possible.
Common Microphone Issues and Fixes
No sound or low output
One common issue is a microphone producing no sound or very low audio. This is usually resolved by performing preliminary checks 1-3 above.
- If the device is silent, first verify that the cables are connected and that phantom power is enabled if required.
- Check whether the microphone is muted—either via a physical mute switch or within the system settings, audio driver, or recording software.
- Adjusting input levels and trying a different port or device can help isolate the issue. Restarting the application or computer may also restore proper function.
Unwanted noise (hum or static)
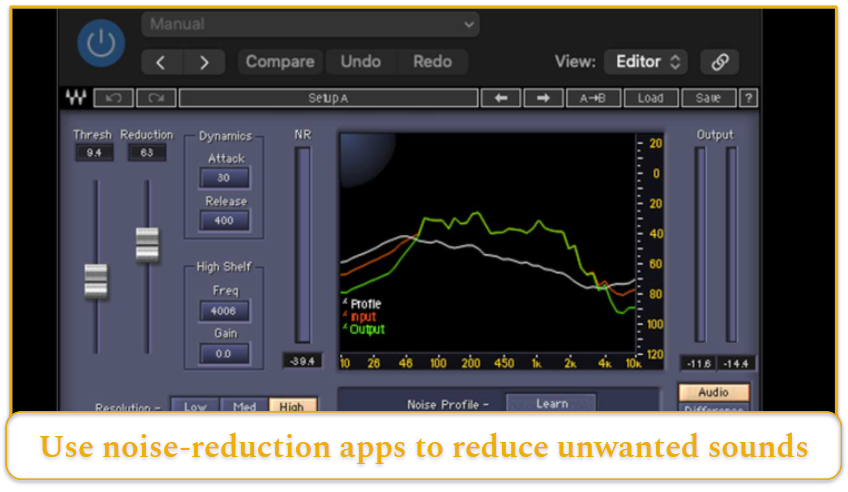
Buzzing, humming, or static noise can have multiple causes, including interference from nearby electronics. Moving the microphone away from sources of interference, using high-quality shielded cables, and ensuring proper grounding of connected equipment can help reduce unwanted noise.
If you’re recording, noise reduction plugins like Waves X-Noise are effective tools for removing noise from tracks.
If the problem persists, testing the microphone in a different location can help determine if environmental factors are responsible.
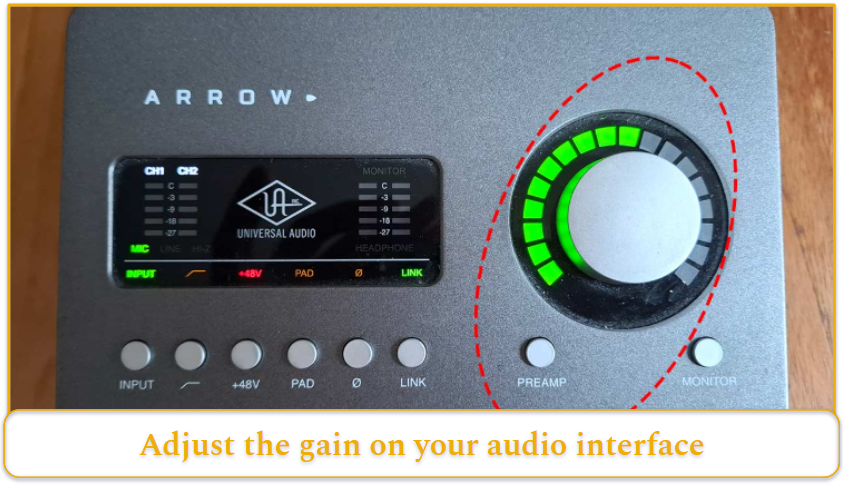
Distortion or clipping
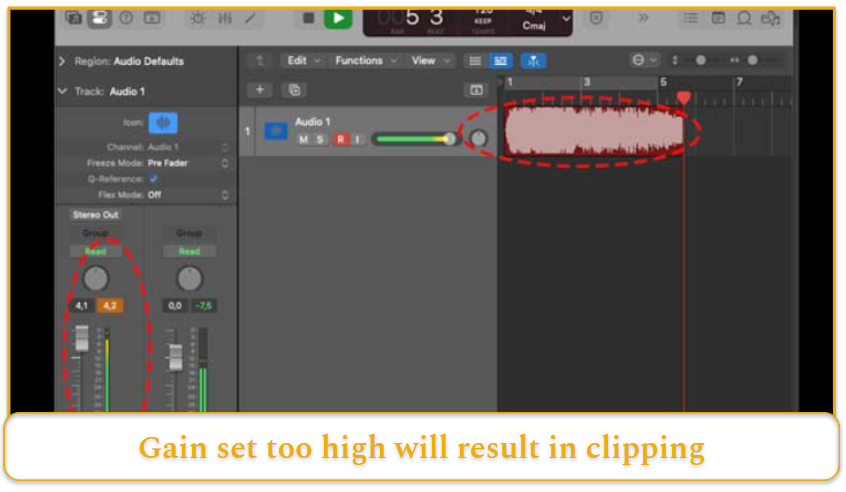
Distortion or clipping occurs when the microphone’s input gain is set too high.
- Reducing the gain or increasing the distance from the sound source can prevent overload.
- Pop filters can also help control plosive sounds that cause sudden bursts of air hitting the microphone.
Mic is missing access permissions
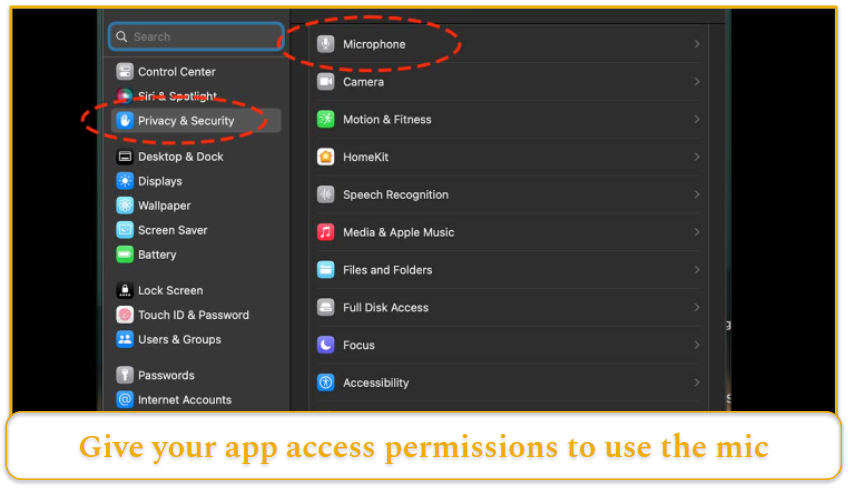
If the microphone is not recognized by the computer or is missing permissions, adjusting system privacy settings may resolve the issue.
- Windows: Enable microphone access under Settings > Privacy & Security > Microphone.
- macOS: Go to System Settings > Privacy & Security > Microphone and grant necessary permissions.
Some applications also require explicit permission to use the microphone, so reviewing in-app settings is essential.
Others cannot hear you in calls
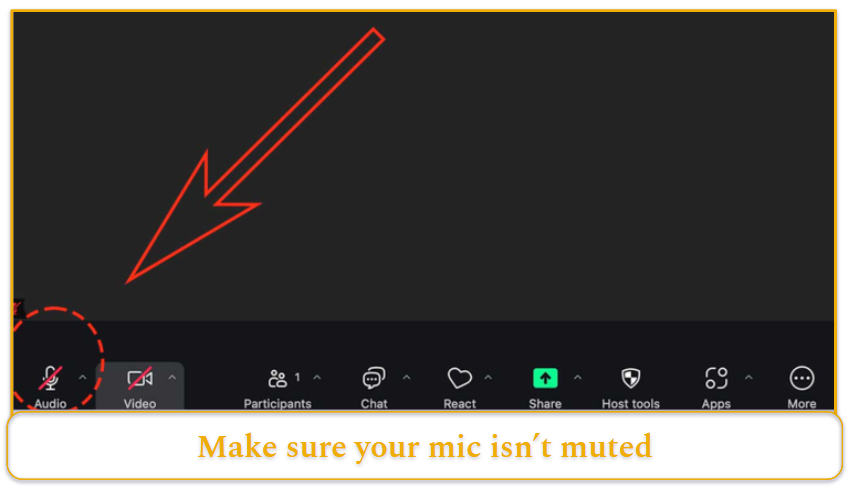
- If your microphone isn’t working during video calls, check that the correct device is selected in the conferencing software.
- If others still can’t hear you, ensure the microphone isn’t muted within the app, restart the software, or try switching to another input device.
If the audio frequently drops or cuts out, a stable internet connection is necessary for uninterrupted communication.
Mic is not recording properly (or records only voice)
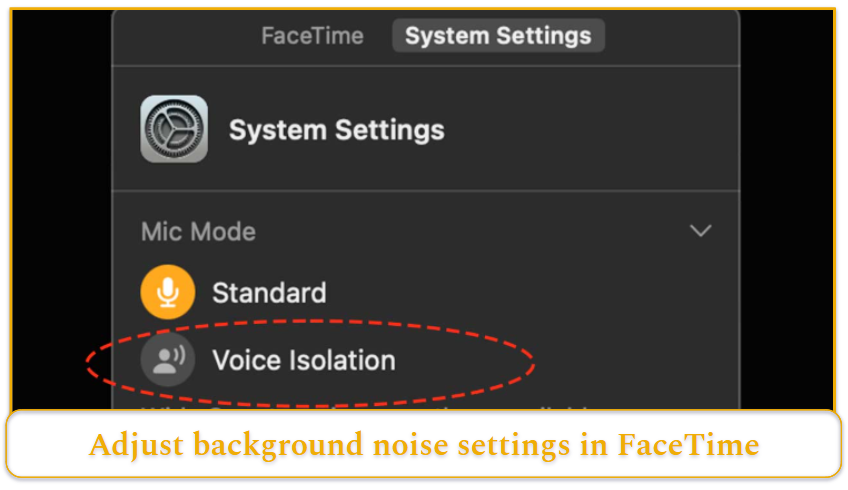
Some microphones may filter out background sounds aggressively, making recordings sound unnatural.
This could be due to noise suppression settings in software.
- Adjusting or disabling noise reduction features can restore a more natural sound.
- Ensure the correct recording mode—stereo or mono—is selected for your microphone type. These settings can be found in OS settings for Windows and macOS, as well as in software-specific configurations in apps like Microsoft Teams, FaceTime, and Realtek.
Mic is missing the right audio drivers
If your microphone is not detected or is producing distorted or no sound, missing or outdated audio drivers may be the issue. Drivers act as a bridge between the microphone and your operating system, and incorrect or outdated versions can cause malfunction.
To check your driver status:
- Windows: Go to Device Manager > Sound, video and game controllers and look for your microphone or audio interface. If a yellow triangle or error message appears, the driver may be outdated.
- macOS: Navigate to System Settings > Sound > Input, and check if your microphone appears in the list. If not, ensure the correct software or firmware from the manufacturer is installed.
FAQ
Why is your mic not picking up your voice?
How do you reset your mic?
How do you update your mic driver?
Updating your microphone driver involves checking for available updates:
- Windows: Open Device Manager, locate your microphone, right-click it, and select Update Driver.
- macOS: Go to System Preferences > Sound, and check for updates via Software Update.
- Alternatively, visit the manufacturer’s website to download and install the latest driver.