
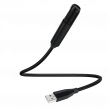

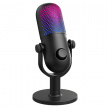


Simple to set up, easy to use, and capable of producing great results without needing a stack of extra gear, there’s a lot to love about USB microphones. If you’ve ever wanted to start recording your voice, launch a podcast, stream on Twitch, or make music without getting tangled in audio tech, a USB mic can get you to great results pretty quickly.
That convenience is exactly why they’ve become so popular in home setups. A USB mic handles the heavy lifting internally, taking the sound from its capsule, boosting it with a built-in preamp, converting it into a digital signal, and sending it straight into your computer over a single cable. No audio interface, no external power, no hassle, perfect.
That’s not to say USB mics are perfect though. They have their limits and drawbacks, and while pristine audio is possible, overall sound quality varies widely between models and brands. We’ve pulled together this guide to help you decide which USB microphone is the right one for you. We’ll walk through what makes USB microphones so appealing, where they shine, where they can fall short, and what you should keep in mind when choosing one.
Why Should You Choose a USB Microphone Over XLR?
The biggest benefit of a USB microphone is simplicity, their effort-to-return ratio just can’t be matched. With an XLR mic, you need at least three things before you can record: the mic itself, an audio interface or mixer, and a separate XLR cable. With a USB mic though, you plug in one cable and you’re ready to go. The microphone’s internal hardware handles the audio conversion and passes a digital signal directly to your computer. Plug and play, or plug and record more like.
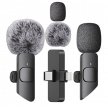
This makes USB microphones ideal for anyone who wants to start recording quickly, without learning how to set up an audio chain. You don’t have to think about gain staging across different devices or matching preamps to mics. It’s all handled for you. Portability is another big plus, a USB mic and a laptop or even a phone are all you need to record almost anywhere. This makes them a favourite for people who travel, record in different spaces, or want a clean, minimal desk setup.
The Pros of USB Microphones
Super Easy Setup
Plug them in, select the mic in your recording software, and you’re set. No extra gear, no additional power supplies, no complicated routing, no compatibility problems. USB microphones just work.
Portable
Generally a little lighter than XLR microphones, USB mics’ lightweight, all-in-one design means they’re far simpler to pop in a laptop bag and take with you on the go.
Cost-effective
With no need to buy extra gear, you can get a similarly capable mic for much less overall than the cost of an equivalent XLR setup.
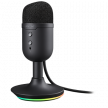
Integrated Features
Some USB mics include headphone jacks for zero-latency monitoring, mute buttons, or built-in gain controls, making them wonderfully user-friendly. They also tend to include internal audio processing, with some even offering a handle of switchable onboard presets too.
The Cons of USB Microphones
No Upgrade Path
All the key components of a USB microphone, that’s the capsule, preamp, and converter, are inside the mic itself. While that’s great for simplicity, it means if you want to improve your sound over time with better electronics, you’ll need to replace the whole microphone.
Single-sound Focus
Recording devices often don’t love trying to work with multiple USB mics at the same time. It’s possible, but it’s often messy and relies on your computer or recording software working it all out, which it won’t always do if you have multiple of the same model.
Cable Length Limits
USB cables have practical limits, usually around 10 feet, before signal quality or power delivery will quickly suffer. This is fine for desks, and realistically that’s where USB mics are most at home, but it’s a consideration for larger recording spaces or unusual setups.
What Should You Consider When Shopping For a USB Microphone?
When shopping for any microphone, your first thought should always be what you’re planning to record most often as this will guide all of the choices you make. Are you starting up a podcast? Streaming on Twitch? Jumping between work video calls? You’ll want to pick a style of mic that’s best suited for capturing vocals, for example.
Next, consider where you’ll use it and whether that place is the same every time.
- If you’re in a noisy environment, a dynamic mic might help cut out background noise, but you’ll find a dynamic USB microphone a little harder to come by.
- If you’re in a quiet space, a condenser can give you crisper, more detailed recordings but they’re going to pick up a lot more other sound from your space too.
- Moving between spaces? Look for a smaller USB microphone and preferably one with its own included or even permanently integrated stand.
Pay attention to onboard controls too. You’ll be surprised how much simpler your life becomes if you have a gain knob on the mic itself to save you from diving into software menus every time you need to adjust levels. An onboard mute button can be handy for live calls or streams, and a built-in headphone jack lets you hear yourself in real time without the slight delay that can happen when monitoring through your computer.
Are All USB Microphone Cables the Same?
Nope, and it can be a cause of frustration if you’re not careful. USB cables may all look the same but there’s a wide range of different speed ratings and overall cable qualities to consider. Most USB microphones will include a compatible cable in the box and where possible, it’s a good idea to use the one that’s provided to avoid headaches.
If you’re looking to swap that cable out though, data transfer rating is an important metric to make sure you’re across. While audio doesn’t need anywhere near as much bandwidth as video, using the cheapest USB-A cable you can find is unlikely to deliver great results. If you can go USB-C to USB-C that’s your best bet, though a high-bandwidth USB3 cable will be fine too.
Then make sure you’re not trying to send your signal too far. USB microphones work best with cables up to around 3 meters if you’re using USB3. Trying to use longer cables than this can cause power or signal issues, especially with bus-powered mics that draw all their power from that USB connection. If you need more reach, use a powered USB hub or an active USB extension cable that boosts the signal, but this should be a last resort.
Build quality matters too. A well-made cable with solid connectors is less likely to fail over time. Braided cables aren’t just for looks either, these generally feature a little more protection of the cable itself and are a good choice If you travel or move your mic often. It’s not always the easiest thing to know from product listings, but don’t underestimate the qualify-of-life boost of a malleable, flexible cable with no positional memory.
The Role of Internal Components
With XLR mics, you choose your own preamp and converter (and the quality of them) by picking an audio interface or mixer. With USB mics on the other hand, those parts are built in and you’ll get what you’re given. This means the mic’s internal design plays a defining role in your sound quality.
Now with a USB microphone you don’t really need to understand what’s going on inside, but knowledge is power so let’s take a quick look at what’s involved. A microphone’s preamp boosts the tiny signal created from the microphone capsule to a level the converter can work with.
A good preamp is important because it needs to do this cleanly, without adding hiss or distortion that would otherwise be added to the final mix. The analog-to-digital converter (ADC) then turns the signal into digital audio your computer can understand, higher-quality converters capture more detail and dynamic range, giving you a better overall sound.
You can’t swap out these components in a USB mic, so you’re buying the whole sound chain in one product. This is why two USB mics with similar-looking capsules can sound very different in practice. Unfortunately there isn’t a way to really know the quality of these internals based off product pages alone, you’ll likely need to rely on social proof and reviews to confirm the quality of those parts.
Polar Pattern
This is how and from where the mic picks up sound.
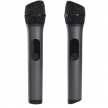
- Cardioid is the most common for solo use as it focuses on what’s in front of the microphone and rejects most of what’s going on from behind and to the sides. If you’re looking to record a specific source, a cardioid pickup pattern is almost certainly what you want.
- Omnidirectional polar patterns also exist, which as the name suggests will capture equally from all sides, useful for group recordings or for when you want to capture more of the vibe of a space along with the people in it.
Some USB mics have multiple patterns you can switch between, though realistically this isn’t something you’re likely to end up doing often.
Frequency Response
Sound exists on a spectrum and different frequencies are responsible for different elements of an overall sound.
- For voices, a range from around 60 Hz to 15 kHz is more than enough to capture the various details and nuances of one individual to another.
- Many USB condenser microphones will go from 20 Hz to 20 kHz, this is essentially the full spectrum of what a human can hear and can help capture the fine detail of instruments.
Don’t just assume a wider range is better, for podcasting you likely don’t want those absolute lows or extreme highs anyway, you can filter these out with post processing if needed.
Sensitivity
This explains how responsive the mic is to quiet sounds and is important to look at if you’re recording in a non-professional, untreated space. Condenser USB mics have a higher sensitivity, which is great for detail but can pick up more unwanted room noise as a result. Dynamic microphones are much less sensitive, needing a stronger source sound to be effective and doing a better job at ignoring gentle background noise.
Self-noise
This one won’t always be listed on USB microphone product pages, but the general rule is that lower is better. Self-noise describes the mic’s own electronic hiss when no sound is present, and it’s more of a consideration for condenser microphones that require active power. Under 15 dBA is excellent, 15–20 dBA is fine for most uses, but above 20 dBA might begin to be noticeable if you’re recording soft-spoken voices or quiet instruments.