


Summary: Installing surveillance cameras is a manageable DIY project with the right planning, tools, and setup knowledge. This guide walks you through wired and wireless installations, camera placement, wiring, and system configuration step by step.
Installing surveillance cameras doesn’t automatically require a professional installer. If you’re comfortable using basic tools and following instructions carefully, many homeowners can complete a standard installation themselves. I learned this firsthand when I installed my Ring security system with three cameras around my home perimeter. The process took me a full weekend, and I saved hundreds of dollars compared to hiring someone else.
Most homeowners can handle a basic camera installation with standard tools and careful planning. Proper camera placement, correct mounting surfaces, and choosing the right power method make the difference between a clean, reliable setup and one that causes problems later. If you’re still evaluating system types, start with our main camera guide to understand how different setups compare.
What You’ll Need:
- Power drill with bits (masonry bit for brick/concrete, wood bits for siding)
- Screwdriver set (Phillips and flathead)
- Level (small torpedo level works well)
- Stud finder (for mounting to a solid backing)
- Wire strippers (for wired cameras)
- Ethernet cable (Cat5e or Cat6 for PoE cameras)
- Ladder (appropriate height for installation locations)
- Pencil (for marking mounting holes)
- Safety glasses
- Camera mounting brackets (usually included with the camera)
- Screws and anchors (plastic anchors for hollow walls, concrete anchors for masonry)
- Electrical tape
- Caulk or weatherproof sealant (for outdoor installations)
How To Install a Surveillance Camera: Step by Step
I’ll walk you through the standard installation process for wired cameras, drawing from my experience with both my Ring system and the prep work I did for my planned Ubiquiti upgrade. This approach covers the most common “serious DIY” setup you’ll run into, where cameras are mounted permanently and connected reliably.
If you’re new to system architecture, it helps to review how surveillance cameras work before starting installation.
Step 1: Plan Your Camera Locations
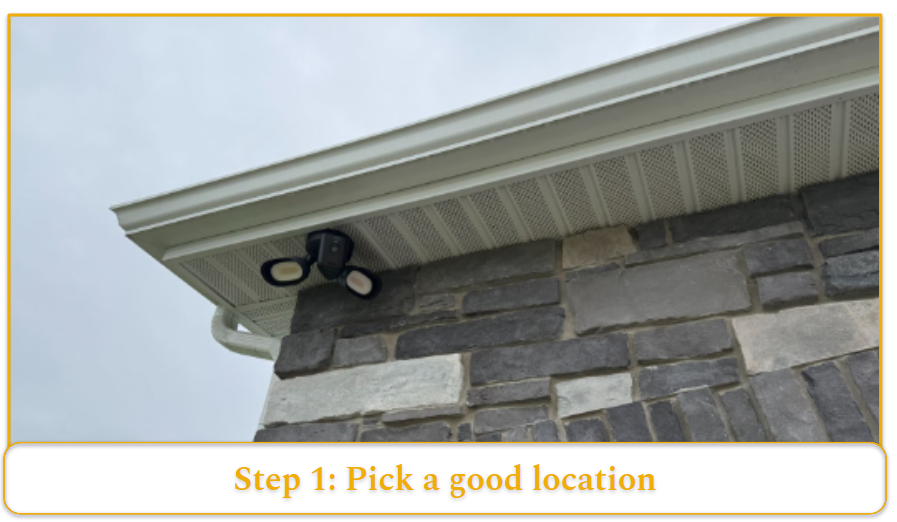
Before touching any tools, take time to plan camera placement. The biggest DIY mistake is mounting first and “fixing the angle later.” I did this with my first Ring camera. I mounted it immediately, then realized the angle missed the area I actually cared about.
Do a quick “real-world view” test before drilling. Hold the camera at different heights and positions while someone else watches the live view in the phone app. This helps you confirm three practical details that aren’t obvious on paper.
- What the camera sees (field of view): A wide-angle lens can make areas look “covered” while shrinking faces and license plates. It’s great for coverage, but not always great for identification.
- Whether the camera is fighting glare or backlighting: For example, a camera aimed toward the street at the wrong angle can wash out faces when the sun is low, or blow out details at night from headlights.
- Whether motion detection will behave the way you expect: Branches, busy roads, and reflective surfaces can trigger motion constantly, which matters if you want usable alerts instead of notification fatigue.Hold
You can use painter’s tape to mark different height options to compare angles without committing to holes. For outdoor cameras, 8–10 feet is typically the optimal height. This keeps cameras out of easy reach while still capturing facial detail.
Mounting above 12 feet increases coverage but reduces identification clarity because faces appear smaller and viewing angles become steeper. Many homeowners balance this by using higher cameras for wide perimeter views and lower cameras near entry points where identification matters most.
Note: If identifying faces is a priority, placement matters more than specs. A 4K camera mounted too high can still deliver unusable identification footage.
Step 2: Check for Power and Data Requirements
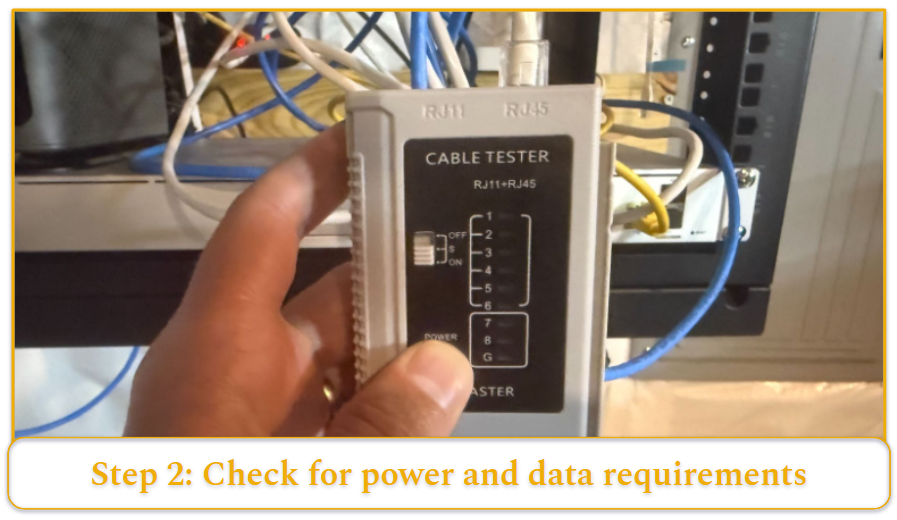
Installation requirements vary dramatically based on your camera type. My Ring cameras needed both power and WiFi access, while my planned Ubiquiti system uses PoE (Power over Ethernet) PoE delivers power and data through a single Ethernet cable, which simplifies wiring and improves connection stability.
- For PoE cameras, you need Ethernet cable runs from each camera location back to your network switch.
- For wireless cameras, verify a strong WiFi signal at each mounting location using your phone.
- For cameras requiring separate power, locate the nearest outlet or plan your wire routing to avoid creating trip hazards.
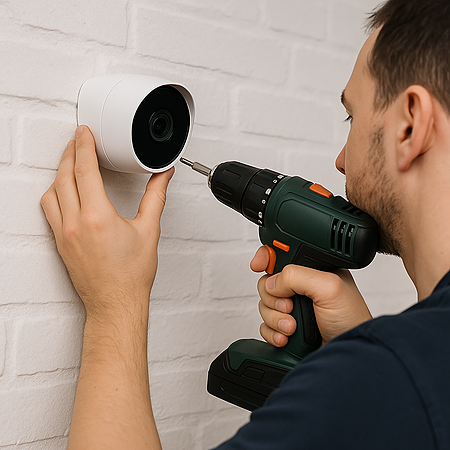
Step 3: Mount the Bracket
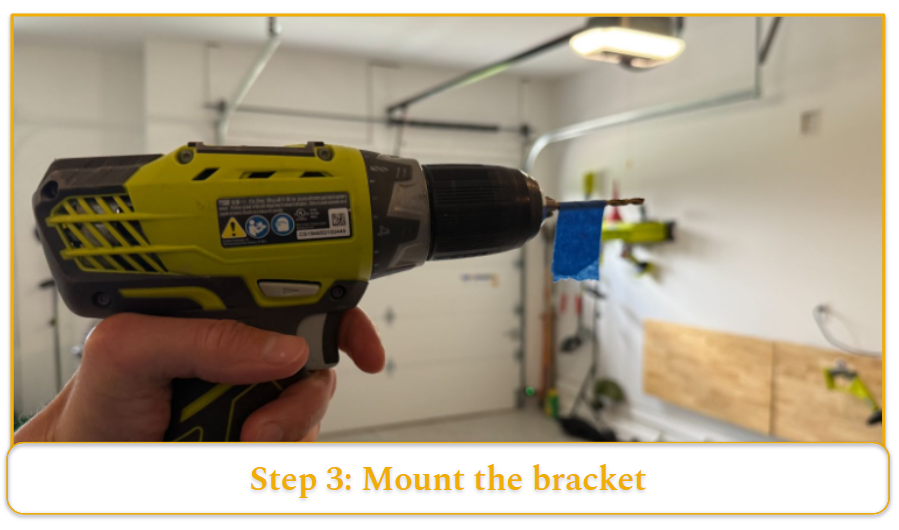
Start by finding solid backing for your mount. On exterior walls, this usually means locating a stud so the bracket is secured into structural wood rather than just siding or drywall. In many perimeter installs, though, you’ll be drilling into brick or concrete instead.
For cameras mounted on brick, use a masonry drill bit along with concrete anchors rated to support more than the camera’s weight. This keeps the mount stable over time and prevents loosening.
Mark your holes using the bracket as a template, then drill pilot holes to guide your screws and keep the bracket aligned.
Pro tip: Wrap your drill bit with tape at the desired depth so you don’t drill too far. This helped me avoid hitting electrical wiring during my own installation.
Step 4: Run Cables (For Wired Systems)
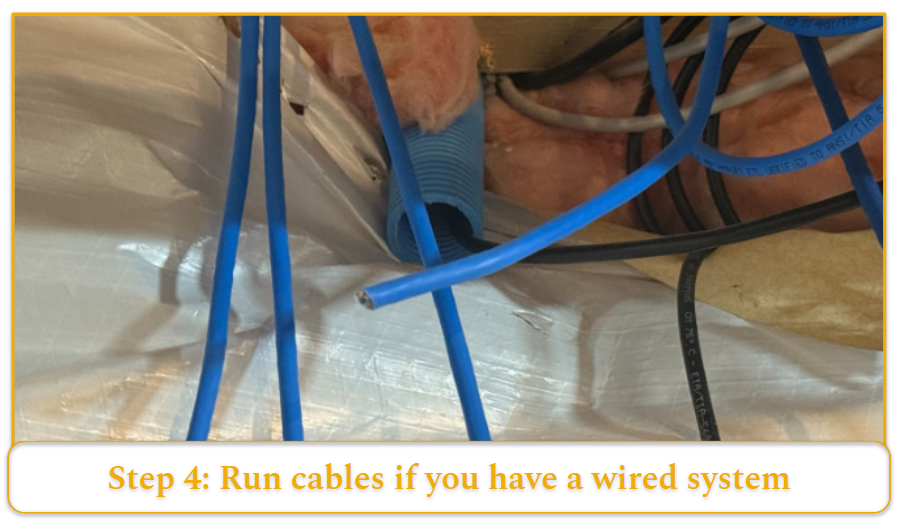
This is the step that often determines whether a project stays DIY-friendly or starts to feel like professional territory.
If you’re running new Ethernet cables for wired cameras, plan the route before pulling anything. I had mine installed during construction, but retrofit installs usually require external routing or attic runs. The cleaner the path, the more reliable and durable the installation will be.
For external runs, use weatherproof-rated Ethernet cable and secure it every 2–3 feet with cable clips. A loose cable not only looks unprofessional but can sag over time and strain connectors. Avoid running Ethernet parallel to electrical wiring for extended distances. Long parallel runs can introduce electromagnetic interference, which may cause signal instability or reduced video reliability.
Another option is routing cables through the attic and exiting near each camera location. This takes more time and effort, but the result is much cleaner than visible exterior wiring. In my current home, I had my builder install a conduit from the basement (where my Ubiquiti rack is located) up to the attic. That setup allows me to pull additional Ethernet lines later without opening walls – a major advantage if you plan to expand your PoE system over time.
Cable routing affects not just appearance, but long-term flexibility. If you expect to add cameras later, planning for future cable paths now can save significant effort.
Step 5: Connect Power and Data
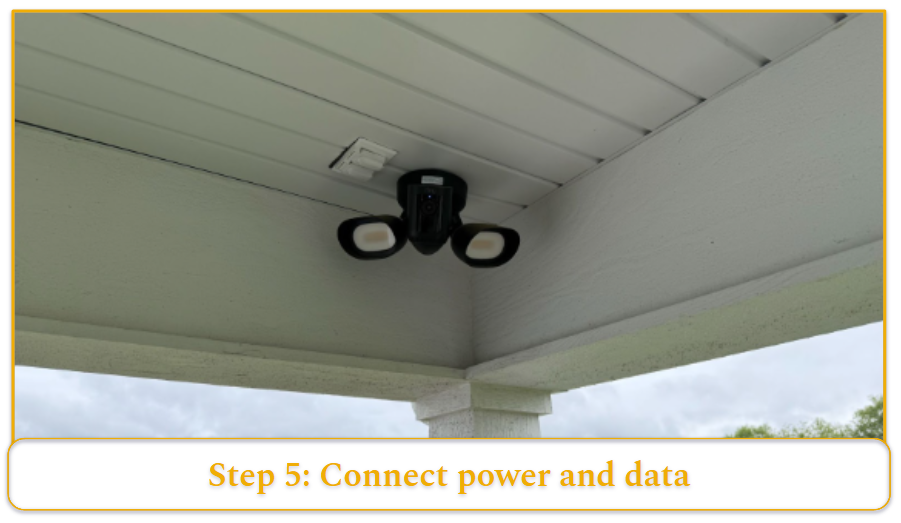
PoE cameras get both power and data through the Ethernet cable Once connected to a PoE-capable switch or recorder, the camera powers on automatically.
For cameras that use separate power adapters, run the power cable along the same route as your data cable when possible. Keeping cables bundled and secured reduces strain and keeps the installation cleaner.
Before sealing anything or tightening final mounts, test every connection.
- Plug in the camera, confirm it powers on
- Verify the video feed quality through your app or monitoring software
- Check for a stable image and expected resolution
- Confirm consistent connectivity
Discovering a faulty cable after everything is sealed and weatherproofed can mean redoing hours of work.
Storage method also matters at this stage. If you’re deciding between onboard and recorder storage, see which micro SD card to use with surveillance cameras for compatibility guidance.
Step 6: Mount and Aim the Camera
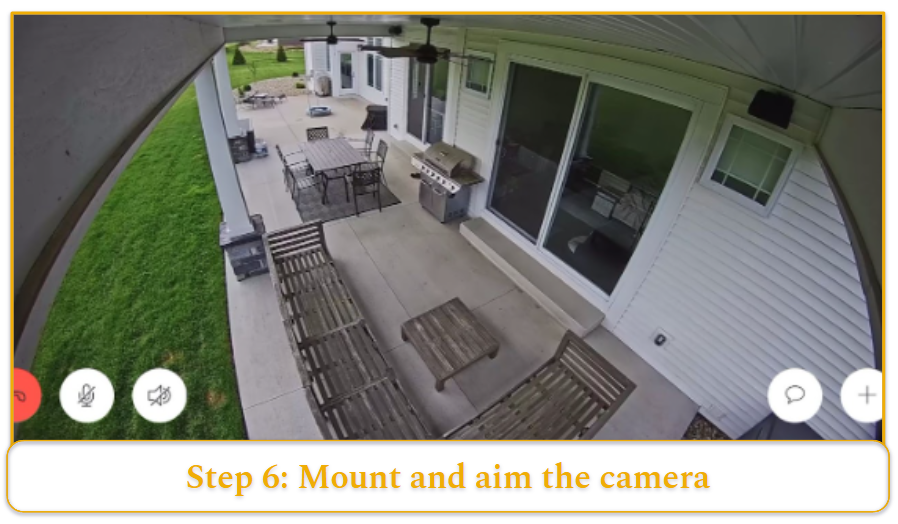
Attach the camera to your mounted bracket and roughly aim it into position.
- Don’t tighten everything down yet – you’ll need to fine-tune the angle. Most cameras have adjustment screws that let you pan, tilt, and rotate the view.
- Use your phone app or monitoring software to adjust the angle in real time. Live viewing ensures you’re aligning the frame based on actual coverage, not guesswork. I initially underestimated how long this step takes, but precise aiming prevents having to remount later.
- Focus on capturing the approach path rather than trying to cover everything. (driveways, walkways, and entry points). Capturing how someone approaches a door is typically more valuable than covering a wide but less detailed area.
Step 7: Weatherproof All Connections
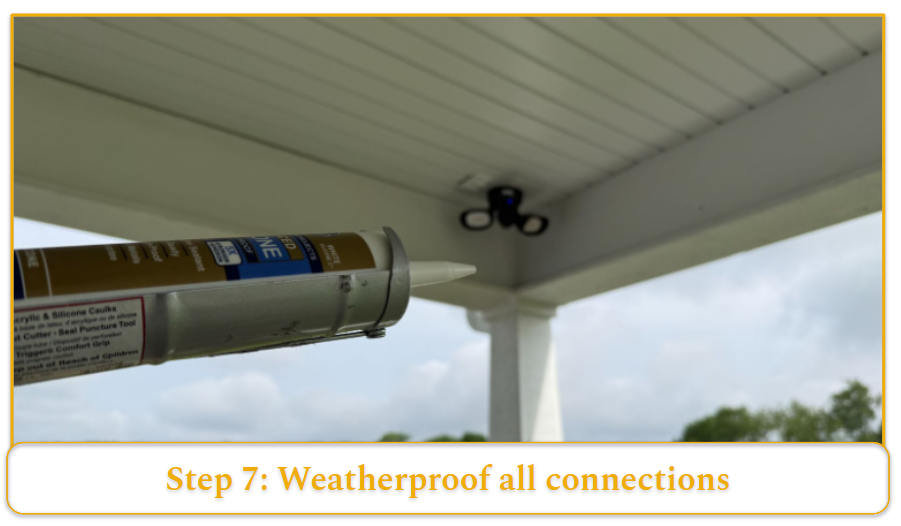
Outdoor installations need protection from moisture. Any unsealed penetration can allow water into walls, which can damage insulation, drywall, or wiring over time.
I use silicone caulk around the mounting bracket to seal screw penetrations and prevent water intrusion. For exposed cable connections that can’t be housed inside a junction box, self-amalgamating tape provides a weather-resistant seal by bonding to itself as it wraps.
Pay special attention to where cables enter the building.
- Seal entry holes with exterior-grade caulk or sealant
- Avoid straight horizontal cable runs into the wall
- Create a drip loop before the cable enters
A drip loop simply means letting the cable dip below the entry point before rising into the wall. This forces rainwater to drip off the lower curve rather than follow the cable indoors. It’s a small step that prevented water infiltration during my first winter with the Ring system installed.
Step 8: Test System Operation

Once everything is mounted and sealed, power up the full system and verify each camera feed.
- Confirm that every camera appears in your monitoring app or recorder
- Check image clarity and viewing angles
- Test night vision functionality if included
- Walk through each camera’s field of view
- Adjust motion detection zones as needed
- Record test footage to verify storage is working
Testing in both daylight and darkness is important. I discovered one of my Ring cameras had a defective IR LED only after reviewing nighttime footage, which would have gone unnoticed if I’d only tested during the day.
How To Install Wireless Surveillance Cameras
Wireless cameras simplify installation but introduce their own challenges. My Ring setup reinforced that “wireless” really means “no data cable” – most cameras still require a power source. Here’s how to handle a wireless installation properly.
Test WiFi Signal Strength First
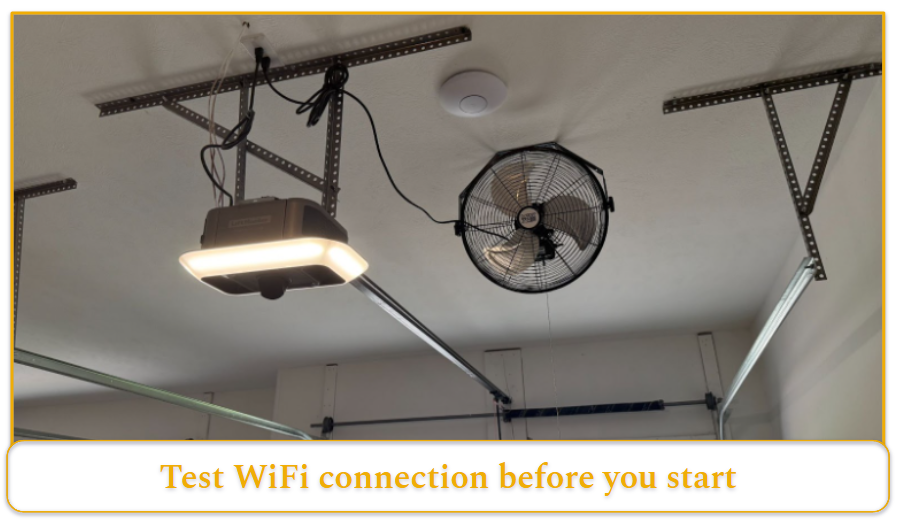
Before mounting anything, test your WiFi signal at each planned camera location. I use a WiFi analyzer app on my phone, but you can also stream a video call from each spot to test real-world performance.
Your camera needs consistent signal strength, not just basic connectivity. I learned this when one of my Ring cameras kept dropping offline during peak usage hours. If you’re seeing a weak signal (typically under three bars), consider repositioning your router or adding a Wi-Fi extender. I ended up installing one in my garage to stabilize coverage.
Mount Cameras Near Power Sources
Most wireless cameras still need power cables. This is especially relevant for hybrid installs like doorbell cameras, which often rely on existing low-voltage wiring. During my Ring installation, I planned camera placements around existing outdoor outlets whenever possible to avoid extension runs.
For cameras that need new power outlets, you’ll likely need an electrician unless you’re comfortable with electrical work. In my previous home, I opted to use existing outlets and accept slightly less-than-perfect camera angles rather than running new electrical lines. For many homeowners, that tradeoff keeps installation simpler and more cost-effective.
Configure Network Settings Before Final Installation
Connect each camera to your WiFi network before mounting. Most cameras have a temporary setup mode that requires pressing sync buttons or scanning QR codes – much easier to do at ground level than on a ladder.
After setup, test connectivity by walking the powered camera to the installation location while monitoring the live feed on your phone. This helps identify connection issues before permanent mounting.
Account for Battery-Powered Cameras
Some wireless cameras run on rechargeable batteries, which changes how you mount them. Since you’ll need periodic access for charging, install the bracket so the camera can be removed easily without tools.
I used battery cameras in my previous home, but ruled them out for my current one because I didn’t want to charge each camera every 2–3 months. For buyers weighing convenience vs. upkeep, battery cameras reduce wiring but increase ongoing management.
Set Motion Detection Zones Carefully
Wireless cameras often have limited recording time or cloud storage, so the motion detection setup becomes more important. I spent considerable time fine-tuning my Ring cameras’ motion zones to avoid constant alerts from every passing car or swaying tree branch.
Test motion detection by walking through different areas while watching the feed. Adjust sensitivity settings to balance between missing important events and getting flooded with false alerts. Dialing this in takes trial and error. It took me several days of adjustments to balance capturing meaningful events without being flooded by false notifications.
Positioning and Adjusting Cameras
Proper placement is the difference between usable evidence and wide, low-value footage. I repositioned two of my Ring cameras after the initial installation because I prioritized total coverage area instead of identification quality.
Height Matters More Than You Think
Mount outdoor cameras between 8–10 feet high. I initially mounted one Ring camera at 12 feet, assuming higher meant better coverage. The result was a steep downward angle that captured the tops of people’s heads, but not faces.
At 8–9 feet, you typically get a better balance: clear facial detail for approaching visitors while keeping the camera out of easy reach. If you need more ground-level detail from that height, slightly tilting the camera downward or using a model with a narrower (longer) lens helps maintain identification clarity.
Height affects angle, and angle affects identification. A camera positioned too high can undermine even high-resolution footage.
Cover Approach Paths, Not Everything
Focus on where people naturally move – driveways, walkways, gates, and door approaches. My biggest mistake was trying to cover my entire front yard with one camera. The footage was wide, but lacked detail where it mattered.
Instead, prioritize the 15–20 feet leading up to entry points. Capturing someone during their approach gives you multiple frames at usable angles, increasing the likelihood of clear identification rather than a single distant snapshot.
Avoid Common Angle Traps
Avoid pointing cameras directly into sunrise or sunset paths. I discovered my east-facing camera was effectively unusable every morning due to glare. Backlighting reduces contrast and can wash out facial details even if the camera technically records in high resolution.
Also, watch for reflective surfaces like windows, cars, or metal siding that can cause glare or wash out your image, especially at night when infrared (IR) light reflects back into the lens. Position cameras at slight angles rather than aiming them directly at reflective areas to reduce image distortion.
Indoor Camera Placement Strategy
For indoor cameras, corner mounting gives you the widest coverage with the fewest blind spots. Mount them high enough to avoid accidental bumping but low enough to capture faces clearly – usually 7-8 feet works well.
Avoid pointing indoor cameras toward windows during the day. The contrast between bright outdoor light and darker indoor spaces will either overexpose the window area or make indoor details too dark to see, depending on how the camera’s exposure adjusts.
Test Different Times and Conditions
Test your camera views at different times of day and in different weather conditions. I discovered that one camera’s night vision performance dropped significantly during rain because water droplets on the lens scattered infrared light, reducing clarity.
Check how shadows shift throughout the day. That perfectly positioned camera at noon might create a blind spot in late afternoon. I ended up adjusting one camera angle by 15 degrees to compensate for a shadow that appeared every day around 4 PM. Environmental changes impact footage quality more than most buyers expect, so testing beyond the initial install is essential.
Fine-Tune Motion Detection Zones
Most modern cameras let you customize motion detection areas. Use this feature to focus on important zones while excluding areas with routine movement like busy streets or neighboring properties.
Creating overlapping detection zones where multiple cameras can see the same approach path adds redundancy. In my setup, this helped me catch several incidents where one camera temporarily missed motion due to lighting changes or brief obstructions.
Connecting To Monitoring and Storage Systems
The monitoring and storage setup differs significantly between wired and wireless systems. My Ring cameras connect through WiFi to cloud storage, while my planned Ubiquiti upgrade will use a local Networks Video Recorders (NVRs). Each approach has trade-offs in cost, reliability, and control.
Wired Camera Connections
PoE cameras carry both power and data through a single Ethernet cable. These connect directly to a PoE switch, which then connects back to your network and NVR system. I had CAT6 cables run during construction specifically to support this type of system.
For non-PoE wired cameras, power and data cables. run separately. Data transmission depends on camera type:
- Analog cameras use BNC connectors and feed into a DVR (Digital Video Recorder)
- IP cameras use Ethernet and connect directly to your network or NVR
Test each connection before finalizing the installation. I always verify video quality and recording functionality for each camera individually before connecting the full system.
Wireless Camera Network Setup
Wireless cameras connect to your home WiFi network and usually stream to cloud-based storage services. My Ring system works this way – cameras connect to my WiFi router, then upload footage to Amazon’s cloud servers.
Bandwidth is the main limitation:
- Standard HD cameras often use ~1–2 Mbps upload bandwidth
- Higher resolutions require more
- Multiple cameras compound the demand
With three cameras active, I noticed network slowdowns during peak recording periods until I upgraded my internet plan.
Router capacity also matters. Older routers – like the 802.11n model I originally used – often struggle with multiple HD streams. Upgrading to a newer standard improved connection stability significantly.
Local vs Cloud Storage Decisions
Cloud storage offers convenience and off-site backup but comes with ongoing subscription costs. My Ring cameras have a monthly plan for recorded footage beyond basic live viewing. The convenience of accessing footage from anywhere justified the price for my setup.
Local storage through NVR systems eliminates recurring fees after the hardware investment and gives you full control over retention and privacy. This long-term cost advantage is one reason I’m planning to move toward a Ubiquiti system as I expand camera coverage.
Storage planning matters regardless of platform:
- Continuous recording consumes storage the fastest
- Motion-triggered recording is far more efficient
My Ring system records only on motion detection, which keeps cloud storage costs manageable.
Network Infrastructure Requirements
For wired IP camera systems, network design becomes part of the installation. Each camera needs network connectivity back to your recording device. POE switches simplify this by providing both network and power distribution from a central location.
In my planned setup, all camera Ethernet runs terminate in a basement network rack. This requires a PoE switch capable of supporting the total power draw of all connected cameras simultaneously.
Wireless systems put different demands on your network. Strong WiFi coverage becomes essential, and you may need additional access points for reliable connectivity to exterior or distant cameras.
Recording and Backup Strategies
Set up redundant recording if your security needs justify the cost. Some systems can record locally while simultaneously backing up to cloud storage. This protects against both hardware failures and network outages.
Consider recording schedules that match your actual security needs. Continuous recording provides complete coverage but requires massive storage. Motion-triggered recording with pre-buffer captures sufficient detail for most home security applications while using far less storage space.
For local storage systems, plan for hard drive failures. RAID configurations or scheduled backups to external drives prevent losing footage when drives fail. I learned from IT colleagues that hard drives in continuous recording applications fail more frequently than typical computer drives.
Maintenance and Best Practices
Surveillance systems need regular maintenance to function reliably. My Ring cameras taught me that outdoor electronics face constant challenges from weather, dust, and temperature changes. A little preventive care prevents expensive replacements and gaps in coverage.
Clean Cameras Quarterly
Outdoor camera lenses collect dirt, spider webs, and water spots that degrade image quality. I clean my Ring cameras every three months or after major storms. Use a microfiber cloth slightly dampened with water – avoid harsh cleaners that can damage lens coatings.
Check for spider webs around cameras monthly during warm weather. Spiders love the infrared heat from night vision cameras and will build webs directly across the lens. I learned this after reviewing footage that looked like it was shot through frosted glass.
Remove any vegetation growing near cameras during your quarterly cleaning. Tree branches and bushes can shift over time, gradually blocking camera views. What starts as a small twig can become a major obstruction after a growing season.
Inspect Mounting Hardware Twice Yearly
Check mounting screws and brackets every six months. Temperature cycling loosens hardware over time, and I’ve seen cameras gradually tilt downward as mounts work loose. Carry a screwdriver during your cleaning routine and tighten anything that’s backing out.
Look for rust or corrosion on mounting hardware, especially in coastal areas or regions with road salt. Replace corroded hardware before it fails completely. I use stainless steel hardware for all outdoor camera installations after seeing what road salt did to standard screws.
Inspect weatherproofing seals around cable connections annually. UV exposure and temperature cycling degrade silicone caulk and rubber boots over time. Re-seal any connections showing cracks or gaps before water infiltration causes damage.
Monitor System Performance Monthly
Check recording quality and storage capacity monthly. Review sample footage from each camera to verify image quality hasn’t degraded. Look for new blind spots, lighting issues, or obstructions that may have developed.
Test motion detection and alert systems monthly by walking through detection zones. I discovered one of my Ring cameras had stopped sending alerts after a firmware update, but only because I tested the system regularly.
Monitor your network performance if using wireless cameras. WiFi signal strength can change as neighbors add new routers or as the weather affects outdoor equipment. Use your camera app to check signal strength at each camera location.
Plan for Component Replacement
Camera batteries in wireless systems typically last 2–6 months, depending on usage and weather. Cold temperatures dramatically reduce battery life – my Ring cameras at my previous house needed more frequent charging during the winter months.
Plan to replace outdoor camera housing every 5–7 years in harsh climates. UV exposure and temperature cycling eventually degrade plastic components. Metal housings last longer but cost more initially. Learn more about how much a surveillance camera costs over time.
Hard drives in NVR systems typically need replacement every 3–5 years under continuous recording loads. Monitor drive health through your system’s diagnostics and replace drives showing early warning signs before they fail completely.
Network Equipment Maintenance
Clean dust from the NVR and switch equipment every six months. Electronics generate heat, and dust accumulation reduces cooling efficiency. I learned this lesson when an overheated switch caused intermittent camera dropouts.
Update firmware annually or when security patches are released. Set calendar reminders to check for updates since some systems don’t update automatically. Security cameras are frequent targets for network attacks, so staying current with patches is important.
Test backup power systems quarterly if you have them. UPS batteries degrade over time and may not provide the expected runtime during power outages. Replace UPS batteries every 3–4 years as preventive maintenance.
Keep Documentation Current
Maintain records of camera positions, network settings, and access credentials. I keep a simple diagram showing each camera’s coverage area and any known blind spots. This helps when troubleshooting issues or planning system upgrades.
Document any changes you make to camera positions or settings. What seems obvious during installation becomes fuzzy months later when you’re trying to diagnose a problem. I learned to photograph camera angles and write down the reasons for specific positioning choices.