


So, you just bought or are in the process of buying your first projector? That’s great. But after all that research comparing lumens and throw ratios, you’re probably staring at your wall wondering if you really need to drop a few hundred more on a screen or if that’s just a marketing plot to empty your wallet.
Yes, projectors can create amazing images, but they’re only half the equation. The surface those images land on makes a huge difference in what you actually see. Many first-time projector owners simply aim at a wall and call it a day, not knowing that the right screen can greatly improve brightness, contrast, color accuracy, and overall viewing experience.
Why You Can’t Just Use a Wall
A lot of people start by projecting onto a plain wall, and if you’ve done this, you’ve probably noticed a few issues. Wall texture creates visible imperfections in the image. Even with perfectly smooth walls, standard house paint absorbs and scatters light unevenly, reducing brightness and washing out colors.
A proper projection screen offers several major advantages:
- Reflectivity designed specifically for projection
- Perfectly smooth, uniform surface
- Consistent color reproduction
- Enhanced brightness and contrast
- Precise aspect ratio with defined borders
- Specialized materials for different environments
Many renters face restrictions on mounting or painting walls. So, for temporary setups, consider tension rods with white blackout fabric stretched between them, or large format prints on foam board that lean against the wall. These solutions provide a smoother surface than textured walls without permanent modifications.
But if You Want to Use a Wall
Projecting onto a wall might work if you address these factors:
- Make the wall as smooth as possible by filling dents, sanding lightly, and wiping off dust since texture shows up in bright scenes.
- Use flat or matte paint rather than glossy or eggshell finishes, which create hot spots and lower contrast.
- Stick with neutral colors like white or very light gray to keep colors accurate, and avoid tinted walls.
- Keep the room dim by closing curtains, switching off nearby lamps, and blocking light from the sides.
- Don’t oversize the image, as a slightly smaller picture looks sharper and brighter on a wall.
- Center the projector and keep it level with the wall, avoiding keystone correction when possible.
- Add a simple black tape border on the wall to tighten the frame and help perceived contrast.
- Keep the wall clean since marks and dust catch the light and become visible during motion.
- Position seating far enough back so minor texture and surface noise don’t become distracting.
However, even with these adjustments, a wall will never match a proper screen. So, let’s look at what makes a good screen and how to choose the right one for your setup.
What to Check When Buying a Projector Screen
Screen Size
Screen size greatly impacts your viewing experience. I was personally shocked by the contrast improvement when I upgraded from a simple white wall to a dedicated 120-inch screen. The difference was immediately visible, even when the room wasn’t completely dark, although perfect darkness made the change even more dramatic.
On a white wall, black levels appear gray and highlights bloom into surrounding areas. A proper screen maintains separation between bright and dark areas, making details visible that were previously lost.
Like a television, a projector screen’s size is measured diagonally in inches, and choosing the right one requires balancing room dimensions, viewing distance, and personal preference.
For guidance, the Society of Motion Picture and Television Engineers (SMPTE) recommends a minimum viewing angle of 30 degrees to ensure an immersive experience without eye strain. This translates to a simple formula: your ideal diagonal screen size should be approximately 0.6 times your viewing distance in inches.
For example:
- 10 feet away (120 inches) = 74-inch screen (minimum)
- 12 feet away (144 inches) = 89-inch screen (minimum)
Home theater enthusiasts prefer larger screens than these minimum recommendations. I’ve never heard anyone say “I wish I got a smaller screen.”
However, also note that going too large can create practical problems:
- First, larger screens require more powerful projectors to maintain brightness. A 150-inch screen needs substantially more lumens than a 100-inch screen to achieve the same perceived brightness. Your projector might look brilliant on a smaller screen but dim and washed out when pushed too large.
- Second, screen size is limited by your room’s physical constraints. You need appropriate wall space, plus room for speakers, furniture, and walking areas. Measure your available wall space carefully before committing to a screen size.
- Finally, consider how different content will look. While movies might be stunning on an enormous screen, regular TV programming or sports broadcasts (which are often lower resolution) might expose flaws when effectively enlarged.
Aspect Ratio
After discussing screen size, the natural next step is to select an aspect ratio, which defines the proportional relationship between the screen’s width and height. Different types of content utilize different aspect ratios, which is why you occasionally see black bars at the top and bottom (letterboxing) or the sides (pillarboxing) of your screen
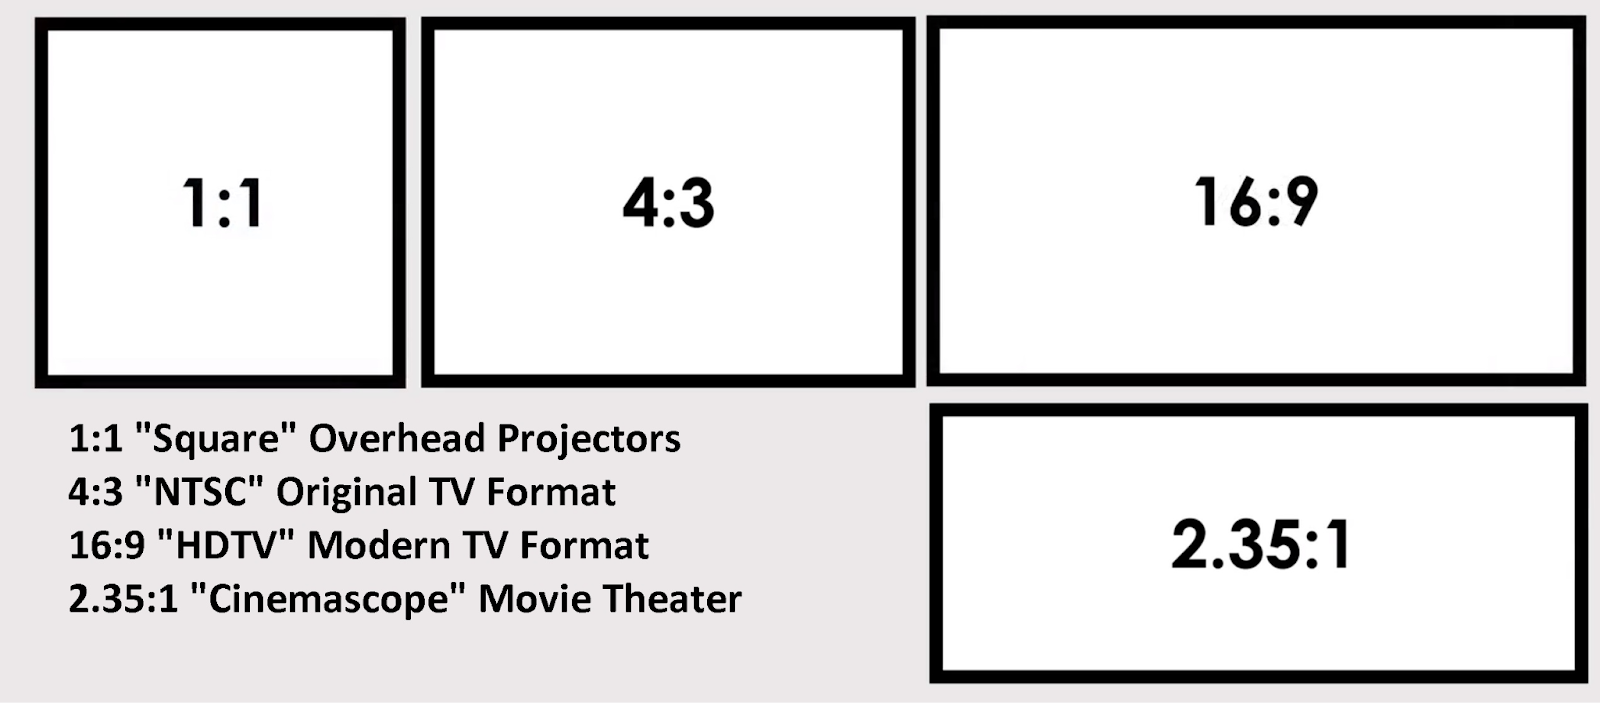
Source: Elite Screens
16:9 (1.78:1)-Most Versatile and Common Choice
This is the standard high-definition television (HDTV) format used by the majority of modern media, including most streaming content, TV shows, sports broadcasts, and video games.
Since most home-theater projectors are built with a native 16:9 chip, a 16:9 screen is the simplest and most practical choice for mixed-use environments, unless you are specifically building a dedicated cinema-first setup.
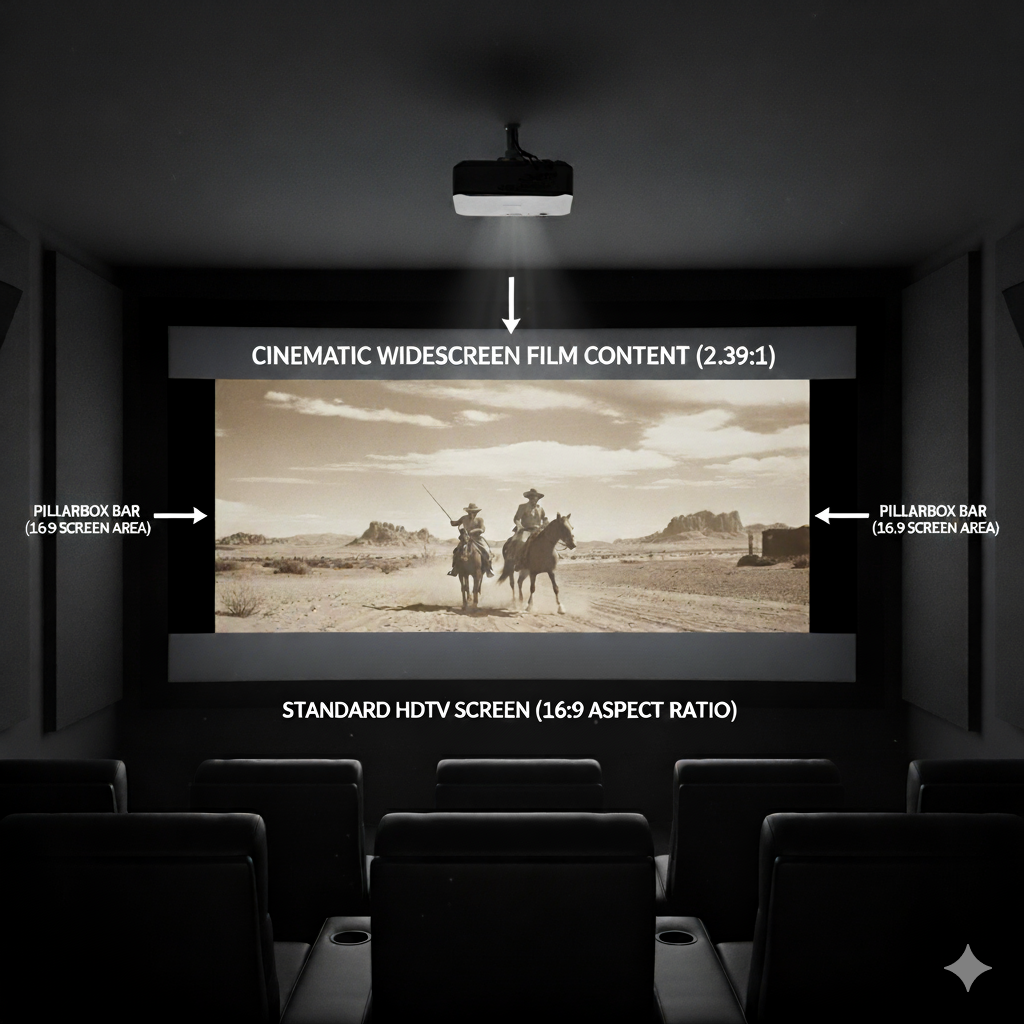
2.35:1 or 2.40:1 (Cinemascope)
For those dedicated movie enthusiasts, a wider format like 2.35:1 or 2.40:1 (Cinemascope) is often preferred, as many Hollywood blockbusters are shot in this cinematic aspect ratio. Opting for Cinemascope, however, means you will have black bars on the sides when watching standard 16:9 content.
Advanced projector setups can manage this using specialized features like anamorphic lenses or lens memory settings to properly switch between the two ratios.
To visualize the difference, a 120-inch diagonal screen in 16:9 is about 104.6 inches wide and 58.8 inches tall, while the same diagonal size in 2.35:1 is a much wider 110.4 inches but only 47.0 inches tall.
16:10 (1.6:1)
Slightly taller than 16:9, this ratio is common in business and education settings. It provides more vertical space for presentations, spreadsheets, and documents while still accommodating widescreen video content reasonably well.
4:3 (1.33:1)
The 4:3 (1.33:1) format was the standard for older TV broadcasts but is rarely used for new home screens today, except in specialized applications where legacy content is common.
1:1 (Square)
Square screens are uncommon but can be found in specialized applications or multi-format setups. They allow for adjustable masking to achieve different aspect ratios.
Gain, Brightness and Viewing Angle
Gain measures how efficiently a screen reflects light compared to a reference white surface with 1.0 gain. This seemingly simple concept significantly impacts brightness, viewing angle, and overall image quality.
A 1.0 gain screen reflects light evenly in all directions, providing consistent brightness across various viewing positions. Higher gain screens (1.3-2.0+) concentrate reflected light in a narrower cone, making the image appear brighter from directly in front but dimmer from the sides. Lower gain screens (0.7-0.9) absorb some light, producing a slightly dimmer image but often with improved contrast.
Explaining the tradeoffs that come with higher-gain screens:
- Hot spotting: High-gain screens often create a visibly brighter area in the center of the screen. This uneven brightness becomes distracting, particularly in scenes with large bright areas.
- Narrower viewing angles: A 2.0 gain screen might look brilliant from the center position but appear significantly dimmer just a few feet off-axis, making it unsuitable for wider seating arrangements.
- Amplified artifacts: High-gain screens can exaggerate projector artifacts and texture, making pixels, screen door effect, or laser speckle more noticeable.
For most home applications, screens between 0.8 and 1.3 gain provide the most balanced performance. Higher gain should only be considered for specific commercial applications or where maximum brightness is absolutely necessary.
Screen Types
The physical form of your screen impacts both image quality and practicality. Each type has specific advantages and limitations.
Fixed Frame Screens
Fixed frame screens consist of a rigid frame with screen material pulled taut across it. They provide the best possible image quality because the surface remains perfectly flat.
These screens are ideal for dedicated viewing rooms where the screen will be a permanent fixture. Usually, the frame has a black velvet border that absorbs overflow light and creates a clean edge for the projected image.
Buyers should also note that while fixed frame screens deliver superior performance, they remain visible and require dedicated wall space. Additionally, assembly can be somewhat involved, usually requiring two people for larger sizes.
If you upgrade from a pull-down screen to a fixed frame, you’ll see significant improvements in image quality, particularly at the edges where waves and curling in retractable screens often distort the picture.
Motorized Screens
Motorized screens retract into a housing when not in use, making them perfect for multi-purpose rooms. They can be controlled via remote, wall switch, or integration with home automation systems like Alexa or Nest.
Tab-tensioned screens use a system of cables running along the sides with tabs attached to the screen material every few inches. When deployed, these cables pull the material outward from the edges, similar to how tent poles create tension. 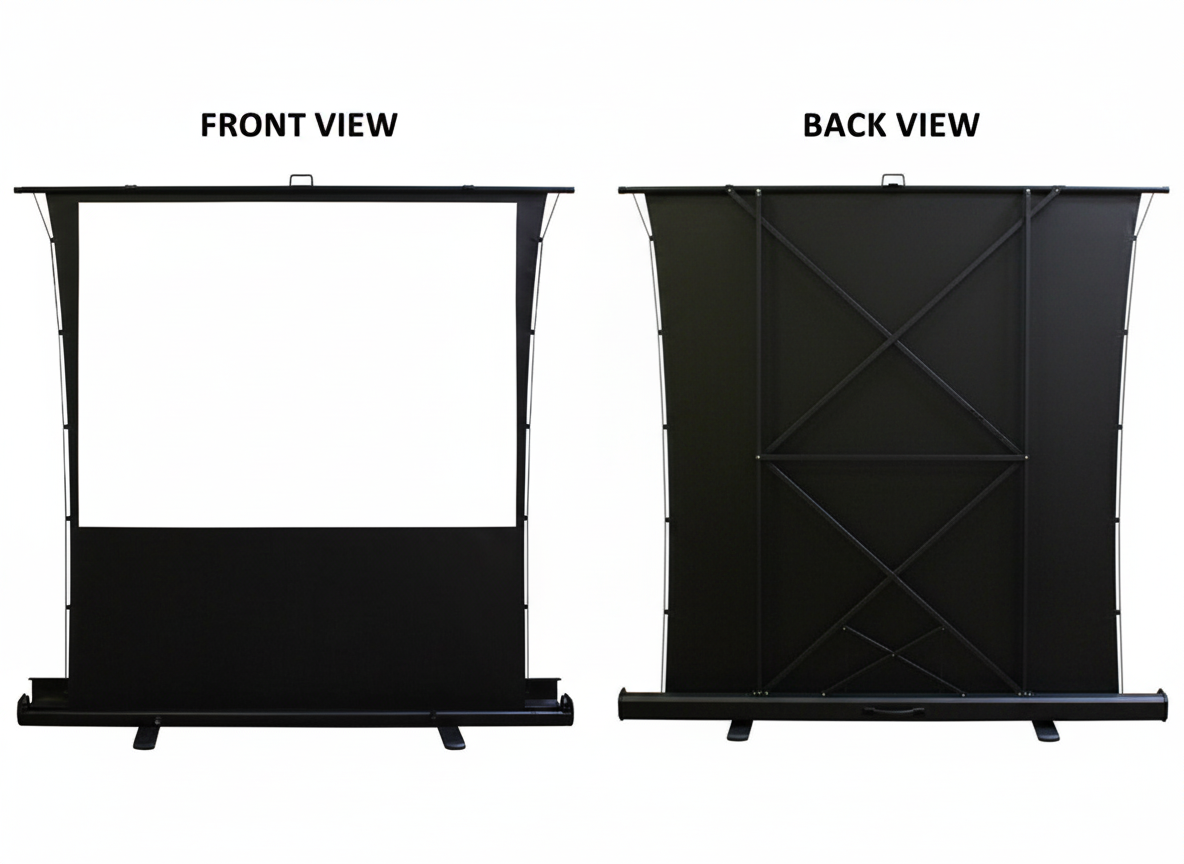
Without this system, motorized screens develop waves at the edges over time, creating visible distortions during panning shots. The difference is immediately noticeable. Untensioned screens show ripples that move with air currents, while tab-tensioned screens remain perfectly flat.
A tab-tensioned motorized screen offers nearly the same image quality as a fixed frame when deployed, with the advantage of disappearing when not needed. The tradeoff comes in price, seeing as quality motorized screens will cost 2-3 times more than comparable fixed frame models.
Installation requires more consideration as well, including electrical access and secure mounting to support the increased weight. Many users find the convenience worth the premium, especially in living rooms where a permanent screen would dominate the space.
Manual Pull-Down Screens
Manual pull-down screens operate like window shades, using a spring mechanism to retract when not in use. They offer an economical alternative between permanent installations and portable options.
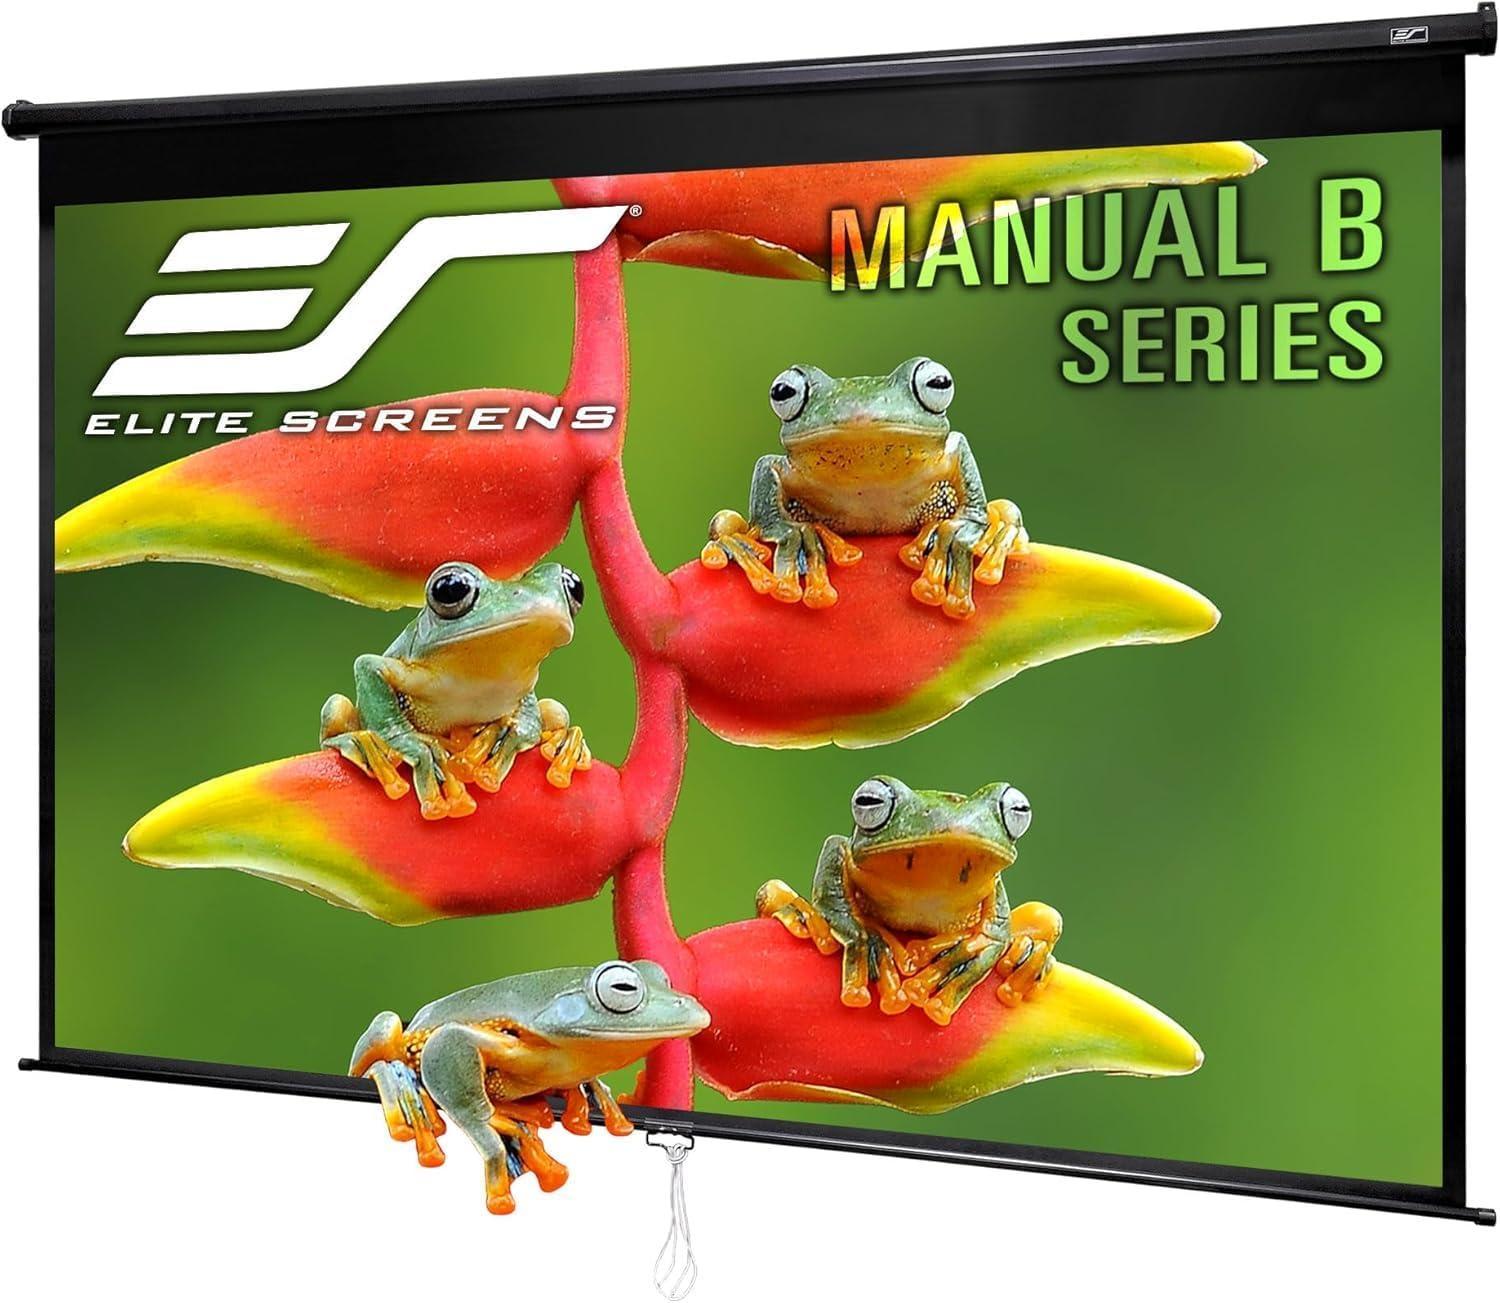
Source: Amazon
While manual screens have improved over the years, they still tend to develop some waviness over time. Higher-quality models include controlled return mechanisms to prevent damage from rapid retraction and locking systems to maintain consistent deployment heights.
One persistent issue with manual screens is “edge curl,” where the sides of the material curl slightly inward, which can create noticeable distortion, especially with short-throw projectors or when viewing from angles.
Manual screens make sense for occasional use, classrooms, or budget-conscious setups where convenience matters more than perfect image reproduction.
Portable Screens
Portable screens come in several varieties including:
- Tripod stands
- Pull-up designs (similar to banner displays)
- Inflatable outdoor models
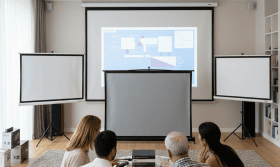
Tripod screens are common in business and education settings, offering quick setup and reasonable stability. Pull-up screens emerge from floor-standing cases and are even more portable, though typically limited to smaller sizes.
For outdoor use, specialized screens include heavier bases for stability in light wind and weather-resistant materials. Inflatable screens provide impressive size for outdoor movie nights but require setup time and proper anchoring.
Portable screens inevitably compromise some image quality for convenience, but modern materials have improved significantly. They remain ideal for traveling presenters, occasional users, or outdoor events.
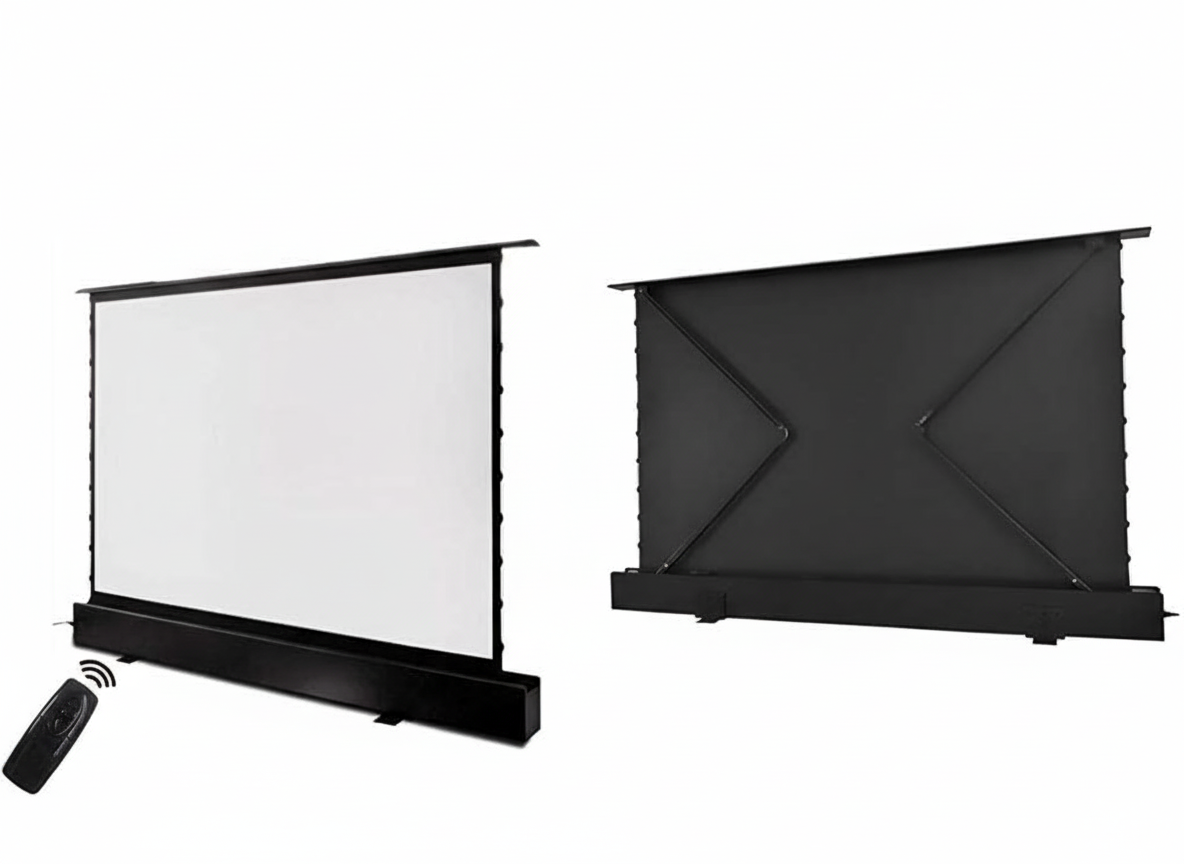
Floor Rising Screens
Floor rising screens extend upward from a floor-mounted housing. They solve specific architectural challenges like windows behind the viewing area or concrete walls where mounting is difficult. If your ideal screen location has a window, these screens deploy when needed while preserving natural light during the day. They work especially well in rooms with high ceilings or in front of features like fireplaces that can’t be permanently covered.
Source: Amazon
Floor rising screens come in both manual and motorized varieties, with motorized versions offering more reliable operation and positioning. They require floor space for the housing but eliminate the need for ceiling or wall modifications.
Recent innovations in this category include specialized UST (Ultra Short Throw) ALR (Ambient Light Rejecting) floor rising screens designed specifically for the growing market of ultra-short throw laser projectors.
Screen Materials
Screen material significantly impacts image quality, sometimes more than the projector itself. Different materials serve specific purposes and environments.
Therefore, before committing to any screen material, request samples from manufacturers. Most companies offer 8×10 inch samples for a small fee or sometimes free. Test these with your actual projector in your room’s lighting conditions.
White Screens
White screens are the traditional standard, providing neutral color reproduction and wide viewing angles. They work best in completely dark rooms where ambient light control is excellent.
White screens typically have a gain rating around 1.0, which means they reflect light evenly in all directions. This creates consistent brightness across various viewing positions but requires good light control to maintain contrast.
In a properly darkened room with dark walls, a quality white screen delivers the most accurate color reproduction and the widest viewing angle. This makes white screens the preferred choice for dedicated home theater environments where lighting is fully controllable.
I tried various screen materials in my setup and eventually returned to a white screen for my dedicated theater. Specialized materials help in challenging environments, but nothing beats a quality white screen in optimal conditions.
Gray Screens
Gray screens are preferred for rooms with imperfect light control. By starting with a darker base color, these screens improve perceived contrast, especially with projectors that struggle with black levels.
Gray screens typically have gain ratings between 0.7 and 0.9, meaning they reflect slightly less light than white screens. This reduced reflectivity helps absorb ambient light and enhances perceived contrast by making dark areas appear darker.
The tradeoff comes in overall brightness and viewing angle. Gray screens generally produce a slightly dimmer image than comparable white screens and may show more brightness variance when viewed from extreme angles.
Gray screens are what you get between standard white screens and specialized ALR materials. They improve contrast without the higher cost or viewing angle limitations of ALR technology, making them popular for mixed-use living rooms and spaces with moderate light control.
Ambient Light Rejecting (ALR) Screens
ALR screens use specialized optical structures to selectively reflect the projector’s light while absorbing light from other directions (typically from above or sides). This makes them ideal for spaces with windows, overhead lighting, or other light sources that can’t be fully controlled.
These screens use microscopic sawtooth-like structures that direct light from the projector back to viewers while rejecting light hitting the screen from other angles. The result is measurably improved contrast and color saturation in challenging lighting environments.
ALR screens come in varying degrees of light rejection, usually measured as a percentage. Higher rejection percentages (80-90%) provide better performance in bright rooms but often with narrower viewing angles and possible texture or “sparkle” visible in bright scenes.
It’s important to match your ALR screen to your projector type:
- Standard ALR screens work with traditional ceiling-mounted projectors
- UST (Ultra Short Throw) projectors require specifically designed ALR screens with completely different optical properties.
You do get quality with ALR screens and viewing conditions that could previously be impractical, though the premium price (often 3-5x that of comparable white screens) requires careful consideration.
Acoustically Transparent Screens
For serious home theater setups, acoustically transparent screens allow placement of speakers directly behind the screen (particularly center channel speakers) for a more immersive audio experience where sound truly comes from the image.
These screens come in two primary types:
Woven Screens
They use a fabric with tiny holes woven throughout, allowing sound to pass through naturally. The woven pattern provides excellent acoustic transparency but may show some texture with 4K content, especially at closer viewing distances.
Perforated Screens
These use solid material with precisely engineered tiny holes. These screens maintain better visual performance but might affect high-frequency audio more than woven options, requiring slight equalization adjustments to compensate.
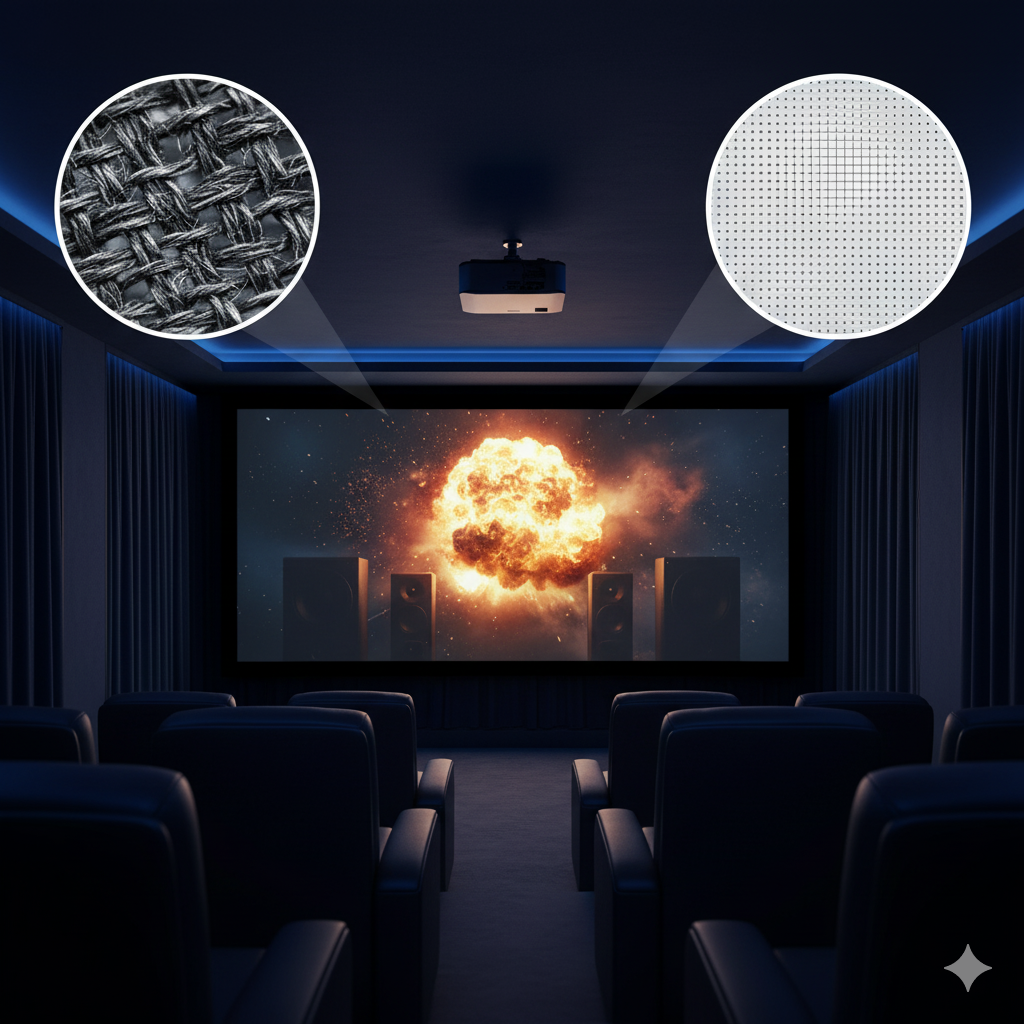
Acoustically transparent screens usually have slightly lower gain (0.8 – 0.9) due to their perforated or woven construction. They also require proper speaker placement behind the screen, with recommended distances varying by manufacturer.
Matching Screens to Room Conditions and Projector Types
Your room environment and projector technology impact screen selection. No screen can work miracles in inappropriate conditions, so an honest assessment of your space and equipment guides proper selection.
Dedicated Home Theater Rooms
In fully light-controlled rooms with dark walls and ceilings, white screens with standard gain (1.0-1.1) provide the best overall performance. They deliver accurate colors, consistent brightness, and excellent contrast without competing light sources interfering with the image.
Fixed frame screens maximize performance in these environments, though tab-tensioned motorized options work nearly as well if you prefer to hide the screen when not in use.
Room treatment often provides more significant improvements than expensive specialized screens. Painting walls and ceilings dark, adding blackout curtains, and using non-reflective materials can transform your viewing experience.
Living Rooms and Multi-Purpose Spaces
Rooms with windows, light-colored walls, or overhead lighting need specialized materials. Gray screens provide a good starting point since they improve perceived contrast without breaking the budget.
Simple room modifications can greatly improve image quality beyond just the screen itself. Dark curtains on windows adjacent to the screen reduce side-wash, and even painting just the wall behind and beside your screen a darker color improves perceived contrast without full room treatment. Renters can temporarily hang black fabric during viewing for similar benefits.
ALR screens justify their premium price in such spaces with significant ambient light by enabling projection in conditions that would wash out standard screens entirely.
Motorized screens are also particularly popular in these environments because they allow normal room use when not watching and deploy only when needed, while tab-tensioning remains important for flat, wave-free performance.
4K and 8K Projection
High-resolution projectors demand screens capable of preserving fine detail. Look for ultra-smooth, textureless surfaces because any grain or weave pattern becomes distracting at 4K resolutions, especially at closer viewing distances.
Most quality fixed frame screens now support 4K resolution, but budget options claiming “4K compatibility” without genuinely textureless materials are common. For 8K, requirements become even more stringent, though few consumer applications currently utilize full 8K capability.
Ultra Short Throw (UST) Projectors
UST projectors require specialized ALR screens, and this isn’t optional marketing upsell. Standard screens won’t work properly with UST geometry, and neither will ALR models designed for traditional projectors.
These projectors sit just inches from the screen and project upward at extreme angles. This requires screens with angular reflective structures (often called “CLR” screens) that reflect light from below while absorbing light from above. They must be perfectly flat because the extreme angle magnifies any imperfection, which means fixed frame or heavily tensioned designs are essentially mandatory.
Laser Projectors
Laser projectors offer exceptional brightness and color performance but can produce “laser speckle,” which is a subtle shimmer visible on some screen surfaces. High-gain materials tend to emphasize this artifact.
Slightly textured surfaces or lower gain materials (0.8-1.1) typically minimize the laser speckle effect. Gray screens also often pair well with laser technology. The higher brightness of laser projectors means you can sacrifice some gain for better overall image quality, making these lower-gain options more viable than with traditional lamp-based projectors.
If you’re investing in a laser projector, pairing it with a high-gain screen will emphasize speckle and other artifacts rather than hide them.
Gaming Applications
Gaming demands quick response times and often happens in rooms with some ambient light. Projector input lag has really improved in recent years, so screen selection becomes the primary concern.
Neutral color reproduction works best for gaming. White or light gray screens with medium gain (1.0-1.3) provide enough brightness without artifacts that distract during fast motion. If you game during daylight, ALR properties become valuable. Fixed frames provide absolute flatness, which matters more for gaming than cinema because you’re staring at static HUD elements that reveal any screen imperfections.
Smaller screens (100-120″) maintain higher pixel density and brightness, which many gamers prefer for competitive games where spotting details quickly matters.
Outdoor and Portable Applications
Outdoor projection presents unique challenges: unpredictable lighting, wind, and setup limitations. Purpose-built outdoor screens provide proper tension and weather resistance that bedsheets and improvised solutions simply cannot match.
Gain becomes particularly important outdoors since ambient light is unavoidable. Higher gain materials (1.3-1.5) help maintain visibility, though they narrow optimal viewing positions. For serious installations, inflatable screens with internal air support provide surprising stability even in light wind.
Business and Educational Environments
Commercial settings prioritize durability, ease of use, and visibility in varying light conditions over absolute image quality. Matte white surfaces with moderate gain (1.0-1.2) provide wide viewing angles for audiences seated throughout a room.
Manual or motorized retractable designs both work well, though the mechanical simplicity of manual screens often proves more reliable in high-use environments. Standard 16:10 aspect ratio accommodates most presentation software better than cinematic formats.
These screens are designed for functionality (projected presentations with room lights partially on for note-taking) rather than cinematic perfection. Spending premium dollars on reference-grade materials makes little sense in these applications.
Budget Expectations
For pricing, here’s what to expect :
Making Your Final Decision
Selecting the right projector screen involves balancing multiple factors. To simplify the process, focus on these key questions:
- How much ambient light control do you have in your viewing space?
- What size screen will work best for your viewing distance and room dimensions?
- Will the screen be permanently installed or need to retract when not in use?
- Does your projector have specific requirements (4K, UST, laser technology)?
- What aspect ratio best matches your typical content?
Remember, projectors come and go as technology advances, quality screens can last through multiple projector upgrades. So date your projector, but marry your screen. In short, if the money allows, go for the best screen.

![[Built-in Apps & 2026 Upgraded] Salange HY300 Ultra Mini Projector Wifi6 Bluetooth5.4,300ANSI Lumen Smart Projector Android Support 8K 1080P Video Decoding,Bedroom Projector for Home Cinema,Black&Whit](https://m.media-amazon.com/images/I/51ae1rKzOUL._SL500_.jpg)

![[Compatible with Netflix & 16000L Electric Focus] Mini Projector – WiFi & Bluetooth, XuanPad 1080P Supported, Portable Projector with 210° Rotatable Stand, Auto Keystone, Dust Removal & Cooling Design](https://m.media-amazon.com/images/I/51FH6KbQ32L._SL500_.jpg)