


Cleaning your air fryer only needs to take a few minutes after each use. Doing this regularly will prolong the life of your machine and keep it operating properly.
Whether you’re tackling melted cheese and a few crumbs or deep-set grease and food spatters, this guide walks you through both regular and deep clean routines for your air fryer.
With tips on the best equipment and handling your heating element with care, you’ll find everything you need to keep your air fryer spotless and odor-free.
Equipment You’ll Need
- Dish tub, large bowl or an empty sink for soaking parts
- Large dish towel or cloth
- Mild dish soap
- Baking powder
- White vinegar
- Soft brush
- Non-abrasive sponges (no wire)
Optional:
- Silicone-tipped cleaning tools
- Hand-held mini vacuum
- Lemon juice
How To Clean an Air Fryer: Step-By-Step
Routine cleaning after each use should take no longer than 3–5 minutes and helps keep your air fryer in good working condition. Regular maintenance cleaning also reduces the time and effort needed for deep cleans later on.
Step 1: Unplug and Cool Your Unit
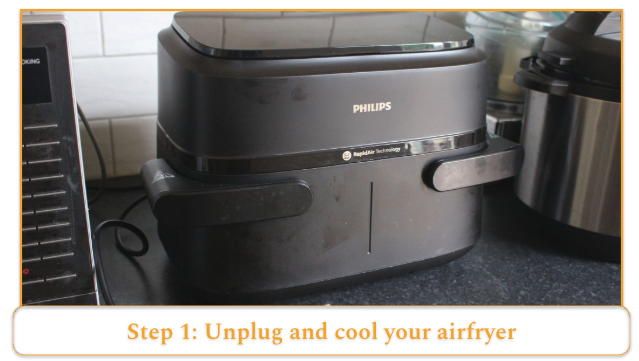
When you’ve finished cooking your food, wait until the air fryer is no longer using its fan to cool down and is no longer running any programs. Unplug it and allow it to cool completely.
Move the unit away from any walls so it is properly ventilated, and leave the drawers out. If you’ve cooked greasy foods, placing the air fryer on a heat-safe mat or towel during cool-down can help catch any drips.
Step 2: Remove and Wash the Basket, Tray, and Pan
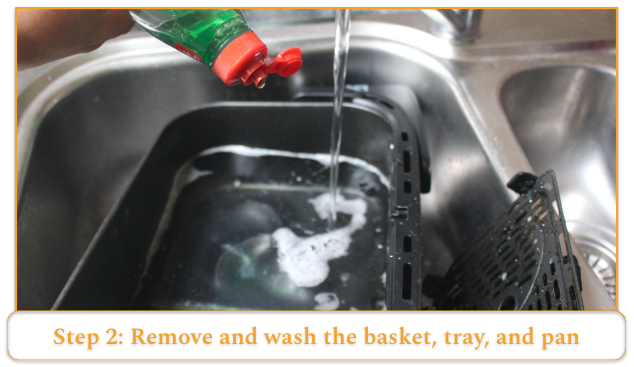
Remove the basket, tray, and any pans, then soak them in warm, soapy water for a few minutes. Use a soft sponge or brush to clean off any food debris and grease.
Step 3: Clean Stuck-on Food or Grease

Some residue may not come off with soaking alone. If your tray has a grated base, check these carefully for leftover food.
For stubborn buildup, make a paste using a few teaspoons of baking soda and a small amount of water. To make the paste, combine a few teaspoons of baking soda with a small amount of water until it is a paste consistency.
Apply the paste to the air fryer parts with a soft brush or sponge, let it sit for 5–10 minutes, then gently scrub. Finally, rinse and dry the removable elements.
Step 4: Wipe Down the Exterior and Interior (Without Damaging the Heating Coil)
The heating element is usually located in the top interior surface of the air fryer. Never spray cleaner or water directly into the unit. Instead, dampen the cloth and wipe down the outer and inner surfaces.
Be especially careful when handling the heating coil, which is easy to damage. If you find any food debris or splatters on the heating coil, leave this for a proper deep clean.
Step 5: Dry all parts properly before reassembly

Lay all parts on a clean dish towel and allow them to air dry, or dry them by hand. Make sure everything is completely dry before reassembling the air fryer.
How to Deep Clean an Air Fryer
Aim to deep clean your air fryer once a month, taking around 15–20 minutes to ensure grease and build-up of debris and food are removed.
It’s time for a deep clean if routine cleaning no longer removes grease, or if you notice unpleasant smells, smoke, or burnt residue during use.
Step 1: Soak Removable Parts

Place removable parts in a sink or large bowl. Fill with either hot soapy water or a vinegar solution made with one part white or malt vinegar to two parts water. Avoid using boiling water, as this can warp or degrade non-stick parts.
Leave to soak for around 5 minutes and never longer than 10 minutes, as this can damage the non-stick coating.
Step 2: Scrub Air Vents and Crevices With a Soft Brush
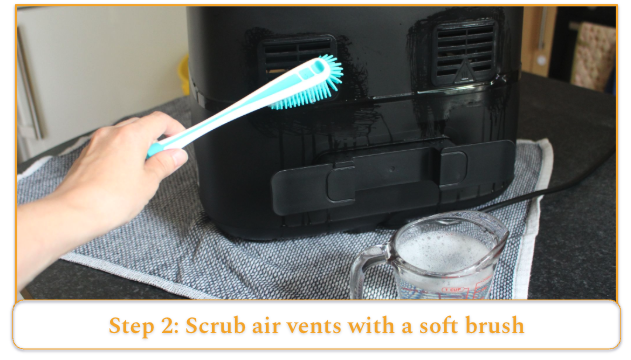
While the parts are soaking, use a soft brush, silicone brush, or a manual toothbrush to scrub the air vents and crevices around the machine. Dip the brush in the same vinegar solution or soapy water beforehand, and use a soft, circular motion. If buildup is stubborn, you can apply baking soda to the brush for extra scrubbing power.
You’ll be surprised how much the air vents can build up with grease if left for too long. Untreated, this can cause stains or discoloration on kitchen walls, so it’s best to keep these areas well-maintained.
Step 3: Clean the Heating Element With a Damp Cloth or Brush
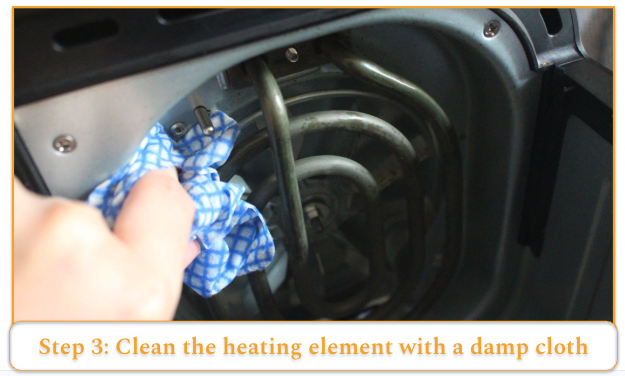
Carefully turn the unit over so you can easily see the heating element. Use a damp cloth to gently remove grease and splatters, paying special attention to any remaining food debris. Avoid using any cleaners that leave a residue. Just a damp (not wet) cloth or soft brush is safest.
Remember to never scrub the heating element with metal tools or spray any cleaners directly on the element. Take your time, as this area is delicate.
Step 4: Break Down Grease and Neutralize Odors
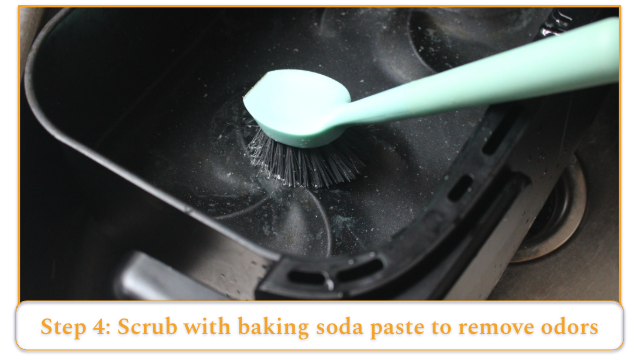
Rinse removable parts to remove vinegar residue. For greasy areas or lingering odors, use lemon juice or a baking soda paste (one tablespoon of baking soda with a few drops of water).
Apply to problem areas, let it sit for 5–10 minutes, then scrub gently. Keep all cleaning agents away from the heating element.
Step 5: Check Fan Areas and Dry
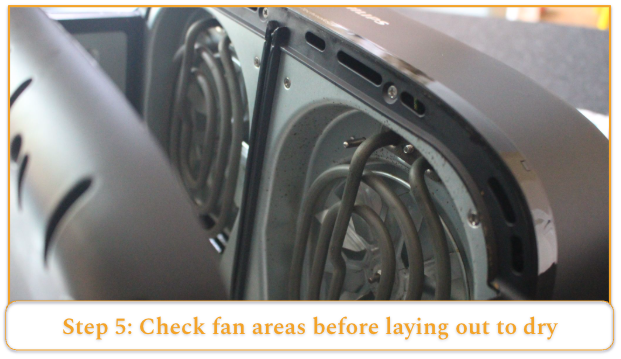
Before reassembling, inspect accessible fan areas for debris and remove it gently with a soft brush. If the fan isn’t user-accessible, refer to your manual and don’t attempt to disassemble the unit without guidance.
When finished, lay out all parts to air dry completely. Do not reassemble until every part, including the interior and fan areas, is bone dry.
How To Clean the Heating Element
Cleaning the Heating Element
The heating element is the most important — and most overlooked — part of your air fryer.
Grease splatter, oil vapor, and food particles can collect on it over time. This buildup can cause:
- Burning smells
- Smoke during cooking
- Uneven heating
- Reduced airflow
- Potential fire risk
If your air fryer smells burnt or starts cooking unevenly, check the heating element.
When to Clean It
- During deep cleaning
- If you notice visible residue
- If smoke appears during cooking
- If food isn’t browning evenly
Step-by-Step Cleaning
1. Unplug and cool completely. Never clean while the unit is warm.
2. Locate the heating element. It’s usually on the “ceiling” of the unit. Place a towel on a stable surface and gently turn the air fryer upside down to inspect it. If your model has a bottom-mounted element, check the manual first.
3. Remove loose debris. Use a soft dry brush or handheld vacuum to clear crumbs and dust.
4. Wipe gently. Dampen a cloth or sponge with warm water and mild dish soap. Carefully wipe the heating element and surrounding area. Avoid pressing — the element is delicate.
5. Tackle stubborn residue. Use a soft brush dipped in soapy water. Work slowly and gently.
6. Let it dry completely. Do not reassemble or plug in until fully dry.
How Often Should You Clean an Air Fryer?
Making time to regularly clean your air fryer will extend your machine’s lifespan, keeping it free from fire risks and ensuring optimum performance for preparing food safely.
If you’re unsure which parts require your attention and when, here’s a quick guide:
- After every use: Basket, pan, and tray. Wait for these items to cool, then wash the removable items with warm soapy water or, if these are dishwasher safe, wash as your air fryer manual instructs.
- Weekly: Interior walls and base. If you use your air fryer frequently, be sure to keep the interior walls and base wiped down with a damp cloth to catch any food splatters and crumbs. This will help prevent buildup and reduce your time spent on deep cleaning. If your air fryer is only used once or twice a week, you can space out these cleanings to every two weeks.
- Monthly: Deep clean, including the heating element. If your air fryer is smelling greasy or unclean even when empty, it’s probably a good time to do a deep clean. Equally, if you notice smoke, burning smells, or residue being emitted from the machine when it is on, or if you notice food is cooking unevenly or taking longer than usual, do not continue to use the machine, and do a deep clean as soon as possible. Gently wipe the element to remove grease buildup. Soak and gently scrub removable parts, clean vents and fan areas if possible.
Common Mistakes To Avoid
- Using steel wool or abrasive pads. Steel wool and abrasive scrubbers can scratch non-stick coatings and permanently damage the basket or tray. Treat your air fryer the same way you would any non-stick cookware to avoid shortening its lifespan. Instead, use silicone-tipped cleaning tools, a soft sponge, or a brush.
- Spraying cleaner or water directly onto the heating element. This could damage the internal components of the air fryer or even cause electrical faults. Instead, wipe the element gently with a damp cloth.
- Forgetting to unplug or cool the unit before cleaning. Cleaning an air fryer while it’s still hot or plugged in is a serious safety hazard. Instead, unplug and allow your machine to completely cool before tackling it. It might be easier to do this the following day after using it, just to be safe.
- Immersing the main unit in water. The electrical base should never be submerged, as this can cause short-circuiting or permanently damage the appliance. Instead, only clean the exterior with a damp cloth.
- Not drying parts properly before reassembling. Trapped moisture can lead to rust, mold, or performance issues, which are especially important to avoid on surfaces used for food preparation. Instead, air-dry all parts fully or towel-dry before putting them back.
- Ignoring stuck-on grease or residue. Leaving grease and food buildup can cause smoke, lingering odors, and reduced performance. Over time, it also makes deep cleaning more difficult. Instead, regularly soak removable parts in hot, soapy water and ensure these are debris-free.
Quick Maintenance Tips
Ensuring you follow a few easy steps when using your air fryer will prolong its life and performance.
- Use parchment paper or silicone liners to reduce mess. This prevents food debris from falling into the air fryer, and speeds up daily clean-ups.
- Wipe down your machine after each use (once it’s cool). This will remove greasy build-ups before they harden.
- Use oil sparingly (even spray oils). Too much oil can cause excess smoke and sticky residue due to the other chemicals that spray oils contain.
- Check for crumbs underneath the trays. Loose bits of food can fall beneath the basket, which can cause bad odors and grease buildup.
- Keep your air fryer dry and ventilated between uses. A good idea is to leave the drawer or trays slightly open when not in use, to prevent trapped moisture and odors.
FAQ
Can air fryer parts go in the dishwasher?
What’s the easiest way to clean stuck-on food?
How do I get rid of burnt smells in my air fryer?
Do I need to clean the heating element regularly?
Is it safe to use vinegar or baking soda in an air fryer?
Can I use cooking spray in my air fryer without causing buildup?
To prevent buildup, opt for a high-quality oil spray with no propellants, an oil with a high smoke point (such as refined avocado oil), or brush a small amount of oil on food instead. In general, avoid adding oil directly to the air fryer trays and instead transfer food to the air fryer after adding oil to reduce build-up over time.