Thinking about heating milk in your electric kettle? It’s tempting; one button, fast heat, done in minutes. But electric kettles are designed exclusively for water, and milk behaves very differently under heat.
In this guide, you’ll learn:
- Why milk and electric kettles don’t mix
- What actually happens inside the kettle if you try
- Safer ways to heat milk without damaging appliances
- What to do if you’ve already made the mistake
Can You Put Milk in an Electric Kettle? Quick Answer
No, you should not put milk in an electric kettle. Milk scorches at lower temperatures than water, sticks permanently to heating elements, creates safety risks, and can ruin your kettle (often voiding the warranty). If you’re trying to heat milk quickly, there are safer and more effective methods explained below.
Why You Shouldn’t Heat Milk in an Electric Kettle
1. The Heating Element Problem
Electric kettles are engineered for simple liquids like water, not protein- and fat-rich liquids like milk.
What goes wrong:
- Milk proteins denature and bond to hot metal
- Burnt residue fuses to concealed elements
- You can’t access or fully clean sealed heating plates
Once milk burns onto a concealed element, it’s usually permanent.
2. Milk Burns Before the Kettle Stops Heating
Here’s the core issue:
- Milk scorches at ~180°F
- Kettles heat toward 212°F or higher
- Rapid-boil models overshoot even more
That means the kettle keeps heating milk long after damage starts.
3. Cleaning Becomes a Nightmare
Burnt milk residue:
- Bonds to metal and plastic
- Resists dish soap
- Leaves a persistent sour-burnt smell
Even vinegar often can’t remove everything, especially when residue is trapped inside sealed components.
4. It Voids Your Warranty
Manufacturers are explicit: water only.
If technicians find milk residue:
- Warranty claims are immediately denied
- Repairs become out-of-pocket
- Replacement is often cheaper than repair
What Happens If You Heat Milk in a Kettle?
Burnt Milk Smell and Residue
The smell hits immediately. That sickly-sweet burnt milk odor soaks into everything. A thin film coats the sides, lid, spout, and element. Try making tea afterward and it’ll taste like burnt milk for weeks.
Potential Safety Issues
Milk foams unpredictably when heated. Foam can overflow into the base, creating electrical hazards. Auto-shutoff sensors detect water levels, not milk foam, so they might not trigger properly.
Long-Term Damage to Your Kettle
Repeated milk heating degrades heating efficiency. Burnt protein layers insulate the element, forcing it to work harder. Motors burn out faster. Motors overheat, plastics degrade, and a kettle that should last years can fail in months.
Better Ways to Heat Milk (That Won’t Ruin Appliances)
1. Stovetop Method (Best Overall)
The simplest and safest option is a saucepan on the stove. You get direct temperature control and can stir to prevent skin formation. Cleanup is easier on a pan than inside a narrow kettle, and you avoid risking your electric appliance.
Best for: Larger quantities
2. Microwave Heating (Fast & Safe)
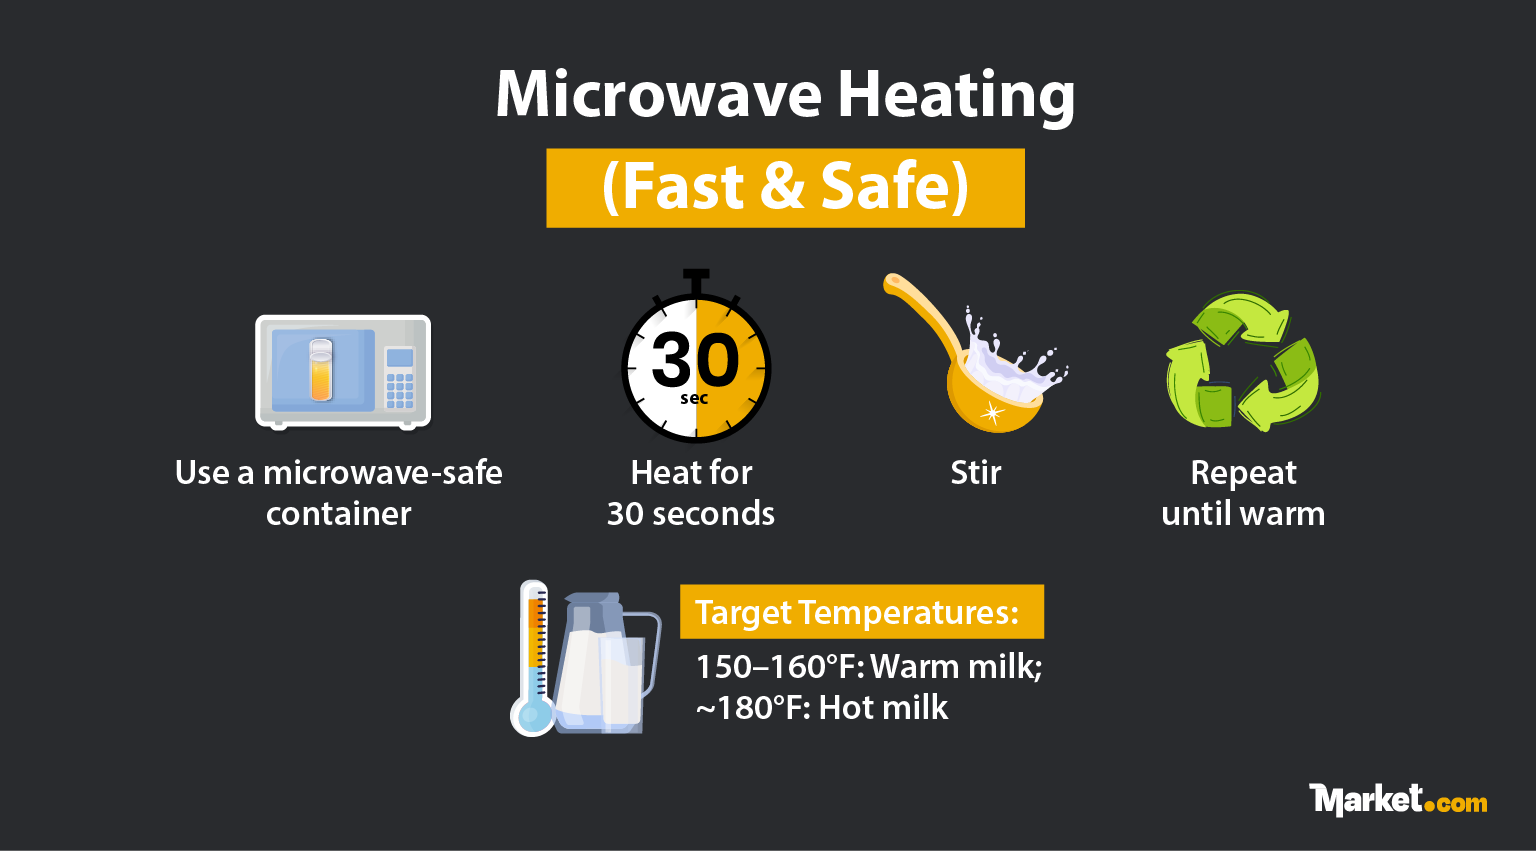
How to do it properly:
- Use a microwave-safe container
- Heat for 30 seconds
- Stir
- Repeat until warm
Target temperatures:
- 150–160°F = warm milk
- ~180°F = hot milk
3. Electric Milk Frother (For Daily Use)
If you heat milk regularly, get the right tool. I recommend investing in an electric milk frother since they’re designed for this exact job. These devices heat gently while aerating, and they usually cap at temperatures that prevent scorching. Most top out around 160–170°F, which is perfect for lattes.
4. Double Boiler Technique (Gentlest Method)
For the gentlest control, use a double boiler. A smaller pot with milk sits over a larger pot of simmering water. The indirect heat prevents scorching completely. It takes longer but gives you perfect control. Professional kitchens use this method for delicate sauces, but it’s a great option for at home, too.
What If You Already Put Milk in Your Kettle?
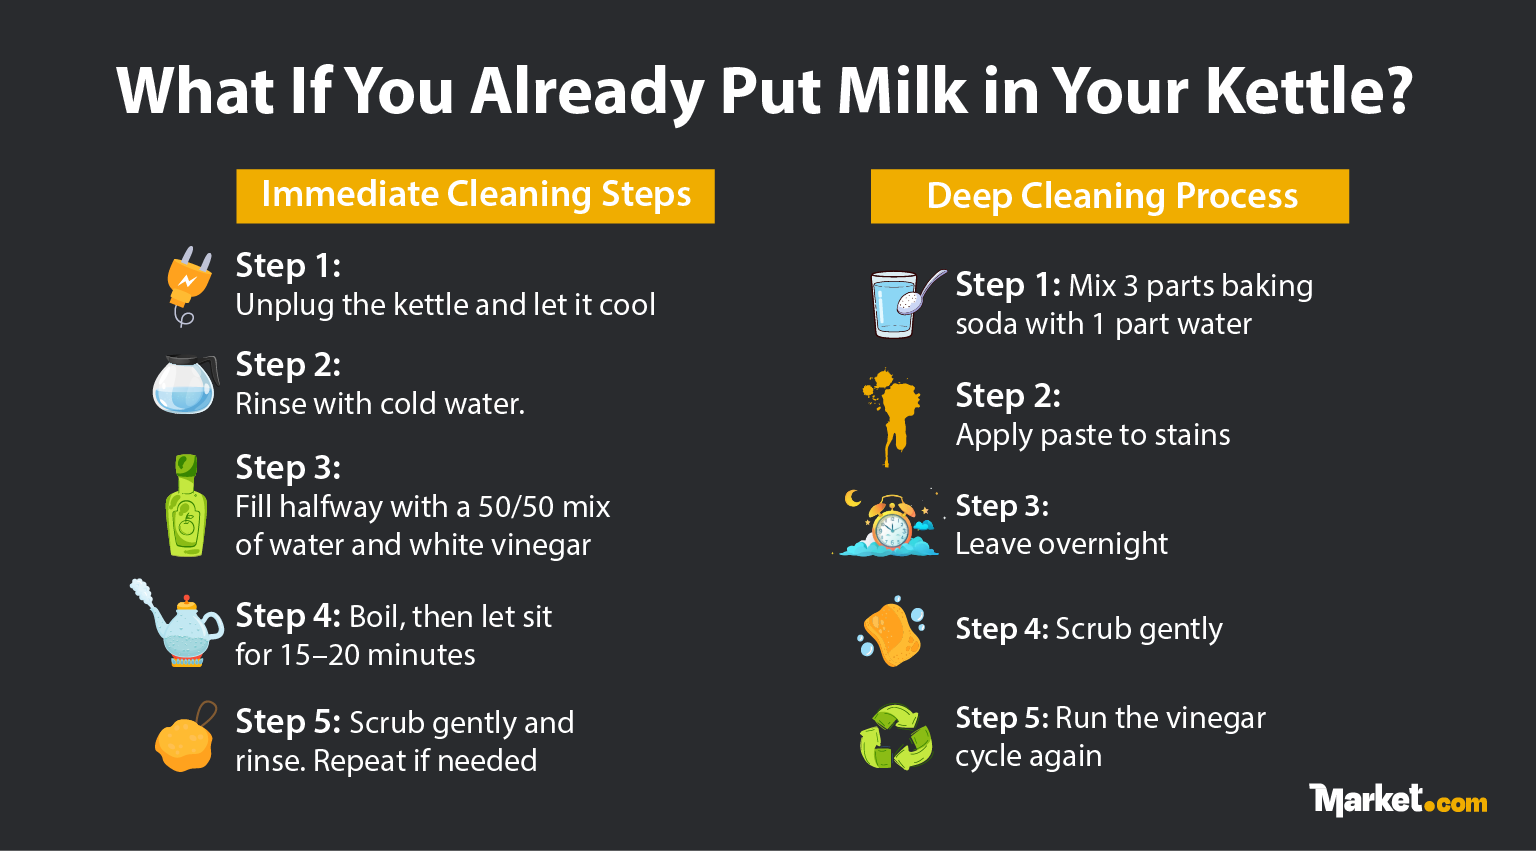
Immediate Cleaning Steps
Do this right away:
- Step 1: Unplug the kettle and let it cool completely.
- Step 2: Rinse with cold water first.
- Step 3: Fill halfway with 50/50 water + white vinegar
- Step 4: Boil, then let sit 15–20 minutes
- Step 5: Scrub gently and rinse. Repeat if needed
Deep Cleaning Process
Baking soda method:
- Step 1: Mix 3 parts baking soda:1 part water
- Step 2: Apply paste to stains
- Step 3: Leave overnight
- Step 4: Scrub gently
- Step 5: Run the vinegar cycle again
Note: Some stains never fully disappear, especially on concealed elements.
When to Replace Your Kettle
If the burnt smell or taste persists after repeated cleanings, replace the kettle. Visible element damage, erratic heating, or a permanent burnt taste mean the appliance is compromised. New kettles cost about the same as the time and supplies you would spend trying to restore a ruined one.